Eduroam configuration for Android

Install geteduroam

Open Google Play store on your Android device and install geteduroam (published by SURF B.V.)

Google play store install page for geteduroam. A blue install button is highlight in the center.

Configure the connection

When you open the geteduroam app, it will prompt you to 'Search for your organization.' Enter 'Alaska' in the search bar, and tap 'University of Alaska Fairbanks' when it loads. 
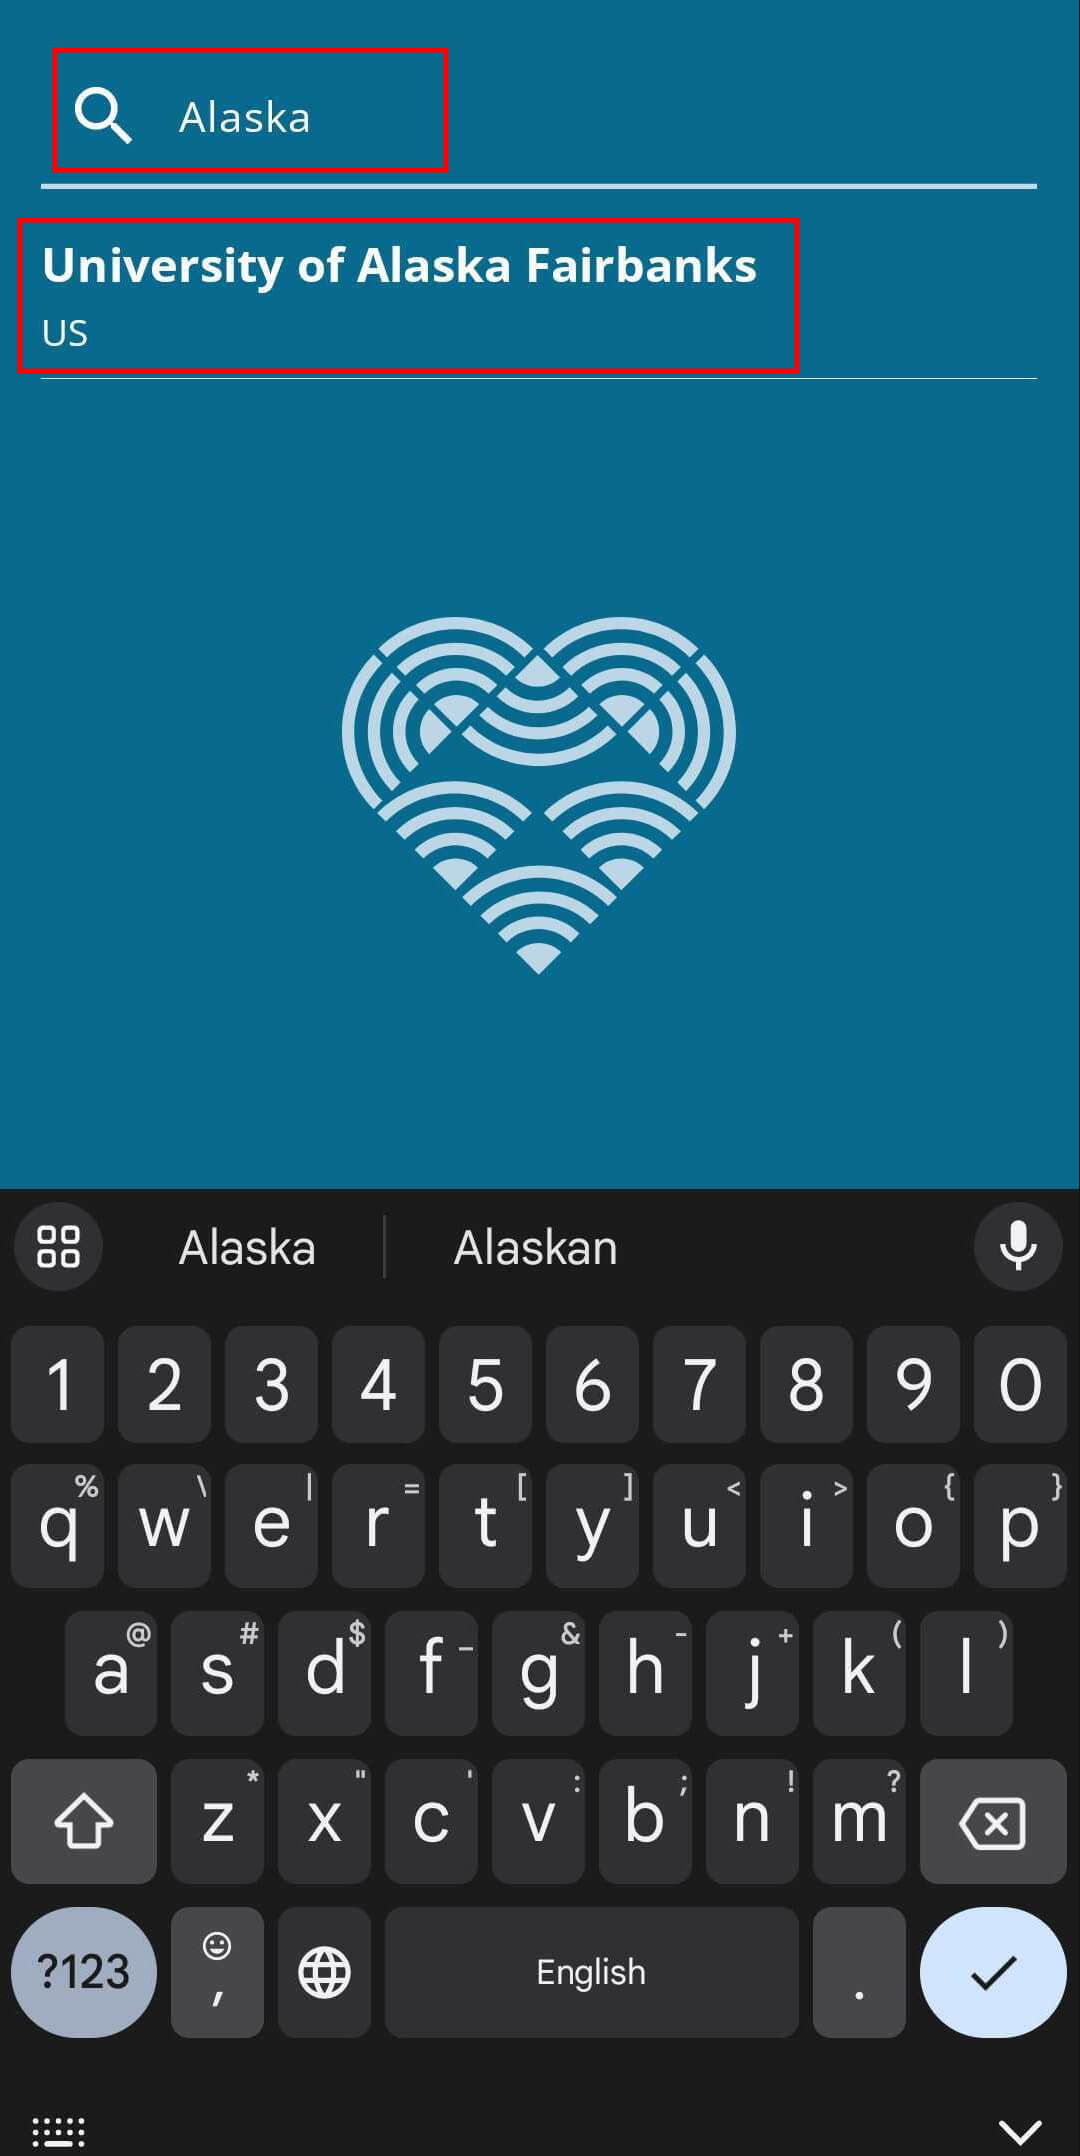
The geteduroam logo is in the center of the screen. A list of nearby configs is just above it, and the item in the list is the University of Alaska Fairbanks. "Alaska" is typed in a search bar at the very top of the screen, and a keyboard is visible at the bottom.

After selecting “University of Alaska Fairbanks,” log in using your UA credentials.
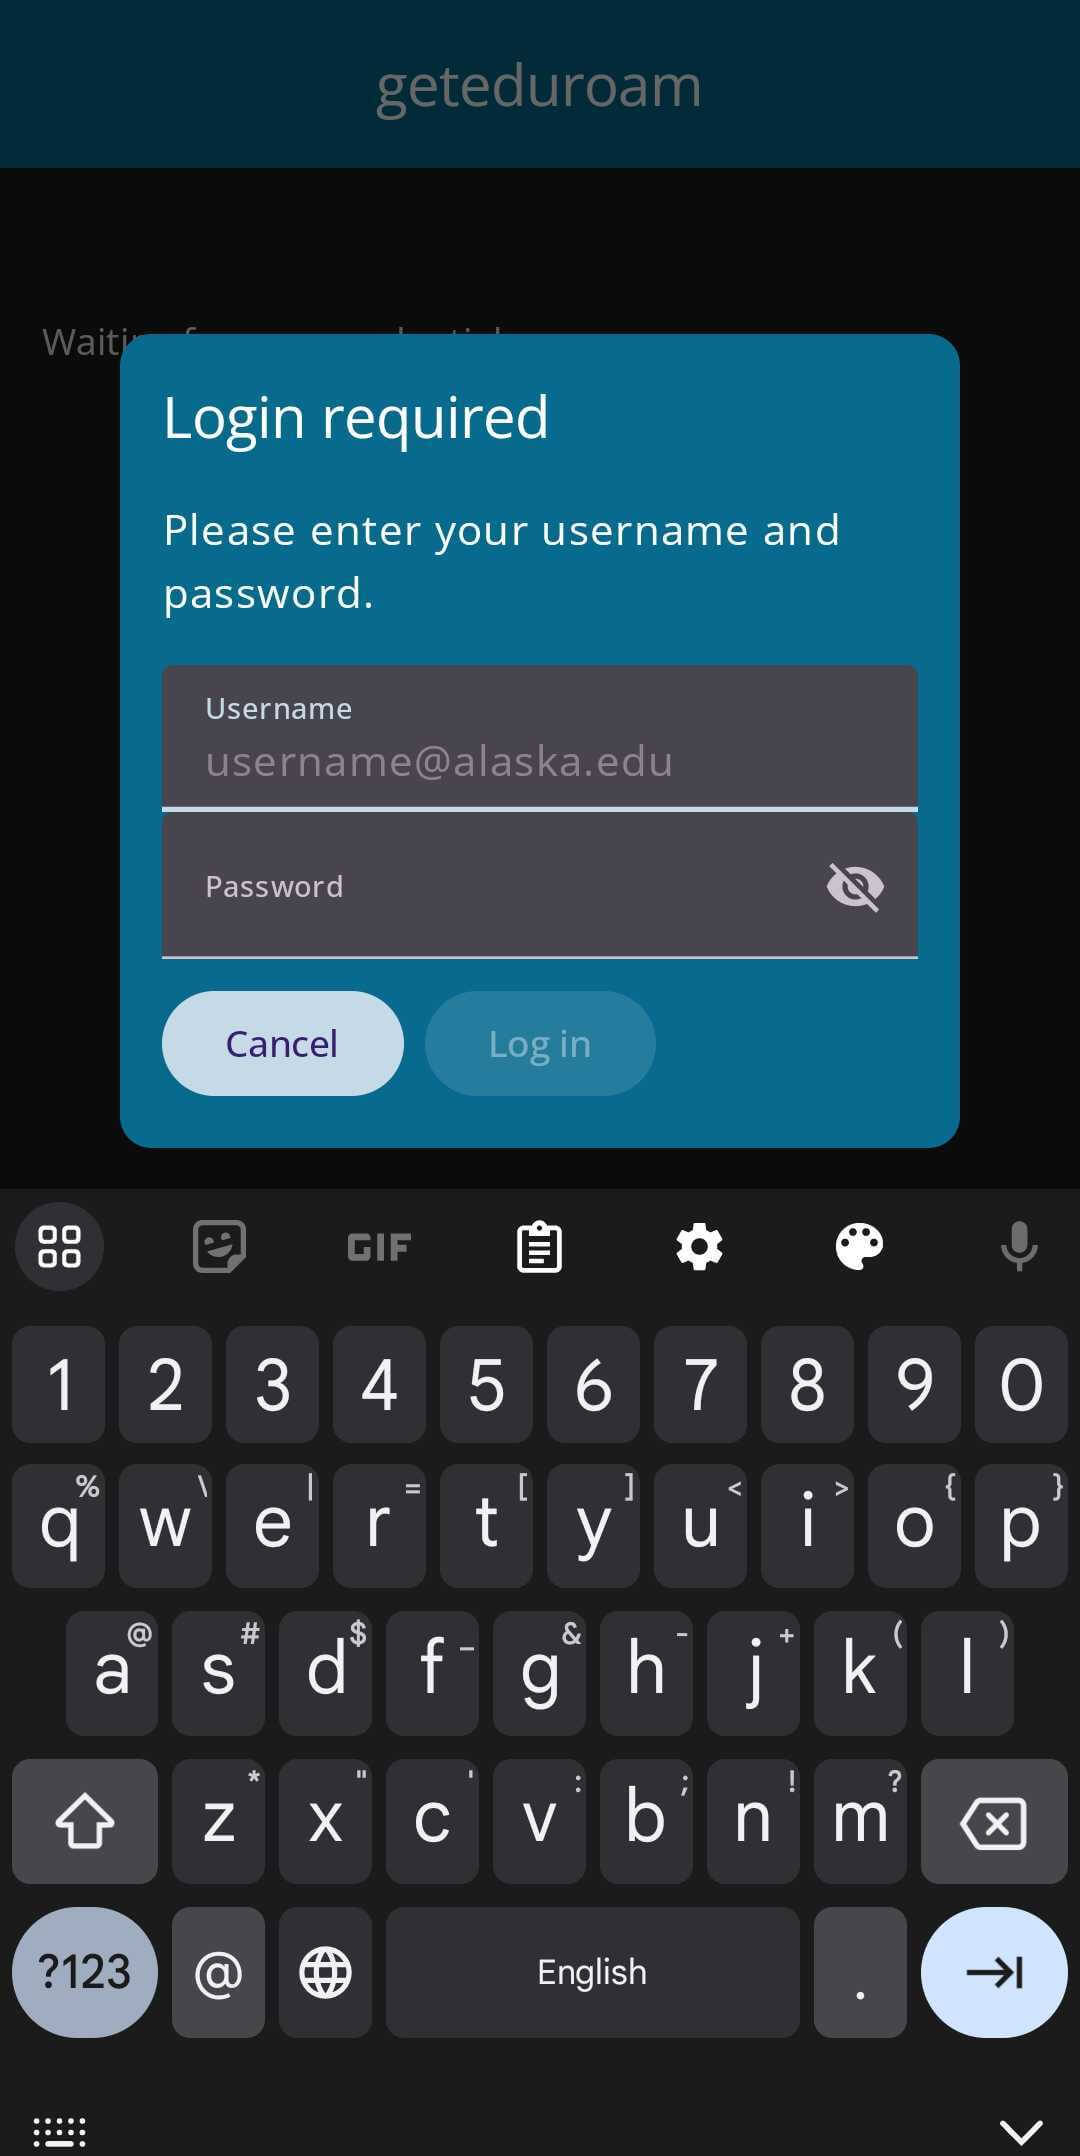
A login prompt within the geteduroam app. It says 'Login required. Please enter your username and password.' and has a field for a username and password below. A keyboard is visible at the bottom of the screen.

A dialog box will prompt you to 'Allow suggested Wi-Fi networks.' Confirm by selecting 'Allow.'
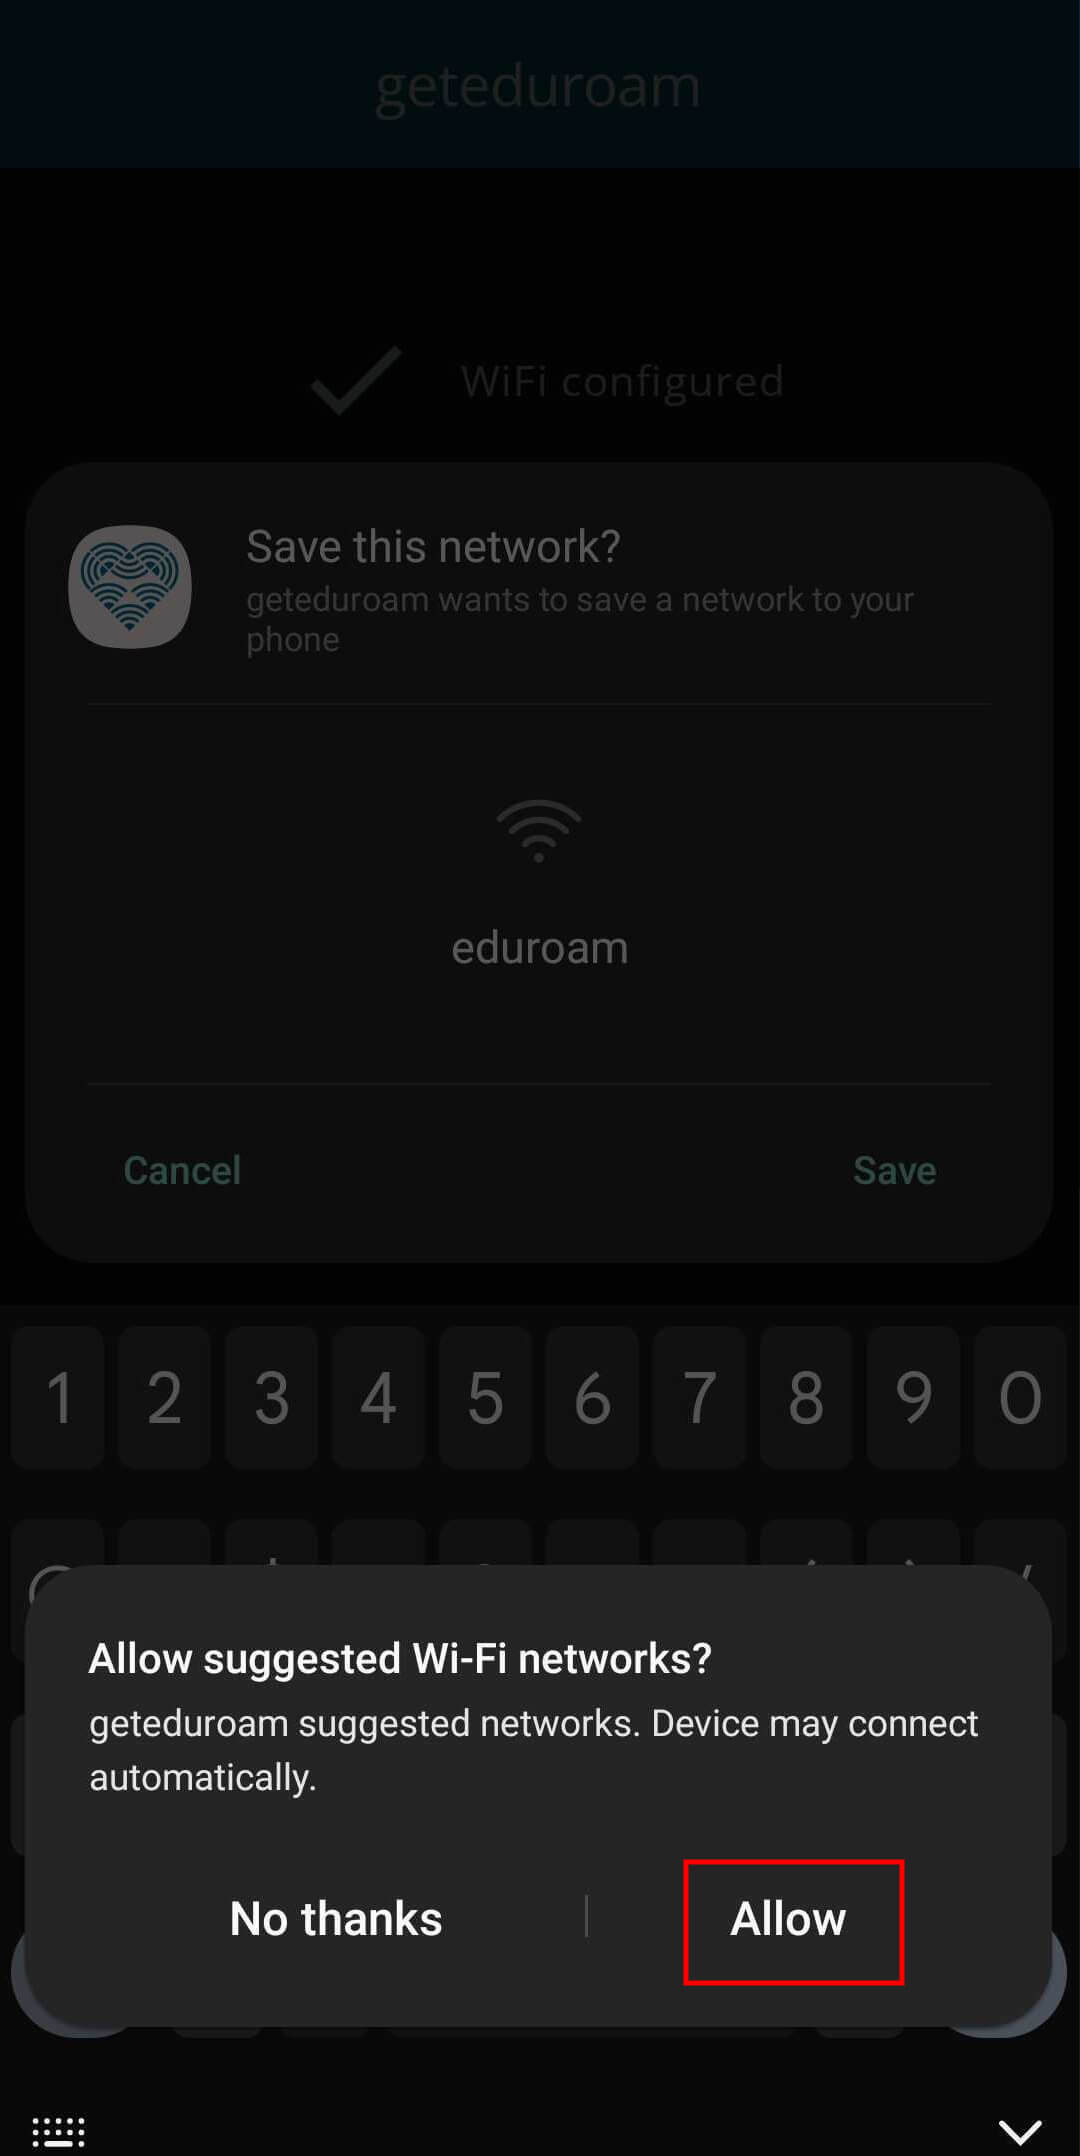
A text box popup asking to allow suggested wi-fi networks. There are two button options titled 'No thanks' and 'Allow,' with 'Allow' highlighted on the right.

After granting permission to suggest Wi-Fi networks, a prompt asking you to save the eduroam network will appear. Confirm by selecting 'Save.' 
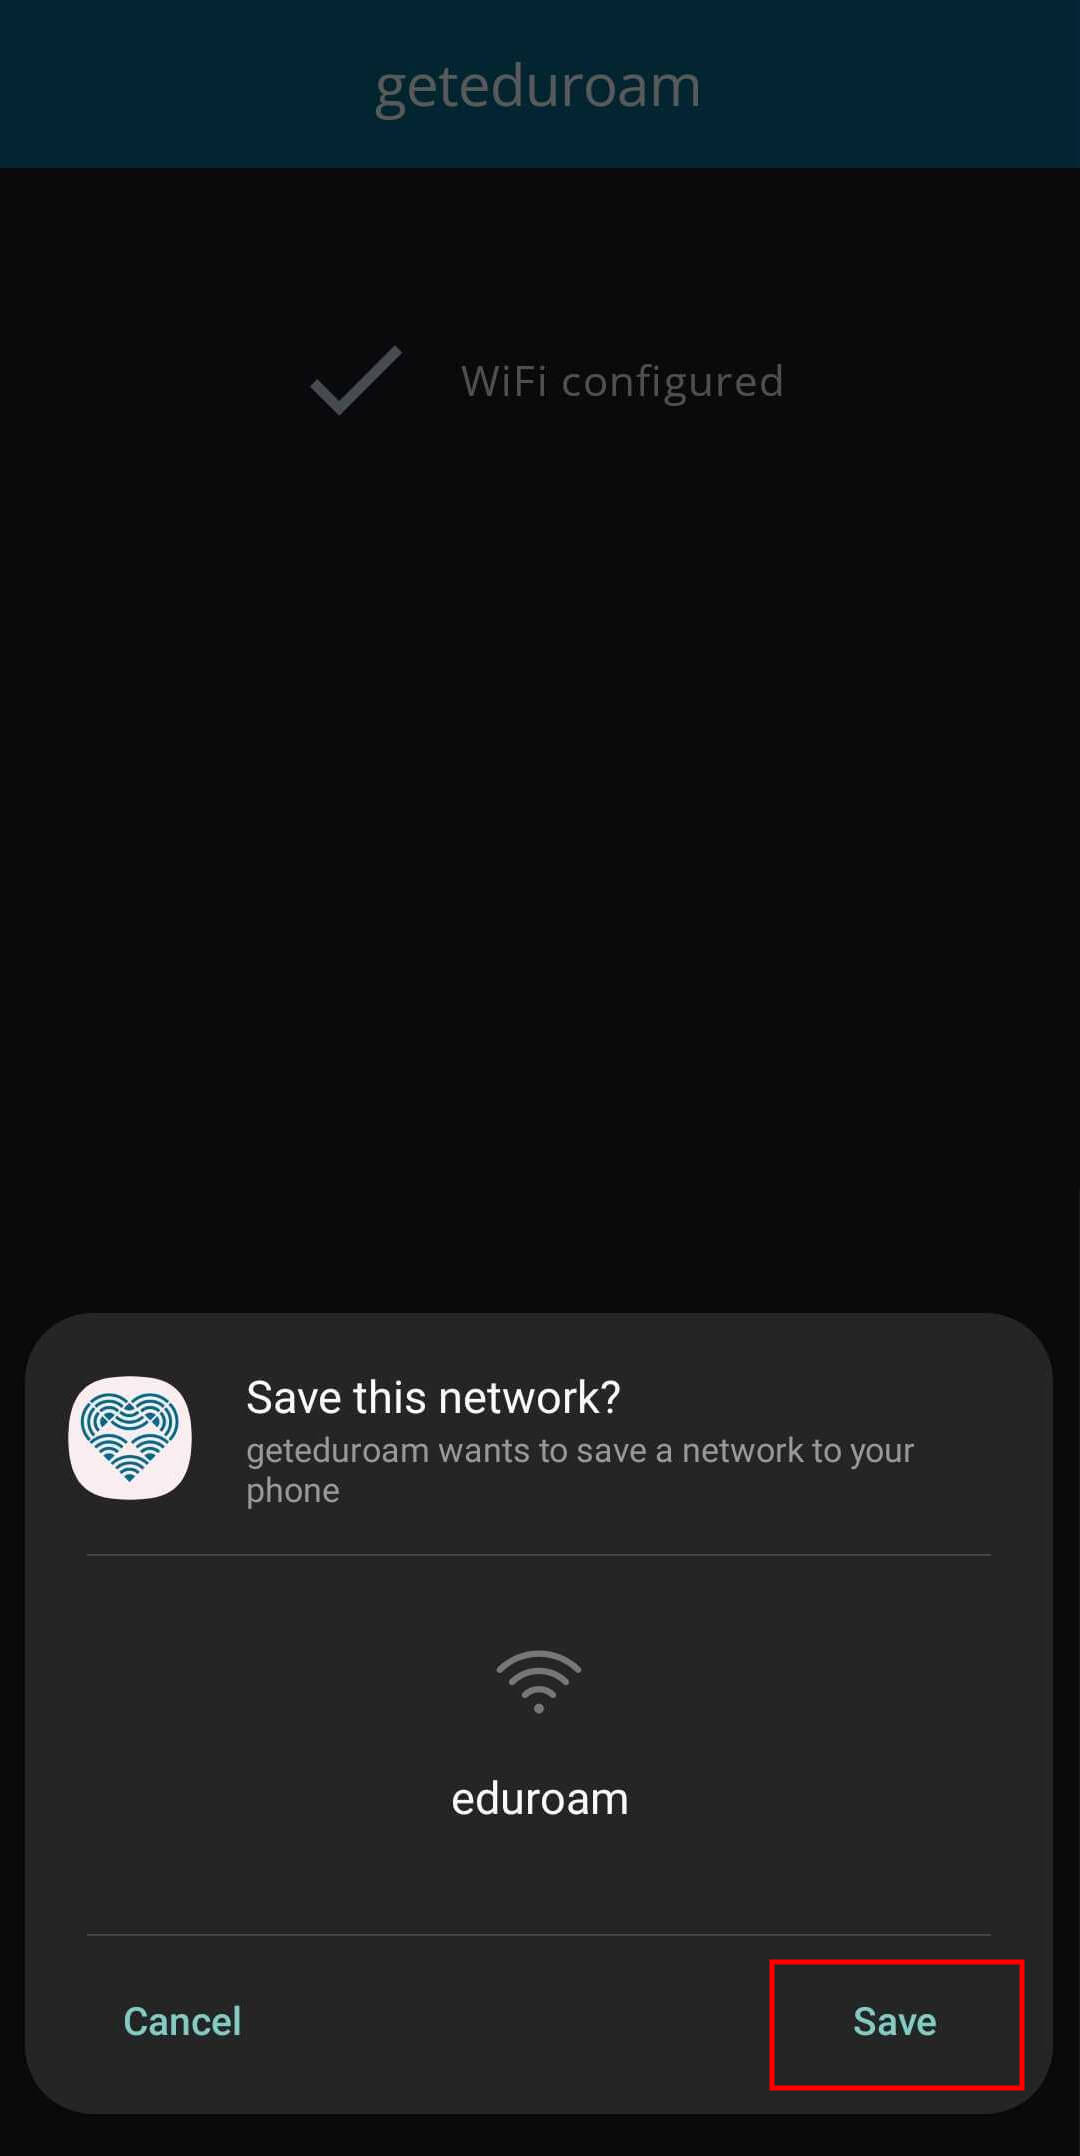
A pop-up in the geteduroam app asking for permission to save a network. There are two button options, 'Cancel' and 'Save,' and 'Save' is highlighted on the right.

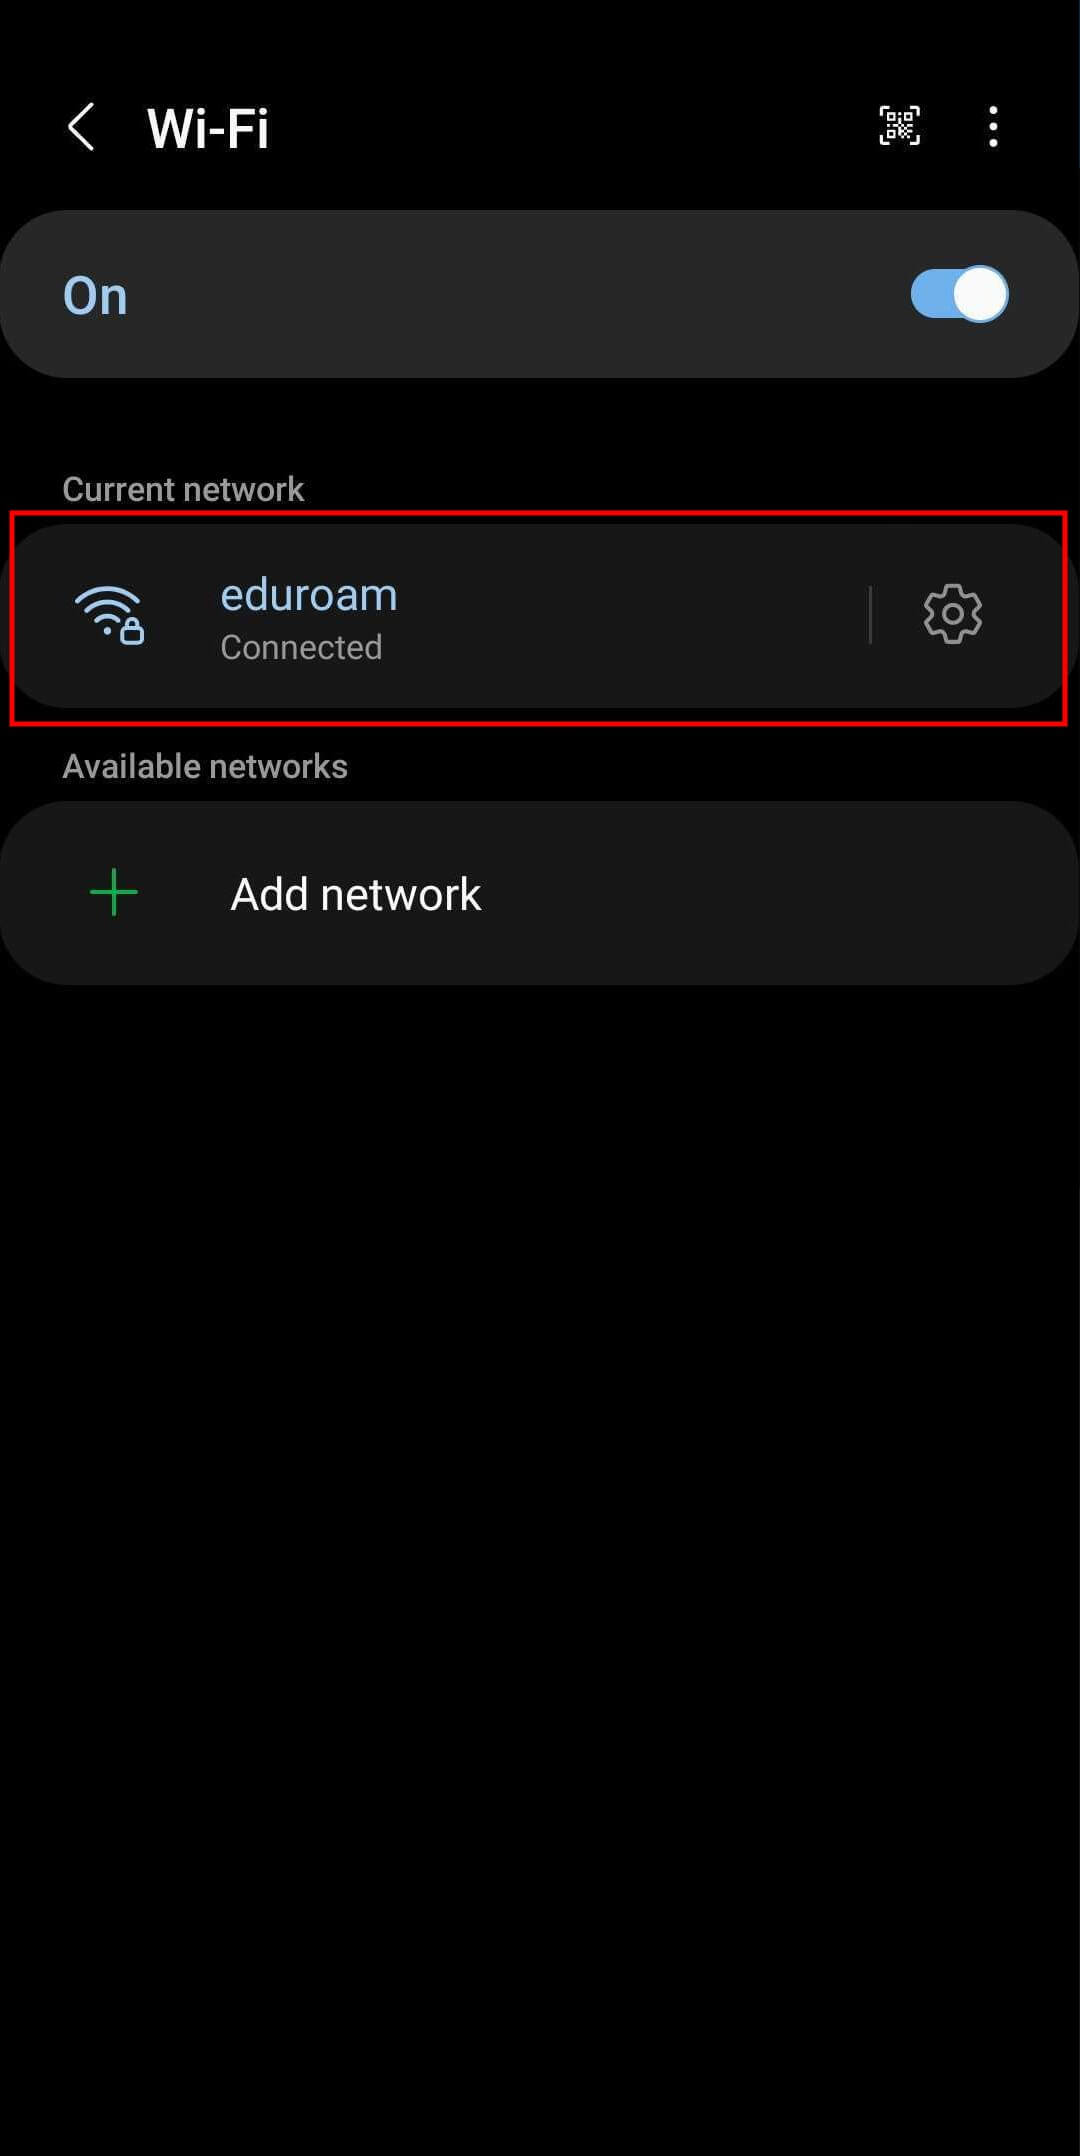
If the configuration is successful, the device will automatically connect to eduroam. You will see in your Wi-Fi settings that the network is connected. 
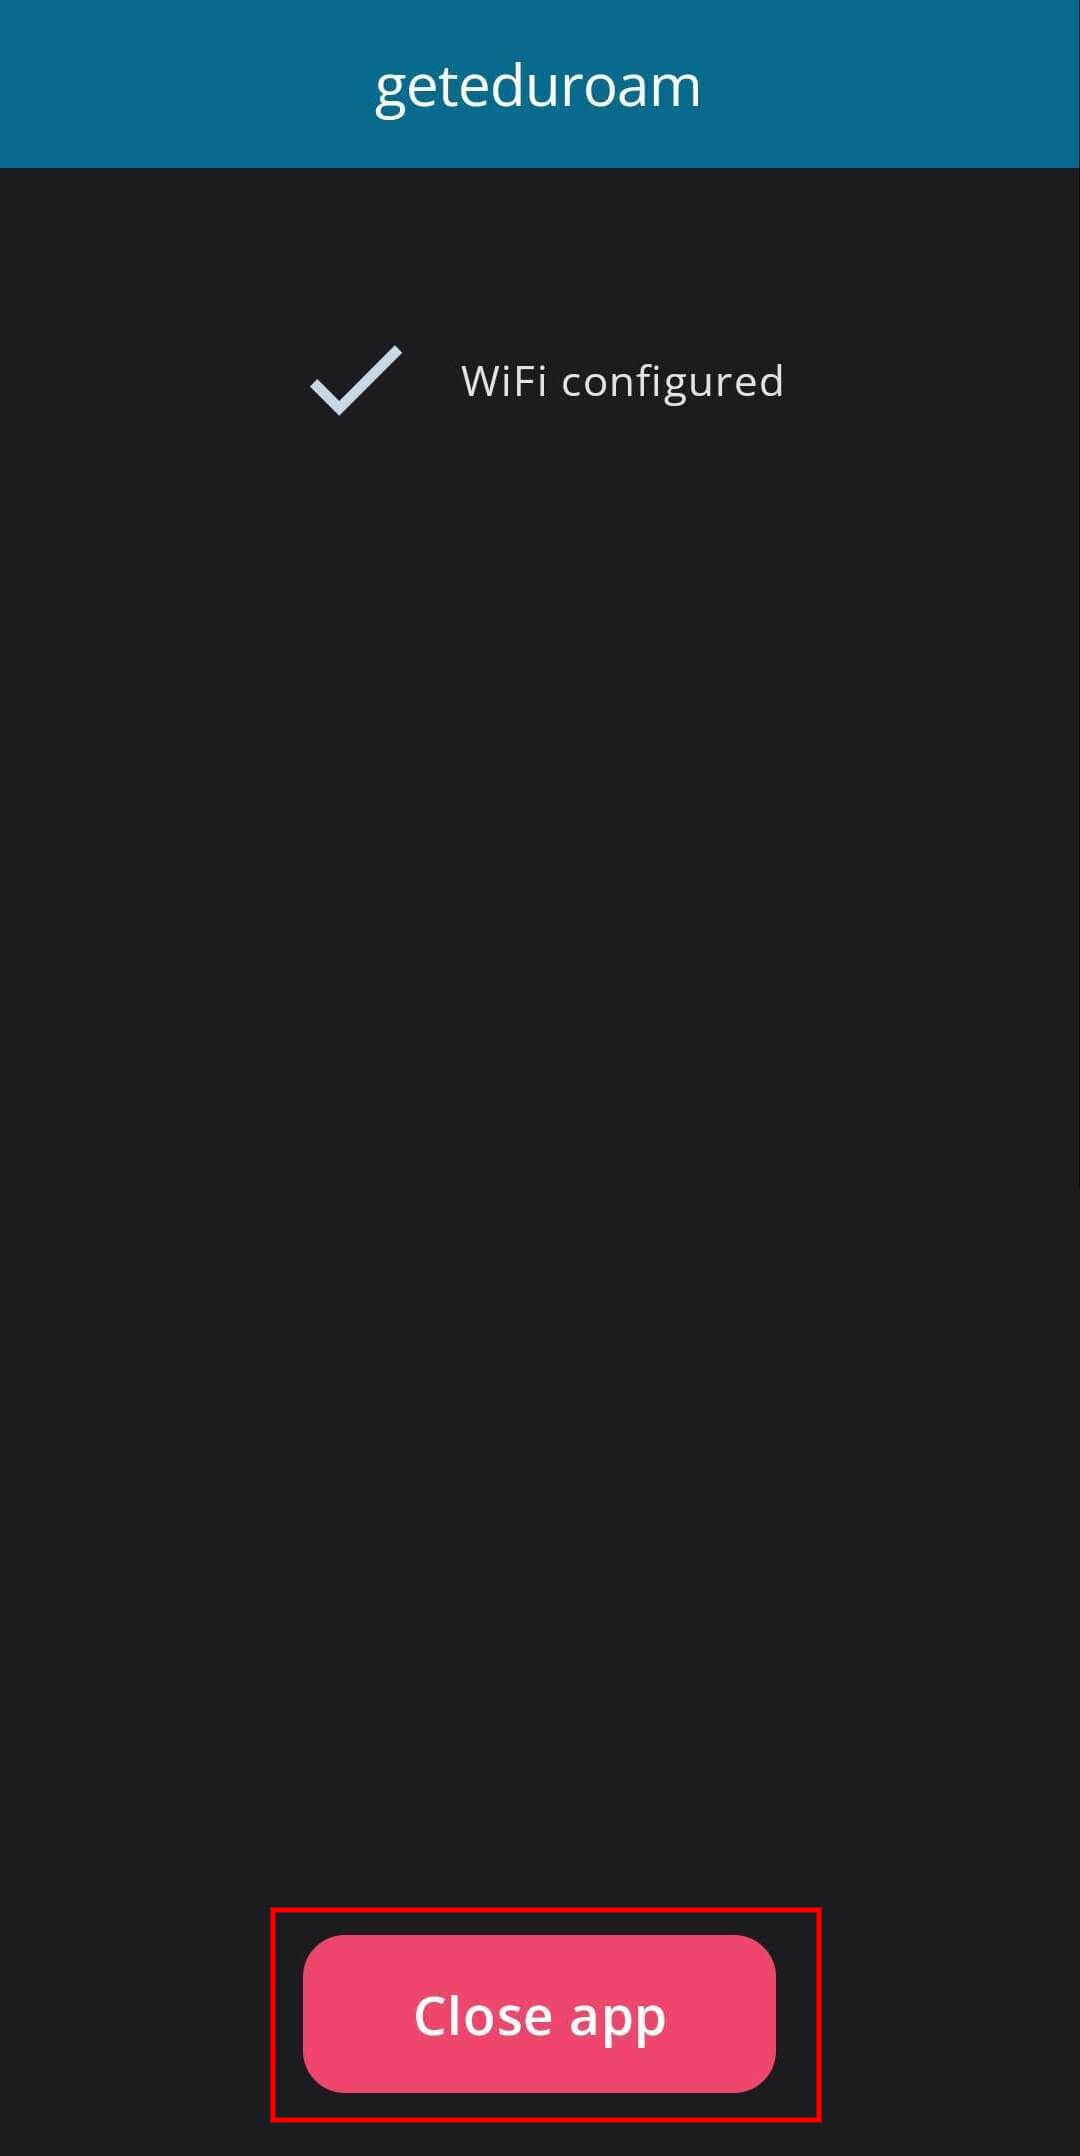
Confirmation menu of successful eduroam installation. A red button at the bottom of the screen labeled 'Close app' is highlighted.

A screenshot of the Wi-Fi settings for an Android device. Eduroam is a listed network, and its status is 'Connected.'