Growing Potatoes in the Alaska Garden
HGA-00027 View this publication in PDF form to print or download.
Potatoes are an incredible crop for the Alaska garden because they are relatively easy to grow and have a high yield per square foot. They also store well through the fall and can be prepared in many different ways. Potatoes are available in many skin colors, ranging from white to almost black, with red, yellow and brown being the most popular in the U.S. The skin can also be smooth, dotted or even crinkled like a russet. Likewise, the flesh comes in many colors ranging from white to black to bicolored, although white and yellow are the most popular. There are, in fact, several thousand potato varieties found throughout the world, and many are adapted to thrive in the Alaska climate. However, because of Alaska’s short, cool growing season, the late maturing varieties (long season) do not perform as well as the short and mid-season varieties.
Seed
Successfully growing potatoes begins with high quality certified seed potatoes. The term “seed potatoes” refers to potatoes that are specifically grown to start the next season’s crop. It is important to use certified seed potatoes because they will minimize the possibility of introducing diseases into the garden. Numerous types of Alaska grown certified seed are usually available at local nurseries. Seed purchased outside of Alaska should be accompanied by a copy of the seed certification tag and the phytosanitary certificate.
Single Drop Seed Pieces
Single drop seed pieces are small potatoes, 1 to 2 inches in diameter, which are planted whole. Some gardeners will pay a premium for single drop potatoes because they do not need to be cut before planting, and the intact skin protects the seed by hindering disease entry. The size of the potato seed piece is important because it needs to be large enough to provide fuel for the plant to grow, but small enough that the buyer does not waste money on unneeded potato mass (seed potatoes are usually purchased on a per pound basis). Therefore, potatoes larger than 3 ounces are usually cut into multiple seed pieces in order to maximize seed value.
Cutting Potato Seed Pieces:
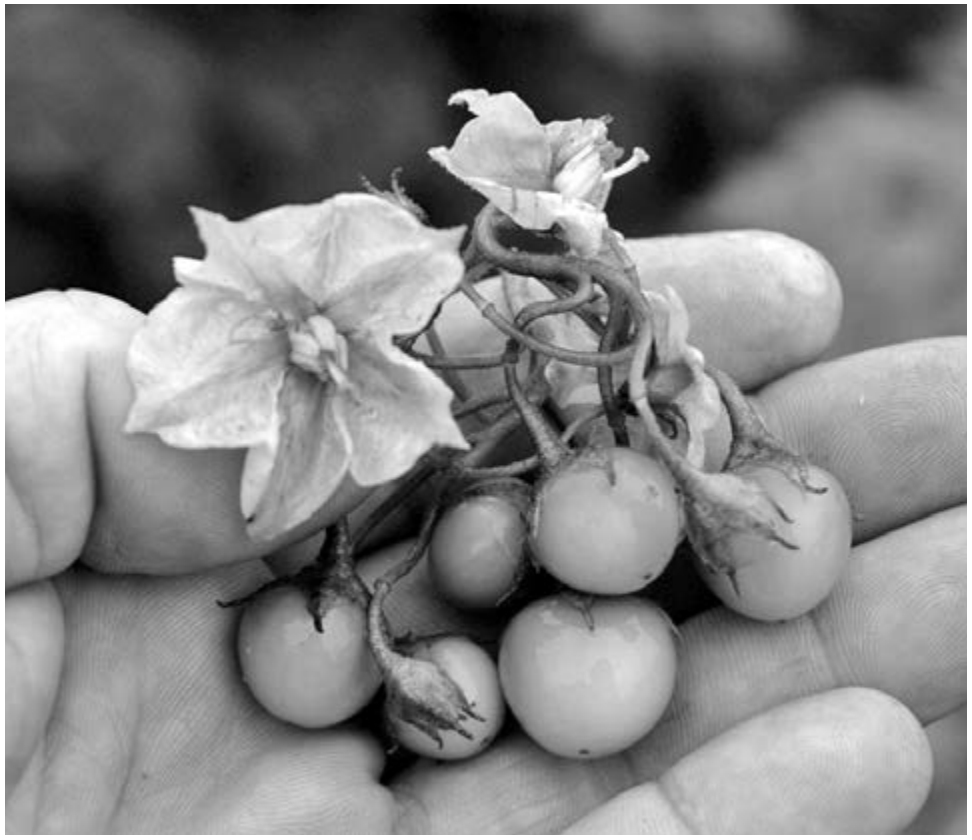
Once potato plants are flowering, the plants begin to pollinate each other. This results in small, round seed pods that look very similar to green cherry tomatoes. These pods contain true potato seeds, which can be planted to grow potato plants, but will not produce the same type of potato the seed came from, nor will the potatoes that are produced be the same as each other. Potato seed pods are poisonous to eat.
Cut seed potatoes larger than 3 ounces into pieces roughly equivalent in size to single drop seed pieces. A 3to 5-ounce potato can be cut in half, while larger tubers could make three or four seed pieces, depending on the distribution of the eyes.
- Sanitation is very important when cutting seed pieces because it reduces the chance of spreading disease. If a diseased potato is cut, the juices left on the knife or cutting surface can transmit the disease to the seed pieces cut afterwards. Choose a hard but easy-to-clean surface on which to cut the potatoes. Between batches of potatoes, clean the cutting surface with bleach water or soapy water by submerging the cutting board or pouring some of the water over the area being used for cutting. While cleaning the cutting area, soak the knife being used in the water. An alternative method is to cut the seed potatoes on several layers of clean newspaper, replacing the top layers with clean newspaper after every batch. When using the newspaper method, it is still important to wash the knife frequently in bleach water or soapy water.
- Each seed piece should be 1.5 to 2 ounces (about 1.5 to 2 inches in diameter) and contain at least two eyes. Only one eye is actually needed to grow, but making sure there are two allows for a backup in case the first is damaged. When cutting the potato, try to minimize the amount of cut surface area on the resulting seed pieces because each cut surface can act as a disease entry site.
- Some gardeners allow their cut seed pieces to sit in a cool area for a week to 10 days before planting to give the tuber time to “suberize,” or begin the healing process. If the seed is cut the day before planting, the pieces can sit at room temperature until planting time to allow the freshly cut surfaces to dry. Allowing the seed pieces to heal decreases the chances of infection from soil diseases. If there are time constraints, the seed can also be cut immediately before planting. Cutting just before planting is a common commercial practice in Alaska.
Site Preparation
Potatoes grow best in well-drained soils and are easier to harvest in soils that will dry out some in the late summer. Adding compost is an excellent way to prepare soil for potato production since it improves soil structure and increases both soil drainage and water retention. Be sure to use properly heated and cured compost in order to minimize weed and disease issues. The soil should be tilled to a depth of 6 to 8 inches to loosen the soil and incorporate the compost. This can be done by machine or by hand.
Fertilization
Potatoes need a lot of nutrients in order to produce a sizable yield. Fertilizer should be applied at planting and be placed near, but not touching, the seed pieces since the salts in many conventional fertilizers can damage the potato roots. In situations where fertilizer is spread prior to tillage, the few fertilizer particles in direct contact with the seed piece shouldn’t be an issue. Potatoes don’t have an aggressive root system, so the nutrients will be used more efficiently if they are concentrated within a foot of the plants. One strategy is to place a band of the appropriate amount of fertilizer in the soil a few inches away from the center of the potato row. The fertilizer gets incorporated when the planting row is closed.
Another nutrient option is to use organic fertilizers, which can be purchased at many local garden supply stores. When using organic fertilizers in the potato patch, avoid non-composted manure. Although it is a great source of nutrients, manure enhances the soil bacteria that cause potato scab disease, which may reduce potato quality.
Potatoes are relatively tolerant of soil pH and they grow quite well in the same pH range as most vegetables (6.5 to 6.7). Unfortunately, this pH range also favors the common scab organism. When applying lime or wood ash to the garden to maintain the soil pH for other vegetables, consider adding it after the potatoes have been harvested. In locations with high levels of potato scab, try planting potatoes in a separate area where the soil pH is kept below 5.4; this may be beneficial since the the soil bacteria that causes common scab is not well adapted to a lower soil pH.
Planting
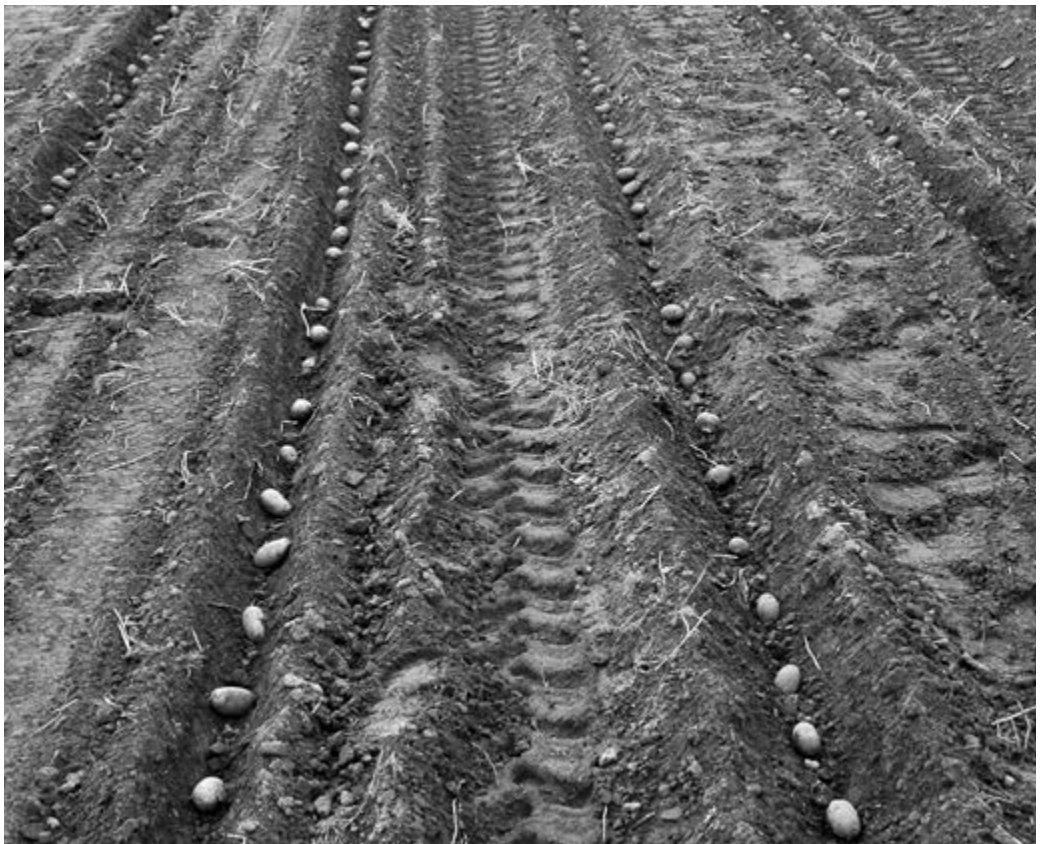
- Start by creating 3to 4-inch-deep furrows, which will become the centers of the potato rows. In commercial operations, the furrows are generally about 36 inches apart. Feel free to use a spacing that fits within the garden, but do not make rows closer than 24 to 30 inches because some varieties produce very large, bushy foliage.
- Spacing for the seed pieces within the row can vary depending on the desired product. In general, seed pieces are placed 11 inches apart. If smaller tubers are desired, a 7to 9-inch spacing works nicely, but if larger potatoes are preferred increase the space between the seed pieces up to 13 inches. When dropping the seed pieces into the furrow, some gardeners orient the seed eyes upward to minimize seed food reserve loss and maximize shoot growth. This is not a commercial practice and many successful gardeners pay no attention to seed piece orientation in the soil.
- After placing the seed pieces along the furrow, pull soil from both sides of the row to cover the seed pieces. Keep building up soil into a bed, making it between 10 and 12 inches across the top and at least 3 to 4 inches high. It is advantageous to build a wide bed over the seed potatoes, because later in the growing season “hilling” will require that more soil be pulled into the row in order to keep newly developing potatoes covered.
- Cover the seed pieces with about 4 to 6 inches of soil. In cooler, wet soils decrease the soil covering to 2 to 4 inches.
An alternative strategy to planting in rows is planting in mounds. Tilling and general soil preparation are the same as with rows; however, instead of planting seed pieces in long, straight furrows, plant several seed pieces in one mound of soil. Begin by forming a mound that is 6 inches high and roughly 2 to 3 feet in diameter. Sprinkle the appropriate amount of fertilizer across the top of the mound. Determine the number of seed pieces that will be planted in the mound by using the above guidelines for spacing, keeping in mind that spacing of the seed pieces within the mound will determine the size of the resulting tubers. For moderately sized potatoes, plant three seed pieces in a 2-foot-diameter mound and four to five in a 3-foot-diameter mound. Create evenly spaced, 1-inch-deep holes in the soil mound for the seed pieces, place the seed pieces in the holes and cover the entire mound with 3 to 4 inches of soil. Throughout the growing season, add soil to the shoulder of the mound to ensure that the developing potatoes remain covered with soil. When creating multiple potato mounds, make sure there are at least 6 feet between mounds, so the foliage has room to grow.
Watering

Across the Southcentral and Interior regions of Alaska, supplemental watering during dry weather increases yields and improves tuber quality. If the garden soil is very dry at planting, the seed pieces may benefit from a light, ½-inch watering; dry, peat-based soils will need more than ½ inch of water to adequately moisten. Once the potato plants are taller than 6 inches, they will benefit from an inch of water per week through a combination of rain and irrigation; peat-based soils may need additional water to adequately moisten. When watering by hand, try to minimize wetting the foliage because wet foliage increases the chance of foliar disease. When using a sprinkler, water early in the day so the foliage has a chance to dry before the cooler evening temperatures arrive. The sooner the leaves dry, the less susceptible they are to disease. The most crucial time for the potatoes to receive adequate moisture is when they are flowering, since this is also the time that the new potato tubers are enlarging, or “bulking up.” Decrease supplemental irrigation several weeks before harvest so the soil has the chance to dry out. Drier soil makes it easier to harvest the potatoes and prepares them for storage.
Weed Control
Controlling weeds in the potato patch is very important while the plants are small, since weeds have a stronger impact on young vegetables than on older, more established plants. Weeds harm the potato plant by competing for water and nutrients from the soil. Fast-growing weeds can shade the potato plants, which keeps them from growing as well as they could. Weeds also grow aggressive root systems that can make digging and separating the potatoes very difficult at harvest time. As the potato plant grows, the impact of weeds decreases. When the potatoes are large enough that the leaves of plants from one row touch the leaves from the adjacent row, the crop foliage forms a continuous canopy (“canopy closure”) that effectively blocks out the light, inhibiting young weed growth.
There are a variety of weed control strategies that are effective with potatoes:
Heavy-duty road building fabric (also called geotextile fabric) can be laid on the top of the raised bed, and holes can be burned into it at the desired plant spacing. The seed pieces are planted in the holes and covered with soil. The potato foliage and a few weeds grow out of the hole, but weeds do not grow between plants. A single round of hand weeding to remove the weeds that grow out of the planting hole usually completes the season’s weed control effort. No hilling is required with this method, but the foliage and geotextile fabric must be removed prior to potato harvest. Geotextile fabric is available at many
building supply outlets. Many Alaska gardeners have had better success with this heavier duty, reusable fabric than with the much lighter weight, single-use
landscape fabrics.
Hand hoeing is the most common means of potato weed control in the Alaska garden. Since the plant is forming potatoes underground, shallow passes with the hoe to sever the weed shoots from their roots will minimize damage to the developing tubers while effectively killing the weeds. Using a chopping action to remove the weed roots or pulling entire weeds by hand can damage the tubers.
Flame weeding is very effective before the potato foliage has emerged. Even after the foliage has emerged, an aggressively growing potato crop can survive a light flame weeding. The foliage will be damaged where the flame contacts it, but the potatoes should grow replacement foliage within a week. This technique is very effective in controlling weeds within the potato row and on the sides of raised potato beds. For more information on the flame weeding technique, visit the National Sustainable Agriculture Information Service website at http://attra.ncat.org/attra-pub/flameweedveg.html.
Cultivation is a very common weed control strategy for gardeners who have access to the right equipment. One method involves knives attached to a small tractor that drags them through the field to sever weeds. Another method of cultivation uses disks, which are curved steel plates that effectively bury small weeds by throwing up soil from between rows onto the sides and tops of the potato hills.
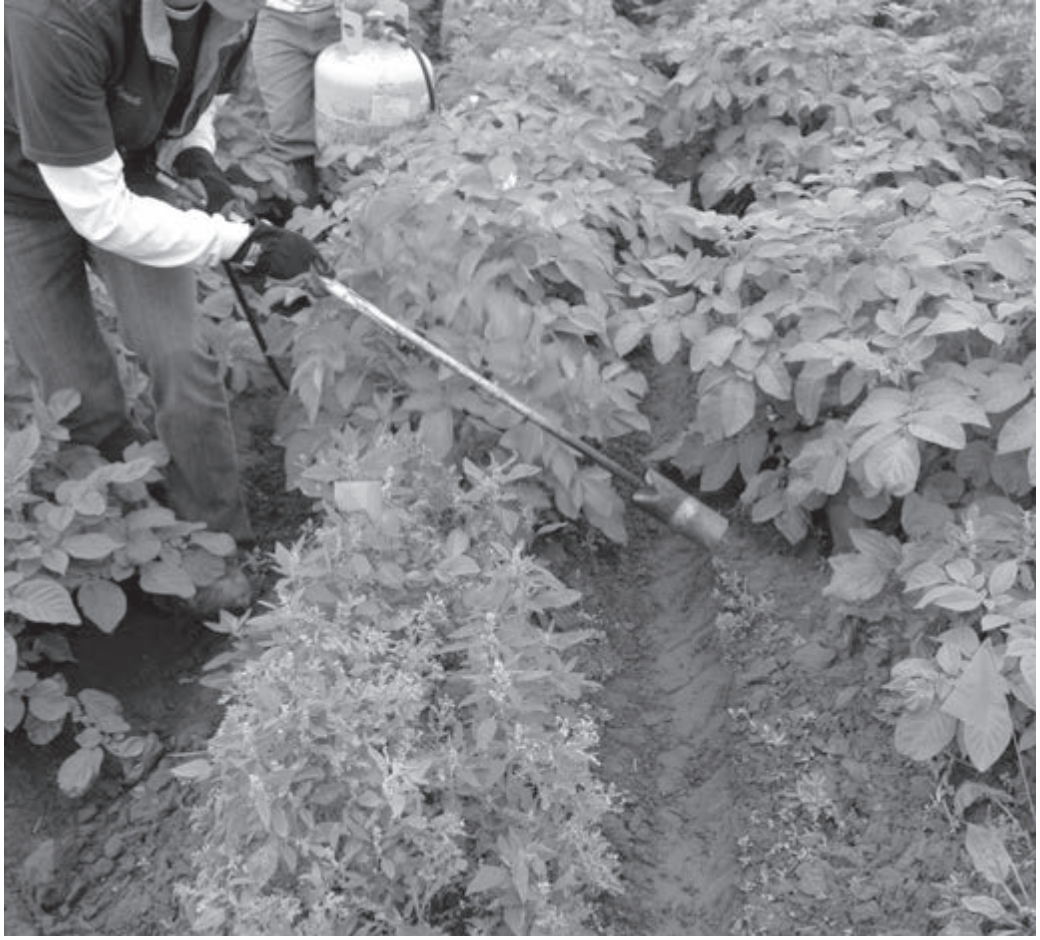
Herbicides are chemicals that control weeds, and there are several that are effective in the potato patch. Contact your local Cooperative Extension Service office for information on suitable herbicides.
Like tomatoes, eggplants and peppers, potatoes are a member of the nightshade (Solanaceae) family of vegetables and produce compounds that in high doses can cause illness. The compounds form when potatoes are in the light for extended periods of time, so keeping them in the dark, both in the soil and in storage, will minimize the level of these potentially dangerous compounds. A greenish color indicates that the potato has been exposed to excessive light, whether it was uncovered in the ground or stored in a well-lit area, and that the harmful compounds may have been formed.
Since the compounds are accumulated near the surface, potatoes with a small portion
of green can be made edible by removing the green portion. If a larger portion of
the potato is green, however, it may be better to discard the entire potato. In the
event that a potato contains no green portions but tastes bitter, discard it. The
compounds have a bitter taste and are sometimes formed without the indicating green
color. See Green Potatoes: Causes and Concerns, Extension publication FGV-00337, for
further information.
Hilling
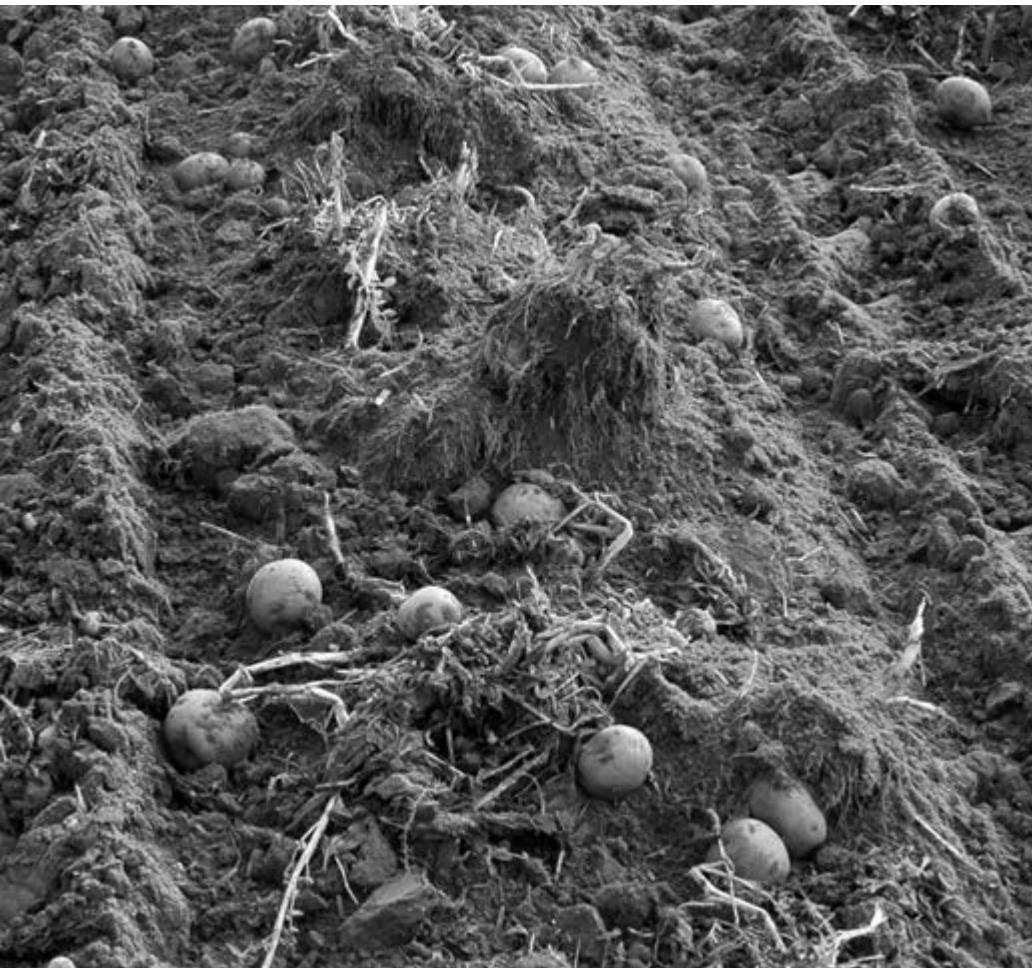
When the potato plants are 8 to 12 inches tall, the hills they are growing in should be built up using soil from between the rows. Although this kills some of the weeds in the row, the main reason for hilling is to increase the amount of soil on the hill so the growing potatoes remain buried. Keeping the potatoes buried is important because it keeps them from being exposed to light. When potatoes are exposed to the light, they begin to turn green and may start accumulating toxic compounds .
Harvesting
Potatoes can be harvested both during the growing season and at the end of the growing season. Some varieties mature sooner than others, but most varieties can be harvested early for a crop of “new” potatoes. New potatoes are small, young potatoes that are at least an ounce and have very thin, weak skin. They are delicious and do not require peeling. Many gardeners dig a couple of plants during the growing season in order to enjoy new potatoes, while leaving the rest to continue to develop. The potatoes that are harvested at the end of the growing season tend to have thicker, more durable skin and store much better than new potatoes.
In warmer climates with longer growing seasons, harvest comes after the potato vines have died back and the potato skins have toughened. In Alaska, with its short growing season, potatoes are harvested before they are fully mature and while their skins are still very delicate. Cutting back the vines one to two weeks before harvest is recommended to toughen the tuber skin before storage. If the threat of frozen soil doesn’t allow time to cut back vines ahead of time, dig the tubers carefully and let the delicate skins toughen naturally in storage.
The easiest way to harvest potatoes in the garden is to dig them up with a shovel or a garden fork, being careful not to damage the tubers in the process. A good way to avoid damaging any potatoes is by digging 8 to 10 inches or more away from the stems, and at least 8 to 10 inches deep. Each variety produces potatoes in different locations under the soil. Some will be shallow and close to the stem, while others will have spread throughout the hill. Carefully digging up the first plant will help to determine what to expect with the other plants of that variety. If any potatoes are damaged during the digging process, those can be eaten right away but should not be stored for winter.
Storing
While the optimal storage condition for potatoes is a dark, cool, high humidity area, most homes are not equipped to meet the exact storage standards used by commercial producers. Simply storing your potatoes in a cool place where they are not exposed to light or at risk of freezing will suffice for a few months. If the potatoes freeze, they will fall apart once they are thawed and become inedible. A few examples of ideal places to store potatoes are a root cellar, a garage or a slightly heated shed. Try to keep the temperature between 33° and 50°F and shield the potatoes from both natural and artificial light as much as possible. Potatoes that are beginning to sprout are still edible; however, once they begin to shrivel they should be discarded.
If there is no specific way the potatoes will be prepared, the above guidelines for storage are adequate. Store potatoes that will be fried, boiled or saved for seed at slightly different temperatures. Potatoes that are meant for frying should be stored around 50°F, because lower temperatures promote the conversion of starches to sugars, a process that can cause browning of the potatoes when fried, which is often considered unappealing. These potatoes can be reconditioned by allowing them to sit at room temperature for a week or two in order to decrease the sugar content, making them suitable for frying. If the potatoes will primarily be boiled or baked, they should be stored around 40° to 45°F. Potatoes to be stored through the winter should be kept at 33° to 40°F to minimize sprouting.
by Leslie Shallcross, Extension Faculty, Health, Home and Family Development
Before cooking, wash potatoes well, scrubbing with a soft brush under running water. Remove eyes, blemished areas and green-tinged areas. New potatoes will have soft, thin skins, so clean them gently. Cooking times for potatoes will vary in each preparation method, depending on the size of the potato or potato pieces. It is also the cook’s choice whether to peel the potatoes or to leave skins intact, retaining the fiber and nutrients.
Boiling: Small potatoes can be boiled whole; larger potatoes may be cut to the desired size pieces. Use uniformly-sized potatoes or pieces so they will cook evenly. Place potatoes in a pot and fill with cold water, covering the potatoes by 1 inch; add salt if desired. Place on stove on medium high heat and bring to a boil.
Boiling time varies depending on the freshness, variety and size of the potatoes; it may take from 10 to 30 minutes to cook potatoes. Check doneness by sliding a small fork or paring knife through several potato pieces. If it slides easily, the potatoes are done. Check potatoes often — if potatoes overcook, they will fall apart in the boiling liquid.
Baking: Adjust oven rack to upper middle position. Preheat oven to 400°F. Pierce the skin of washed potatoes repeatedly with a knife or fork to allow steam to escape. If desired, cover potato skins lightly with cooking oil. This will make a crispy skin for stuffed or “twice-baked” potatoes. Bake potatoes for about 1 hour or until a skewer or fork easily pierces the flesh.
Potatoes can be baked at a lower temperature along with other foods in your oven. Check for doneness as specified above — cooking time will vary and may take as long as 2 hours at lower temperatures. Potatoes can also be baked on a baking sheet or even wrapped in aluminum foil. A foil-wrapped potato will be moist, less fluffy and have a “steamed” taste.
Roasting: Preheat oven to 350°F. Use halved, small new potatoes or evenly-sized potato pieces, Place potatoes in a bowl, toss with oil and desired seasonings (e.g., salt, pepper, rosemary, thyme, garlic, balsamic vinegar) and spread in a greased baking pan. Cover pan with aluminum foil and bake for 45 minutes. Remove foil and bake for 10 to 20 minutes longer. Potatoes should be tender and brown on the edges. To speed up cooking and to add flavor, add a small amount of broth to the roasting pan before placing in the oven — the liquid will be absorbed by the potatoes and will add flavor and tenderness.
Frying: Cut raw or cooked potatoes evenly into the desired sized pieces. Heat some high temperature tolerant oil (peanut, safflower, canola) in a heavy bottomed frying pan or electric skillet and add potatoes, being careful not to overload the pan. Adjust the heat to a medium high and turn the potatoes every few minutes to brown on all sides. If you are using raw potatoes, cover the frying pan and stir potatoes occasionally until they are tender, approximately 20 minutes. Remove pan cover and continue frying until the outsides of the potatoes are crispy and brown. Add salt and pepper to taste. Onions, garlic or peppers may be sautéed prior to adding the potatoes and cooked along with the potatoes for additional flavor.
Microwave “Baking:” Pierce cleaned potato skins in several places. Arrange potatoes on a paper towel, 1 inch apart. Microwave at high power or as instructed by your microwave manufacturer for 4 to 6 minutes per potato. Turn the potatoes halfway through the cooking time. After microwaving, let potatoes stand, covered, for 5 minutes to finish cooking in their trapped steam.
Steaming: Steaming works best for thin-skinned, new potatoes. Cut a small strip from skins to keep them from breaking during cooking. Put about 1 inch water in the bottom of a large pot with a lid and bring the water to a boil. Place the steamer basket in the pot, place the potatoes or potato pieces in the basket — do not overload — and cover the pot tightly. Reduce heat to medium-low, keeping the water boiling. Steam for 15 to 20 minutes.
Varieties of potatoes for Alaska*
Russets: Best for baking and boiling because of their high starch content, but good for frying and roasting as well.
- Allagash
- Russet Norkotah
- Hilat Russet Ranger Russet
- Ranger Russet
- Hilite Russet
- (Poor production results with Russet Burbank in Alaska)
White Flesh: Generally these can be prepared in any way with good results.
- Alasclear
- Caribe
- Knik
- Alaska 114
- Caribe (white skin)
- MaineStay
- Alaska Frostless
- Denali
- Shepody
- Alaska Red Eye
- Green Mountain
- Snowchip
- Atlantic
- Jemseg
- Superior
- Bake-King
- Kennebec
- Tundra
- CalWhite
Red-skinned Varieties: These are best for salads, roasting, boiling and steaming.
- Cherry Red
- Iditared
- Robinta
- Chieftain
- NorDonna
- Rote Eerstling
- Dark Red Norland
- Redsen
- Sangre 11
Yellow Flesh: Best for baking, boiling, roasting and steaming.
- Bintje
- Keuka Gold
- Yellow Finn
- French Fingerling (red skin)
- Mrs. Moehrle’s Yellow Flesh
- Yukon Gold
- German Butterball
- Peanut or Banana
Blue and Purple: Best prepared by microwaving (which preserves color), steaming and baking.
- All Blue
- Magic Molly (delicious, almost black flesh)
- Huckleberry (red flesh)
* For more information about potato varieties, visit Washington State University’s website, “Potatoes at WSU,” http://potatoes.wsu.edu/varieties.
Stephen Brown, Extension Faculty, Agriculture and Horticulture. Originally prepared by Jeff Smeenk, former Extension Horticulture Specialist, Bill Campbell, Agronomist, Plant Material Center, and September V. Martin, Research Assistant.
Reviewed March 2023