Making Fresh Mozzarella
FNH-00063 View this publication in PDF form to print or download.
by Julie Cascio
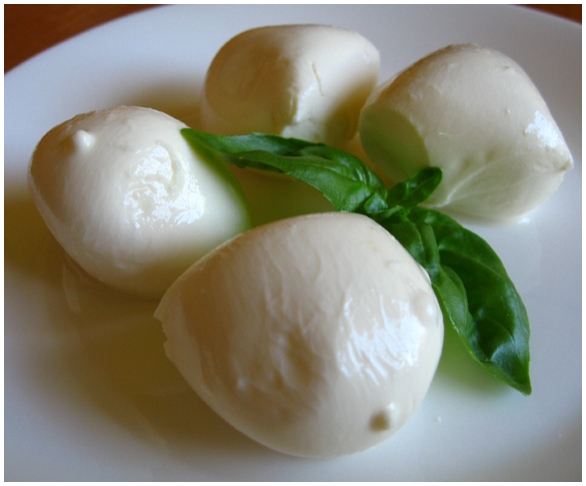
Legend has it that mozzarella was first made when cheese curds accidentally fell into a pail of hot water in a cheese factory. This may have some truth since new cheeses develop because of mistakes. Although mozzarella is traditionally made near Naples, Italy, from water buffalo milk, the quick, fresh mozzarella described here may be made from cow or goat milk. In this method, the milk is made more acidic by adding citric acid. Then rennet is added, which causes the milk to separate into curds and whey.
Equipment
- 2 small bowls
- liquid measuring cup
- measuring spoons
- 6- to 8-quart stainless steel pot (for milk)
- slotted spoon (stainless)
- sharp knife
- colander
- 2 large bowls, 4- to 6-quart size
- thermometer (reads from 0° to 220°F)*
Ingredients
- 1 gallon whole milk, as fresh as possible (pasteurized but not ultrapasteurized)
- ½ tablet or ½ teaspoon liquid rennet
- 2 teaspoons citric acid powder
- ¾ teaspoon salt
* Calibrate the thermometer: Fill a container with ice. Add cold water. Submerge the stem, past the dimple on the stem, in the ice water. The needle should read 32°F. If not, while the stem is submerged, turn the nut under the dial so the needle points to 32°F.
Instructions

Milk picks up unwanted flavors and bacteria easily, so care must be taken to avoid cross contamination. Sanitize all equipment and work surfaces. Wash with hot, soapy water. Submerge equipment in boiling water or in bleach solution (1 tablespoon plain chlorine bleach to 1 gallon water). Allow to air dry.
In a small bowl, add rennet to ¼ cup of cool, distilled water. Stir to dissolve, then set aside.
In a separate bowl, dissolve 2 teaspoons citric acid in ½ cup cool, distilled water. Pour this with 1 gallon milk into the large pot and gently stir. Some curdling will take place because the milk is now quite acidic.
Heat slowly at medium-low heat until the milk reaches 88°F. Stir every few minutes to prevent the milk from scorching on the bottom of the pot. You will begin to see the curd develop.
Once the milk reaches 88°F, add the rennet and water mixture, stirring gently up and down for 30 seconds. Turn the temperature down to low. Heat until the milk reaches 105°F. Monitor the temperature carefully since this happens quickly. Remove the pot from the stove.
Developing the Curd
Let the milk stand quietly for 15 minutes at 105°F. Curd (white mass) and whey (greenish liquid) will now separate.
Separate the Curds and Whey
Cut the curd with the knife into about 1-inch squares. Let this rest for 3 to 5 minutes.
Using the slotted spoon, scoop the curd from the pot into the colander set in a large bowl. Allow the whey to drain into the bowl. Add ¾ teaspoon salt (or to taste) to the curd. The salt will work into the cheese in the following steps.
Fold the curd over on itself as it drains to increase the amount of whey running off. The more you work the curd at this point the drier the mozzarella will be.
Rest the colander with the curd in a third of the whey in the bowl to keep the curd warm.
Stretching the Curds
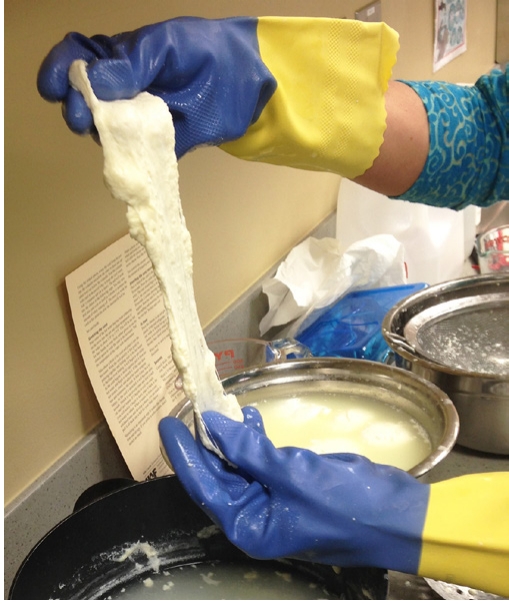
Stretching is an important step. It makes the cheese firm and stringy, which is a trait of mozzarella. Make a brine with 1 tablespoon salt, 1 cup cold water and some ice. This will be used after stretching to chill the cheese and help it hold its shape. Remove cheese from the brine to store.
You control the amount of moisture in the cheese by the amount of kneading and stretching. The more the cheese is worked, the drier and firmer it will be.
Option 1: Stretching the Curds, Hot Water Method
Pour two-thirds of the whey back into the large pot, place it on the stove and heat
to 175°F. The whey that is simmering on the stove at 170° to 175°F is used to heat
the curd so it is malleable enough to stretch. This is very hot, so use the slotted
spoon to dip the curd in the water.
Take about a third of the curd and place it on the spoon and dip it into the hot water. Work the curd by pressing together and folding over. Place back in the water to keep hot. Keeping the curd in a thin, rectangular shape will help facilitate even heating. It will begin to get sticky. As the curd begins to meld together, pull it from the hot water and begin to stretch it. If the curd does not stretch, check and adjust the water temperature and re-immerse the curd. At first it may be a bit lumpy. As the curd is stretched, it will become quite smooth. Stretch it out several times and fold it back on itself and repeat. If it begins to cool too much (you will notice it begin to tear), place it back in the hot water to reheat. When it seems to form a consolidated mass and develop a sheen (it looks like taffy), pull it all back into a ball for your final cheese. Place cheese in brine.
Option 2: Stretching the Curds, Microwave Method
Place a third of the curd in the microwave on high for 20 seconds. Press the curds together to remove excess whey. Drain the whey. The curd should begin to stick together. If it doesn’t, the curd may need to be heated another 20 seconds. Continue pressing and kneading the curd together. Heat the curd 20 seconds more and start pulling and stretching the curd. The cheese will be very hot. Stretch until cool. Place cheese in brine.
To Store
Remove cheese from the brine and place it in an air-tight container or wrap in plastic wrap and refrigerate. Use this cheese within one week or freeze for up to one month. If your cheese is too soft to shred for pizza, place it in the freezer, then shred when it’s partly frozen.
Whey may be used to make ricotta, fed to pigs, used in baking or smoothies, or discarded.
Sources
Carroll, Ricki. 2002. Home Cheesemaking, 3rd edition. North Adams, MA: Storey Publishing, LLC.
Julie Cascio, Extension Faculty, Health, Home and Family Development
Revised July 2024
