Backyard Birch Tapping & Syrup Basics
FNH-00150 View this publication in PDF form to print or download.
by Julie Cascio
Every autumn birch trees collect and store nutrients in their roots to help with tree growth the next spring. These nutrients are contained in the sap that runs from the roots through the whole tree during the freeze/thaw cycle in spring. When the sap begins to flow, it can be collected for use. To collect the sap, a spout, also called a spile, is inserted into a hole drilled into the tree. The spile directs the sap into a bucket. This sap can be drunk fresh as a spring tonic; used in place of water to make tea, coffee or other beverages; collected and made into carbonated drinks, beer or wine; or boiled down to make syrup. The sap should be kept below 41°F (refrigerator temperatures) for no more than six days, or it can be frozen for future use.
Tapping Instructions
Around mid-April, when the days warm and the ground begins to thaw, the sap begins to run. Daytime temperatures consistently above 50°F mean that the sap will run soon. Sap flow occurs as root pressure changes and stops when leaves develop. Sap seems to run best when snow is still on the ground.
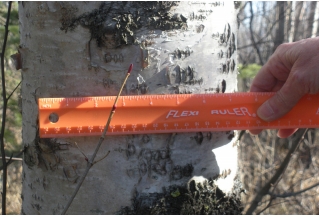
Choose birch trees that are eight inches in diameter or larger to tap. Do not tap trees that have ever been exposed to pesticides, petroleum or other toxic substances. This includes trees along a maintained road, within a dog yard or in other locations that have soil pollutants. Choose accessible trees with healthy crowns and healthy bark to tap. Do not use trees with conks or mushrooms growing on them; these are dead or dying trees. Place only one tap in a birch tree each year.
The drill bit must be sharp, shiny, clean and matched to the drill. Use a ⁷∕16-inch or ⁵∕16-inch drill bit to correspond to the size of the spile being used. A screw-lead auger bit with sharp spurs is fine for a hand brace or low-speed power drills, but a commercial maple-tapping bit is the best for high-speed power drills. Drill bits should be cleaned, polished and soaked in rubbing alcohol before tapping.
Practice the bit and drilling method on a log before using it on sap trees. Drill a clean, round hole without burning.
Sterilize spiles by boiling before and after use. Dry thoroughly and store in sealed containers. Another option for sterilizing the spouts is to dip in rubbing alcohol, then let dry. Discard any cracked or rusty spiles. Spiles may have a hook to hold a bucket or an opening that attaches to plastic tubing. If using tubes to collect sap, use food-grade tubing. Do not use garden hoses. The tubing should fit snugly onto the spile.
How many trees you choose to tap will depend on how you plan to use the sap. Also consider the space you have available to store the sap at 41°F or below for a short time or below freezing for a longer period of time. The time you have available to collect the sap and cook it down is another consideration.
When at the trees, pull any spiles that are not producing. Check to see if the hole is blocked by wood chips or if the spout is touching the end of the tap hole. The hole may be redrilled with a clean, sterile bit and a new, sterile spout put in. Or, another part of the tree may be drilled.
To Gather the Sap
Select a spot on the trunk about 3 to 4 feet from the base of the tree, in the shade as much as possible. Drill approximately 1½ inches into the tree at a slight upward angle to facilitate downward flow of the sap. After the hole is drilled, pull out the drill. Do not put the drill in reverse.
The wood drilled into should be clear and white. If there is brown wood in the shavings, do not use that tree as it is dead or dying.
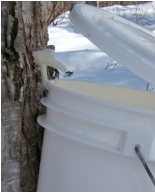
Clean any wood shavings out of the hole by rinsing out with sterile water. Tap the spout gently into the tree with a rubber mallet or hammer. The spout needs to be tight enough to hold the weight of the container full of sap but not so tight that it splits the wood around the hole.
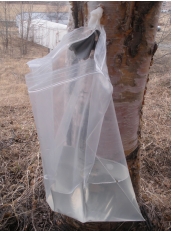
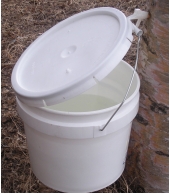
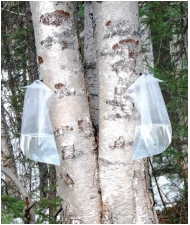
Use clean, food-grade plastic or stainless steel containers for collecting the sap. Do not use any container that has held toxic materials (e.g., car oil, fuels, chemicals, etc.). Food-grade buckets or jugs or reinforced plastic bags may be used to gather the sap. Thoroughly wash containers, rinse with hot water and let air dry. Keep rain or snow out of the bucket with a lid or by zipping the reinforced plastic bag closed.
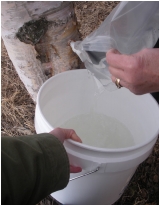
Collect the sap daily, or more often if the container is small and the sap is running well. Pour the sap through a sieve to strain out any bugs, leaves or bark. Sap is quite perishable. Keep the collected sap at 41°F or colder and out of direct sun. You will need a lot of sap if you intend to make syrup. To save space, concentrate it by cooking it down periodically; this evaporates excess liquid and concentrates the solids, such as the sugars in the sap.
Yield
Productive trees will yield an average of a gallon of sap per day. Some trees may produce more and some less. Sap is refreshing and has trace nutrients; it should be crystal clear and taste like slightly sweet water. If the sap from any tree is discolored, discard it and pull out the spout.
The sap typically runs from 14 to 21 days. This will vary depending on the weather each year.
The sap has a sugar content of 0.8 to 1.5 percent. It takes 110 or more gallons of sap to make 1 gallon of syrup at a concentration of 67 percent sugar (or 67 on the brix scale).
When the leaves on the trees start to appear, the sugar is gone from the sap and the season is over. Once the sap appears cloudy or sour-tasting, the spile should be pulled. Current recommendations are to leave the hole unplugged; the tree will eventually heal the taphole. Alternatively, a clean hardwood dowel or cork plug may be used to plug the hole.
End of Season
Pull the spile and clean the hole by spraying with sterilized water. Clean the spiles in soapy water, rinse thoroughly and store for next year.
Birch trees have thin bark, a shallow root system and an average lifespan of more than 100 years. To help protect the tree for a sustainable harvest of sap, drill a new hole in another area of the tree in future years. Drill successive holes in a spiral pattern up and around the tree at about 4-inch intervals and give the tree a year off after a few years.
Nutrients in Birch Sap
Birch sap carries nutrients necessary for the growth of the birch. It contains fructose, glucose, a slight amount of sucrose, fruit acids, amino acids, vitamin C, potassium, calcium, phosphorous, magnesium, manganese, zinc, sodium and iron. Malic, phosphoric, succinic and citric acids are present in birch sap. Nutrient values can vary widely during the season, from one year to another and from tree to tree.
Making Birch Syrup
More than 100 gallons of sap are needed to make just 1 gallon of syrup. It will take the whole season to get enough sap to make syrup when just a couple of trees are tapped. Sap is quite perishable, so it must be used immediately or kept below 41°F for no longer than a few days. The sap may be frozen for future use. Since it takes a lot of sap to make syrup, partially concentrating the sap collected every day is a more efficient use of refrigerated storage space. If birch syrup is the intended final product, evaporate the sap to approximately the same concentration each time.
Concentrate Sap
Choose a large stainless steel or enamel pot and a heat source that will support the pot. The heat source may be a gas burner or a wood fire. Have plenty of fuel on hand as it takes a long time to remove excess liquid and concentrate the sap. Boiling should be done outdoors or in a well-ventilated area to allow the large amounts of steam to escape.
A large, shallow pan or two are better than one big, deep one. Water takes longer to evaporate when the pot is deep, which darkens the syrup. Do not use aluminum or cast iron pots or pans. Strain the sap into the large pan to eliminate any twigs, leaves, insects, etc.
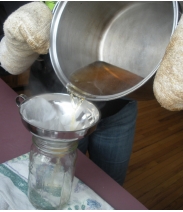
Bring the sap to a hard, rolling boil to evaporate the water as quickly as possible. As the sap boils, scum will form on the surface and stick to the sides of the pans. Skim off this scum as it forms and discard it. When the sap is concentrated to the level you want for the day, strain the hot sap through a filter to remove grit and scum. A coffee filter held in a strainer will work. Fill a sterilized canning jar or other container with the hot (180° to 190°F), concentrated sap and cover with a tight-fitting lid. Cool and store below 41°F. This will hold the sap about two weeks. By this time there should be enough concentrated sap gathered to finish the syrup. This concentrated sap is also delicious to drink hot or cold or use as a base to make other beverages or marinades.
Scrape the crust off the sides of the pan and wash the pan every day after use.
Finish the Syrup
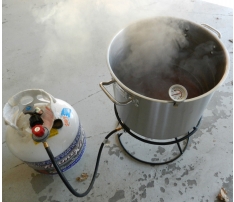
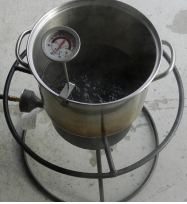
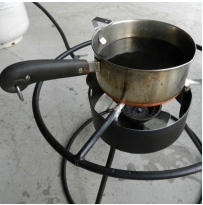
Use progressively smaller pots to maintain the liquid depth of 2 inches or more. Use a candy thermometer at this stage to monitor temperature.
At the end of the season, pour all of the previously concentrated sap into one large pan and boil. As it cooks it will condense. At least 2 inches of liquid must remain in the bottom of the pot. Use progressively smaller pots to maintain the liquid depth of 2 inches or more. The boiling syrup will have very fine bubbles and may look like it wants to boil over. Use a candy thermometer at this stage to monitor temperature. Adding fresh sap to already-concentrated sap as you boil it down will darken the color, and the flavor, of the syrup.
The sugar content of the syrup should be 66 to 67 brix, as measured with a syrup refractometer or hydrometer. If you do not have these tools, bring the syrup to 225° to 228°F to achieve that approximate sugar density. Be watchful, as it is easy to burn the syrup at this stage; heating past this temperature is likely to burn the syrup.
Hot syrup is very thin, so it will be hard to tell if it is the desired thickness until it cools. For a thicker syrup, reheat the syrup to about 180°F, stirring constantly. As long as steam is rising, more water is being eliminated. Be aware that reheating will darken the syrup. If a hydrometer or a syrup refractometer is available, use the brix scale to check the density of the syrup. The sugar content should be 66 to 67 percent brix.
Filter
Filter the hot syrup before filling the containers for storing. There is a natural build-up of bitter, gritty minerals in boiling sap. This grit is called niter sand. Use several layers of paper filters that are cut to the size of the strainer. A basket strainer (sieve) works well to hold the filter. Another option is to use wool or synthetic maple syrup filters.
Fill Containers
Fill hot, sterilized canning jars with hot syrup (180 to 190°F). Leave ¼ inch headspace. Add sterilized lids and screw the band on the jar just finger tight. This will create a vacuum to seal and keep the syrup for long-term storage. Separate the jars to allow air to circulate between them. After the sealed jars are room temperature, store them in a cool, dry place for up to two years. Refrigerate after opening.
Julie Cascio, Extension Faculty, Health, Home and Family Development, and Valerie Barber, former Forestry Resource Specialist
Revised July 2024

