Composting in Alaska
HGA-01027 View this publication in PDF form to print or download.
Composting is a wonderful way for gardeners to convert unwanted organic waste, such as leaves, branches and old stalks from the garden, into “black gold” for the soil. Compost incorporated into the soil improves drainage and water retention by improving soil structure. As the compost breaks down, it slowly releases nutrients to the plant roots and the soil food web. Compost applied above the soil around growing plants acts as a mulch to keep out weeds, while decreasing water loss due to evaporation. In addition to benefitting the garden, composting can decrease the amount of organic material that ends up in the landfill.
Decomposition is the ultimate recycling system, in which microbes use the energy and nutrients tied up in the cells of decaying organic matter and release them back into the soil to use again. Composting accelerates this process, providing stable organic matter more efficiently than happens in nature. Stable
organic matter improves soil structure on a long-term basis, thereby decreasing the need for constant soil maintenance in the garden. Over time, even the most stable organic matter will be broken down into carbon dioxide, water and mineral nutrients, and additional stable matter will need to be incorporated to maintain soil structure.
Alaska’s short growing season and long, cold winters cause many skeptics to think successful composting is not possible. Not so! Even in the depths of winter compost is being made daily in Fairbanks at the Golden Heart Utilities Wastewater Treatment Plant.
Decomposition occurs naturally everywhere in the world when there is adequate moisture and oxygen available. In fact, several studies show that many of the same organisms responsible for decomposition in warmer climates are responsible for decomposition of organic materials in the subarctic regions. So, gardeners in Alaska can use the same scientific principles applied in other parts of the country to accelerate the natural decomposition process — they just have to modify their practices and time line a bit.
Three main types of composting
Hot composting
This is the process that comes to mind when most people think of composting. During hot composting, a combination of feedstocks (the raw materials that go into the compost pile) undergo microbial breakdown, which generates a significant amount of heat. Hot composting is primarily aerobic, meaning that the microbes involved need oxygen to flourish and reproduce. Although hot composting involves a series of natural processes, it is not common in natural systems. A simple demonstration of hot composting would be to collect moist grass clippings and arrange them in a pile; after a few hours the center of the pile will have heated up considerably.
Most of this publication focuses on hot composting methods.
Cold composting
Most decomposition that occurs in nature is a form of cold composting. When plants fall to the ground in thin layers, the microbial heat generated by the decomposing tissue is lost to the air, so the material does not get a chance to significantly heat up. Despite the absence of elevated heat, the microbes slowly break down the material and reduce it to stable organic matter. A fallen tree in the forest provides an example of the cold composting process at work. Generally, the leaves are the first to decompose since the tissue is easy for bacteria to break down. The punky wood of the trunk is usually moist enough for the fungi, specialized bacteria, and insects to slowly break it down. The standing portion of the trunk is often structurally sound wood because it is not moist enough to support the bacteria and fungi that decompose woody tissue; however, even this part of the tree will eventually decompose.
Although most cold composting is aerobic, there are anaerobic organisms that decompose materials in environments with little or no oxygen, such as swamps and septic tanks. Because the metabolic processes used by the anaerobic microorganisms often give off foul smells and create undesirable by-products, garden composters tend to focus on aerobic composting.
Many gardeners use cold composting to convert unwanted organic material into desired compost. A successful cold composting strategy is to create organized layers of unwanted organic materials on top of the garden soil. As these layers break down into stable organic matter throughout the growing season, they nourish existing plants and hinder weed growth. This form of cold composting is often called “sheet composting” and, more recently, “lasagna gardening.” Cold composting is generally a slower process than hot composting, and management methods can be as involved or as minimal as desired. Some gardeners simply throw all unwanted organic materials into a pile and collect the resulting stable organic matter several years later, without any turning, watering or other management practices that are required in hot composting.
Several drawbacks to the cold composting method are 1) a possible increase in weeds in the garden since weed seeds are not killed during cold composting, and 2) unpleasant odors that would be eliminated during hot composting.
Worm Composting
Worm composting, or vermiculture, is becoming a popular method of making high quality compost on a relatively small scale. The worms (primarily red wiggler worms) are kept in a bin, initially with scraps of damp paper and a little soil, and kitchen scraps are tossed into the bin. The worms eat the material, digest it and excrete the by-products, called “castings.” The castings are collected and make a wonderful amendment to the garden. For further information see Extension publications Composting with Worms, HGA-01020, and Worms in a Tote, HGA-01025.
The process of hot composting
The natural decay process can be sped up by providing an environment favorable to the aerobic microbes involved in the decomposition processes. The hot composting process begins with the proper balance of feedstock materials (organic waste) and the appropriate amount of water and air in a pile of adequate size. Composters think of the process as three major phases: The heating up or “mesophilic” phase, the hot or “thermophilic” phase and the curing or “maturation” phase.
Mesophilic Phase
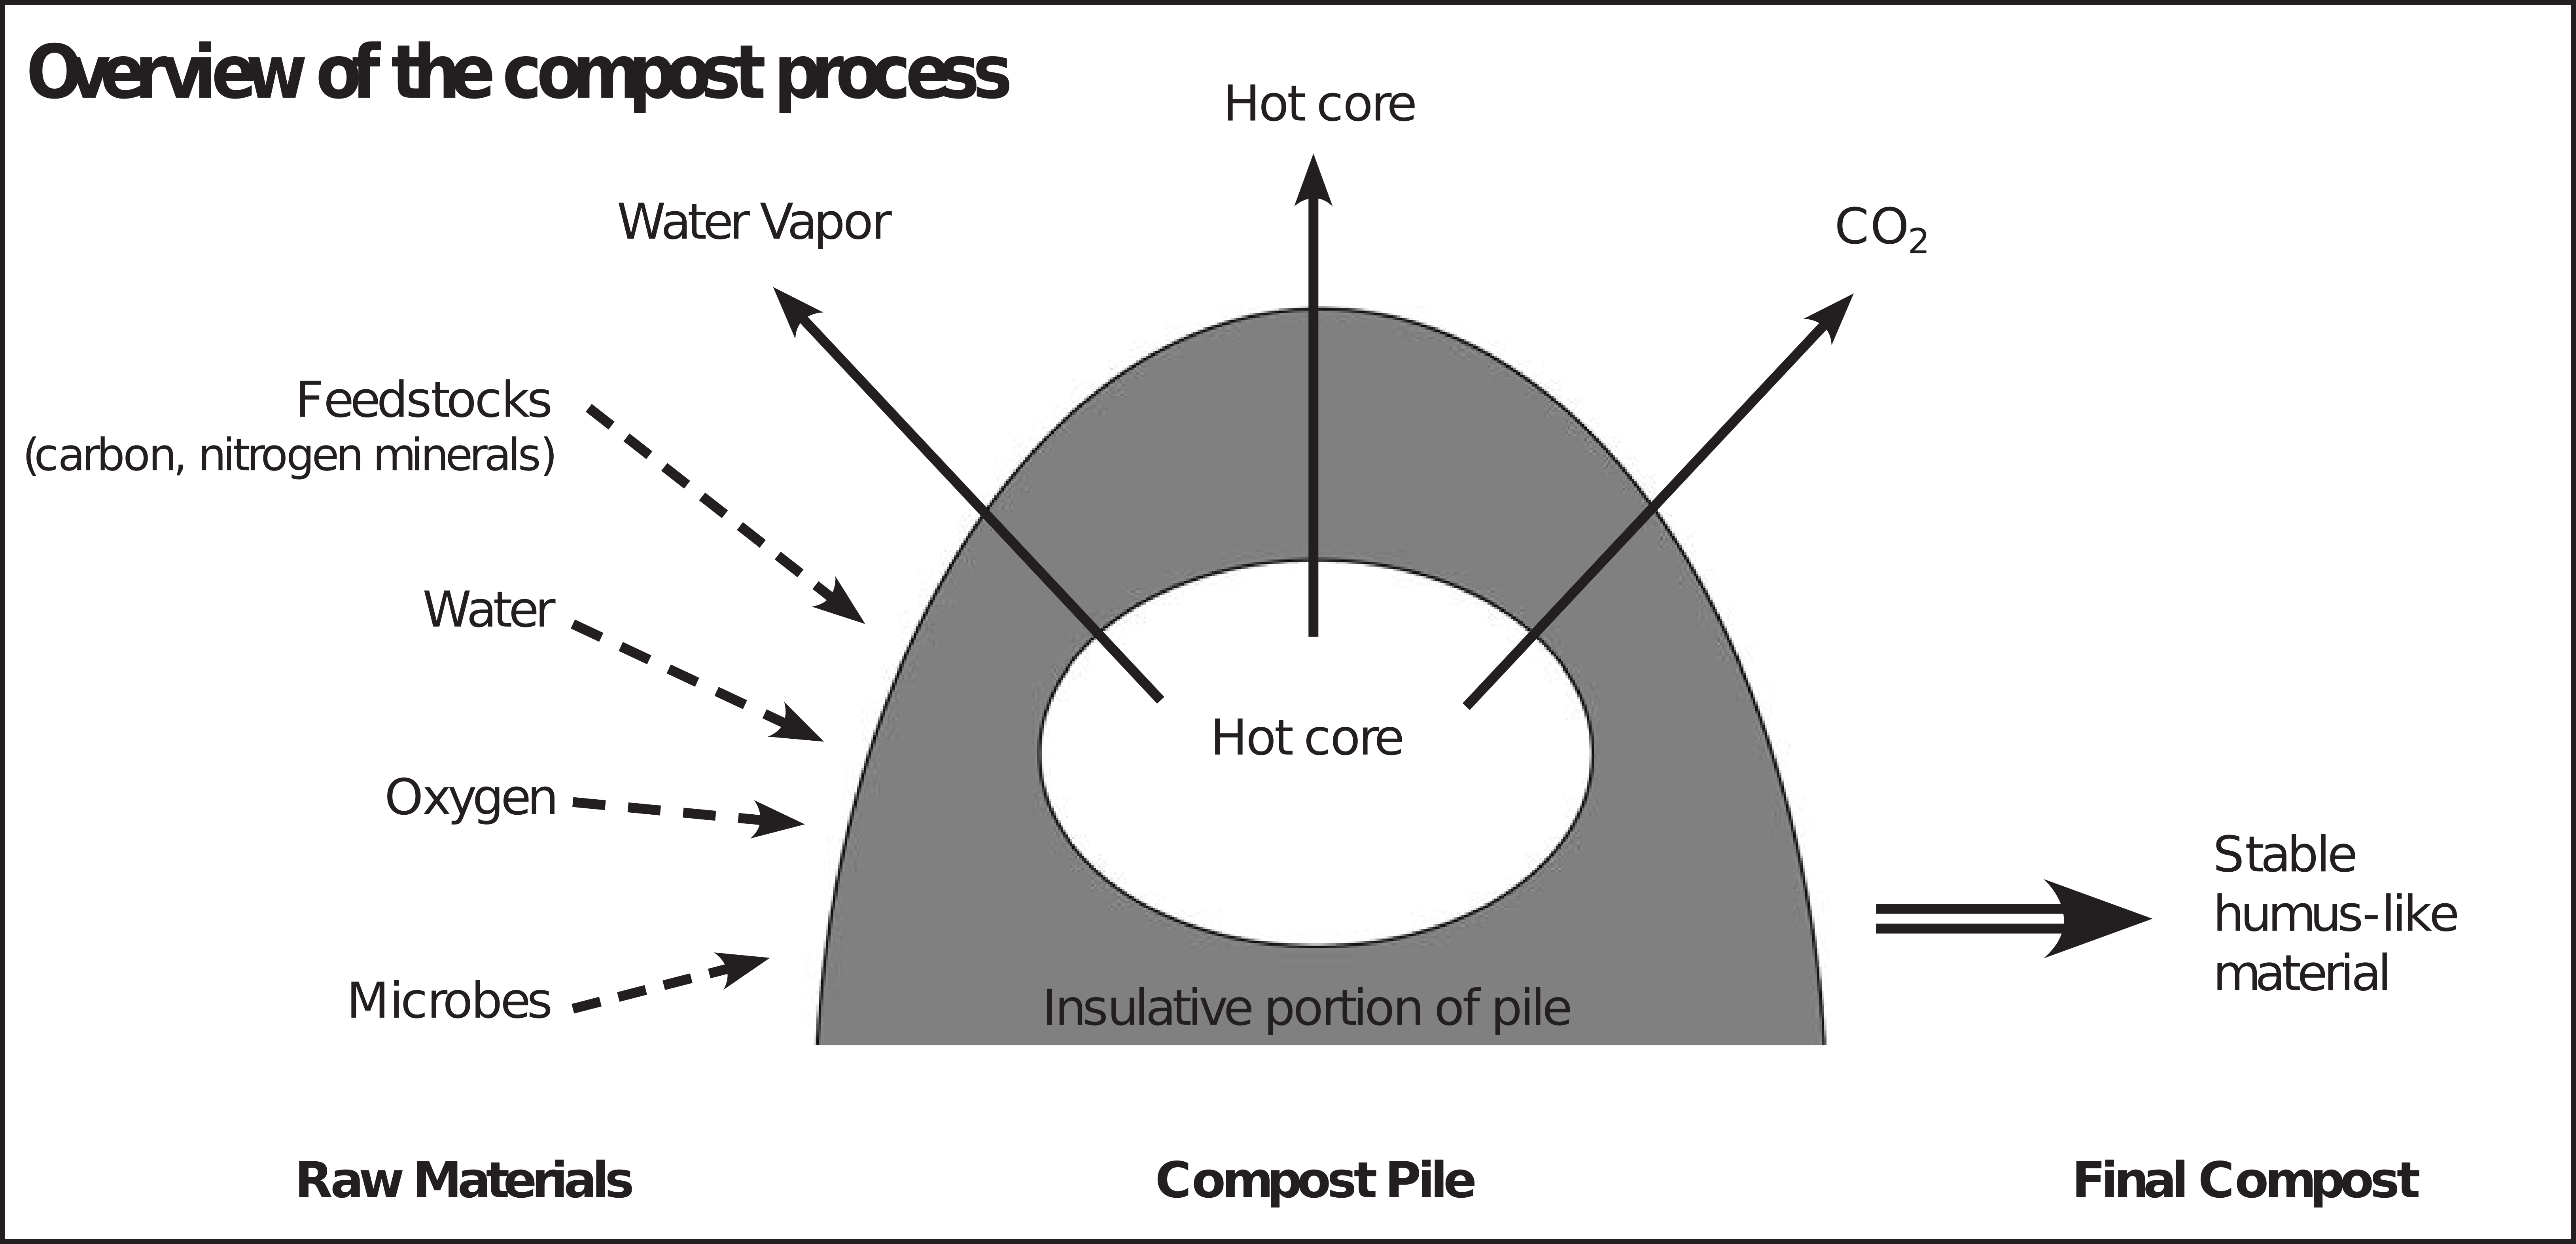
When the pile is first built and the water is added, the microorganisms (primarily bacteria) that are already present on the feedstocks begin to break down the materials. Usually within one to three days the pile begins to get warmer. There is nothing magical about the pile heating up — as trillions of bacteria consume the easy-to-digest portion of the feedstocks, the metabolic processes involved give off heat. The minute amounts of heat generated near the outer surface of the pile are lost to the wind. The center of the pile, however, is insulated from the wind, and it begins to heat up (core temperatures of 120° to 150°F are quite common). As the center gets warmer, the microorganisms work even faster and the heat builds. Eventually, the pile gets too warm for the organisms that initially heated it up and they begin to die off.
Thermophilic Phase
As the pile warms up beyond the temperature range of the mesophilic organisms, about 104°F, the heat-tolerant (or thermophilic) organisms begin to dominate the population and continue the composting process. Over time, the microbes will use up all the air or water in the pile and the microbial population will crash and the pile will cool down. Usually, the microbial population can be revived by adding air or water and the pile will heat up again. The goal for the home composter is to get the pile to reach 131°F for three days, which is effective for killing many weed seeds and garden diseases. If the pile doesn’t reach that temperature for the desired period of time, all is not lost — the composting process will just take a bit longer and more weed seeds will survive the process.
Commercial composters can keep their piles in the thermophilic (or hot) stage continuously by closely monitoring the pile’s temperature and moisture and turning the pile every two to five days before it runs out of oxygen or water. Very few home composters manage their piles this closely. It is much more common in the garden for a hot pile to cool down until it is turned or watered. With a fresh addition of oxygen, and water if necessary, the pile goes through another mesophilic phase, which is followed by another thermophilic phase. Sometimes this heating and cooling process is repeated three to five times. When the pile cools down for the final time the maturation phase begins.
Maturation Phase
In the maturation phase, often called the curing phase, the cooling compost pile is recolonized by organisms that cannot tolerate the high temperatures of the thermophilic phase, along with microscopic animals of the soil food web, such as the protozoa and the nematodes. During this phase the fungi and certain bacteria continue breaking down the tougher compounds, such as the lignins in woody material. It is thought that many of the humus-like materials are formed in the maturation phase. The maturation process also ties up excess nitrogen, making the resulting organic matter safe for sensitive plants. Immature compost may contain high levels of organic acids or salts and can have a pH outside the desired range; all of these conditions can harm sensitive plants. Mature compost, however, is safe for delicate transplants and sensitive plants.
Time Frames
In Alaska, it may be best to plan on using the compost from this year’s pile on next year’s garden. It is difficult to start a compost pile before breakup — not impossible, just more difficult. For the mesophilic bacteria to flourish, they need water, and with freezing temperatures a small, moist pile freezes before the bacteria have a chance to heat the pile up. Many Alaskans with access to large amounts of unfrozen feedstocks, like farmers with daily supplies of fresh manure, have successfully composted year-round. With the more modest amounts of feedstocks normally seen in the garden, many gardeners begin composting in May or early June. A properly built pile will begin heating (mesophilic phase) within a few days and will soon reach the thermophilic phase. If closely monitored, turned regularly and watered as needed, the pile will complete the thermophilic phase in about three to four weeks.
For many gardeners who enjoy their garden more than their compost pile, the pile may go through a series of mesophilic and thermophilic phases and the time line may get stretched out to four to six weeks from lack of attention. For these gardeners, the pile doesn’t begin the maturation phase until early to mid-July. With a maturation phase of six to eight weeks, the compost pile that is begun early in the season will be ready to use just before the garden freezes. A pile of sufficient size that is started in late summer will complete the mesophilic and thermophilic phases despite freezing air temperatures. In Alaska, the compost pile often freezes after it goes through the thermophylic phase and the maturation phase begins in the spring, when the pile thaws and liquid water is again available for the microbes.
The garden composter has a limited set of tools to manage the composting process: choice of, amounts of and particle size of feedstocks; the moisture level; and the frequency of turning.
| Condition | Reasonable Range | Preferred Range |
|---|---|---|
| Carbon to nitrogen ratio | 20:1–40:1 | 25:1–30:1 |
| Moisture content | 40–65% | 50–60% |
| Oxygen content | > 5% much | > 5% |
| Particle size | fine – coarse | mixture ⅛–2 in. |
| pH | 5.5–9.0 | 6.5–8.0 |
| Temperature | 110–150 | 130–140 |
Managing the decay process
The gardener can affect the speed of the compost process and the quality of finished product by managing the environmental factors within the compost pile. The easiest way to do this is to ensure that the microbes have adequate food, water, air and the appropriate temperature to thrive. The food aspect is controlled when the pile is made. The successful pile is a balanced combination of high nitrogen materials and high carbon materials. Water is added to the initial pile, and again when needed; however, it is best to protect the bile from rain to keep it from getting too moist. The oxygen level is managed by turning the pile at appropriate intervals to reintroduce air as needed. The temperature of the pile is influenced by the volume and shape of the pile, along with the moisture levels, the feedstocks and the frequency of turning. So, once the composting process begins, the primary management tools are adjusting the moisture level and turning the pile.
Choice of feedstocks and amounts of each added to the pile
Among the nutrients present in the feedstocks, composters are most interested in the amounts of carbon and nitrogen present in each material. The microorganisms responsible for breaking down the organic matter into compost use carbon as an energy source and cellular building block, and use nitrogen to build proteins. All organisms need more carbon than nitrogen. The amount of carbon compared to the amount of nitrogen in a material is always expressed as a carbon-to-nitrogen ratio (C:N). For example, Condition Reasonable Range Preferred Range sawdust is a feedstock considered high in carbon, so it may have a C:N ratio of 200:1. This means that there are 200 parts of carbon for every 1 part of nitrogen in sawdust. Chicken manure, on the other hand, is a feedstock that is relatively high in nitrogen and may have a C:N ratio of 10:1, meaning that there are only 10 parts of carbon for every 1 part of nitrogen. Feedstocks with a C:N ratio higher than 25:1 are considered “carbon” materials, and feedstocks with a C:N ratio less than 25:1 are considered “nitrogen” materials. Feedstocks with C:N ratios around 25:1 are considered balanced materials.
Understanding the C:N ratios of feedstocks is important because the ideal C:N ratio of a compost pile is 25:1 to 30:1. Feedstocks with a very high C:N ratio, like the sawdust at 200:1, will need the addition of nitrogen materials, like chicken manure at 10:1, in order to decrease the overall C:N ratio of the pile to the desired range. This C:N ratio is very effective in creating a hot compost pile with a minimum of odor.
If the overall C:N ratio of the pile is too low (i.e., 10:1), the pile may get excessively hot or the pilemay use up its oxygen too quickly and an alternative decomposition process will begin. This anaerobic (without oxygen) process releases nitrogen as ammonia, resulting in nitrogen loss to the atmosphere and a strong ammonia odor.
High carbon feedstocks are often called browns and high nitrogen feedstocks are called greens because the materials frequently are these colors. Sometimes high carbon feedstocks are called bulking materials and high nitrogen feedstocks are called energy materials, but these names can cause confusion since some high carbon feedstocks have no bulking properties and both high carbon materials and high nitrogen materials contribute energy to the microbes.
At the other extreme, if the C:N ratio is too high the decomposition process will proceed very slowly since there isn’t adequate nitrogen to quickly use the available carbon. With decomposition proceeding so slowly it is difficult to achieve the proper temperature in the pile. The waste wood piles in Southeast Alaska are a great illustration of this situation. With a relatively high C:N ratio of 200:1, these large piles would take decades to decompose, even with proper moisture from rainfall and adequate aeration. On the other hand, when fish wastes (very low C:N) are added to these wood wastes, a quality compost can be made in a matter of months.
Some C:N Relationships
| Material | C:N Ratio | Green or Brown? |
|---|---|---|
| Poultry manure | 3:1 to 15:1 | Green |
| Food waste | 15:1 | Green |
| Grass clippings (green) | 19:1 | Green |
| Cow manure | 20:1 | Green |
| Horse manure | 20:1 to 50:1 | Green or Brown |
| Coffee grounds | 20:1 | Green |
| Garden stalks and leaves | 25:1 | Green |
| Dead leaves | 35:1 to 85:1 | Brown |
| Grass clippings (dry) | 70:1 | Brown |
| Straw | 80:1 | Brown |
| Paper | 170:1 | Brown |
| Newspaper | 400:1 | Brown |
| Sawdust | 200:1 to 750:1 | Brown |
Selected examples taken from: “Compost Fundamentals: Carbon-Nitrogen Relationships,” Whatcom Co. Extension, Washington State University, 2011 web access, http://whatcom.wsu.edu/ag/compost/fun-damentals/needs_carbon_nitrogen.htm; and “Home Composting,” Cornell Waste Management Institute, 2011 web access, http://cwmi.css.cornell.edu/compostbrochure.pdf.
Availability of the carbon in the feedstocks
In addition to amounts of carbon and nitrogen in the materials (C:N ratio), the composter also needs to consider the availability of the carbon to the microbes. Table sugar (sucrose) is pure carbon with no nitrogen and, as shown in the C:N charts, sawdust (at 200:1) is also almost pure carbon. In the compost pile the bacteria would make short work of the sugar, while the tougher forms of carbon that make up the wood would need specialized fungi to break it down. Therefore, the availability of the carbon in the feedstock also influences the speed of compost breakdown.
Calculating C:N ratios
There are several methods (outlined below) of calculating the proper ratio of feedstocks to achieve an overall C:N ratio of 30:1. Many beginning composters are excessively worried about getting the ratio perfect. Fortunately, the composting process is very forgiving and, with a bit of experience, many composters build functional piles by “guestimating” the feedstock ratios, then modifying the ratios as needed, based on the pile’s core temperature.
Feedstock C:N charts
There are numerous charts that provide detailed C:N information on many types of feedstocks (use Internet search terms “compost C:N” or “compost calculator”). Remember, the C:N ratio doesn’t change if the feedstock is wet or dry but the weight of the material does. When using compost recipes based on these charts, determine if the weights of the feed-stocks are wet weights or dry weights, or if they are measured in volumes rather than weights.
Below are several compost feedstock recipes that have proven effective in Alaska. The carbon parts are dry weight and the nitrogen parts are by wet weight
Recipe No. 1
- 2 parts dry leaves
- 2 parts straw or wood shavings
- 1 part manure
- 1 part grass clippings
- 1 part fresh garden weeds
- 1 part food scraps (fresh)
Recipe No. 2
- 3 parts dry leaves
- 1 part fresh garden weeds
- 1 part fresh grass clippings
- 1 part food scraps (green)
Recipe No. 3
- 2 parts dry leaves
- 1 part food scraps (green)
- 1 part fresh grass clippings
Recipe No. 4
- 1 part dry leaves
- 1 part fresh grass clippings
- Recipe No. 5*
- 1 part dry grass clippings
- 1 part fresh grass clippings
Recipe No. 6
- 1 part fish waste (carcass)
- 1 part saw dust
- 1 part green materials (lawn clippings)
* Best used with bulking agents and frequent turning. Do not use if clippings are moldy
or at risk of becoming moldy.
Soil Particle Size
Compost Calculators
Although some composters love the applied math challenge and want to calculate the appropriate volumes of individual feedstocks to add to their pile, many composters prefer to use the compost feed-stock calculators available online (search “compost calculator”) that take much of the guesswork and discovery time out of the compost process. One good one is a free web-based compost calculator available for download from Green Mountain Technologies, www.compostingtechnology.com/probe-sandsoftware/compostcalc.
This compost calculator, like most of them, uses drop-down menus containing various organic sources. You select the source and the amount (in pounds) of each source and the calculator adds up the various sources and gives you the total C:N ratio of the mix, as well as moisture and bulk density. You add or subtract the amounts of each of your materials until approximately a 30:1 (C:N) ratio is achieved.
Other free Compost Calculator websites that you may find useful include:
- http://compostingtechnology.com/resources/compost-calculator/
- www.martindalecenter.com/Calculators1_2_Ag.html#AGRI-FERT-COMPOST
- www.agric.gov.ab.ca/app19/calc/manure/manure.jsp
Particle Size
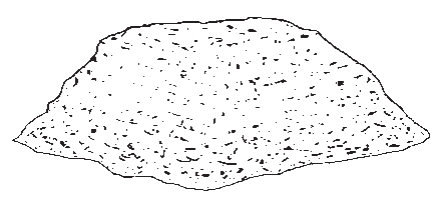
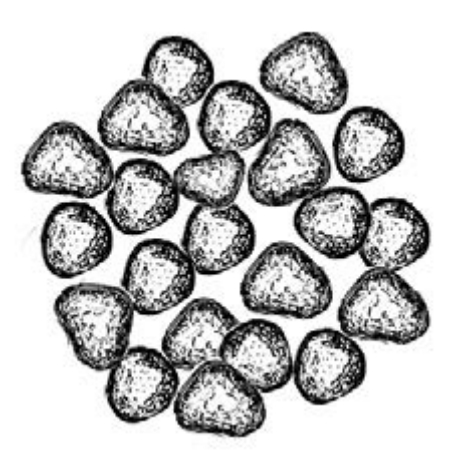
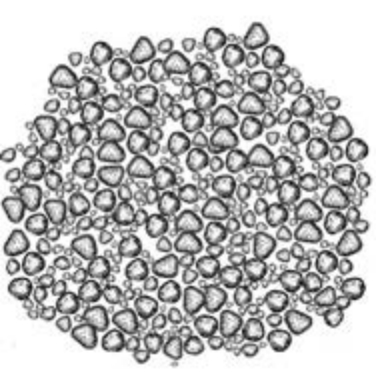
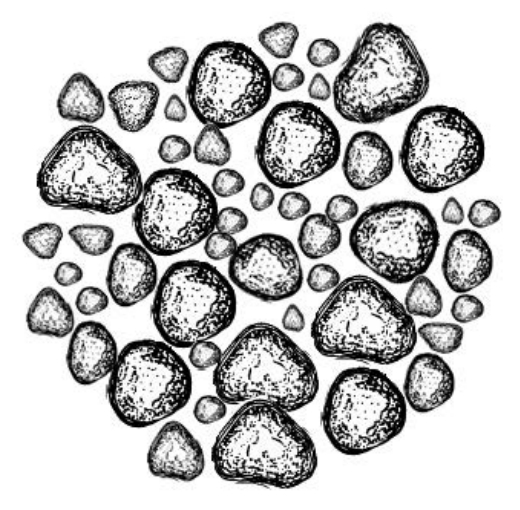
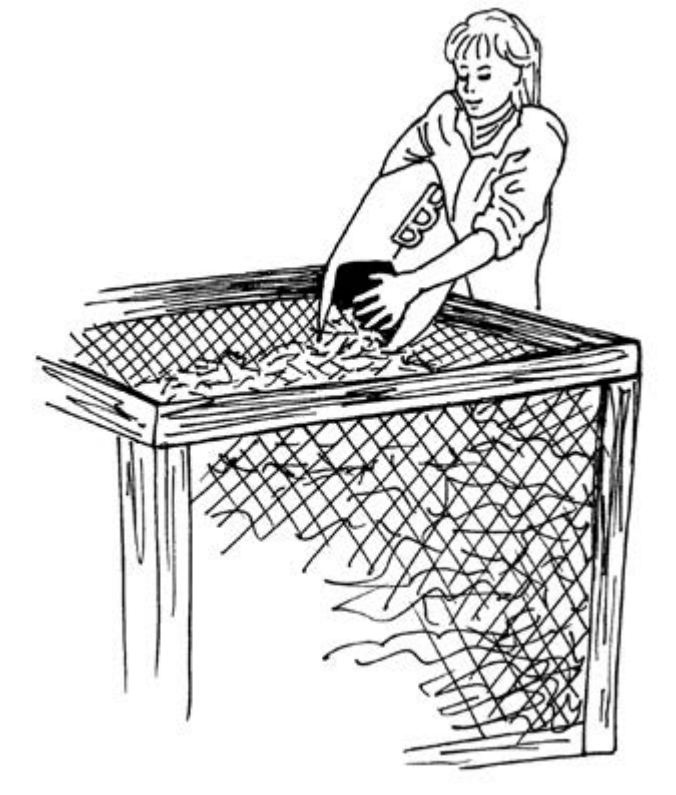
Particle size is an important factor in composting (see figure above). Since most microbial activity takes place on the surface of the particles, coarsely grinding the feedstocks speeds up the composting process by increasing the feedstock surfaces available. If a garden chipper or leaf shredder is available, make sure the discharge screen is not too fine (1¾ inches is the ideal opening size). Ideally, ground feedstock should comprise a variety of particles ranging in size from ⅛ inch to 2 inches across. If the majority of particles are too fine there will not be enough air spaces throughout the pile for proper aerobic composting and the pile will soon be anaerobic. If the pile contains primarily large particles, such as wood chips, it will have such great airflow that it will be difficult to achieve and maintain the proper moisture level and any heat generated by the microbes will soon be lost to the atmosphere. With the proper range of particle sizes the small particles readily absorb and retain water and provide the microbes with an extensive surface area to feed on while the large particles in the mix “bridge” each other, forming air spaces throughout the.
Bulking Agents
Bulking agents are materials that are added to the pile to create many tiny air spaces within the pile. They are especially important when the majority of feedstocks are very fine (see the above section on particle size). Sometimes bulking agents are stored dry and can be added to an overly moist pile to assist in lowering the overall moisture level to the desired 50-percent range by weight. Common garden bulking agents include plant stalks, small sticks, leaves and wood chips. Although not commonly used by home composters, some bulking agents are made of rubber or plastic. They do not decompose during the composting process and are screened out of the finished compost for future reuse. The municipality of Fairbanks uses wood chips as a bulking agent in its biosolids compost since the biosolids by themselves are very fine and do not retain many air spaces within the pile. After the biosolids have completed composting, the wood chips are screened out and reused in the next batch. With each composting cycle the wood chips decompose a little bit more, and when they become small enough to pass through the screen, they become part of the finished compost.
Composting structures
Simple Pile
This is the simplest of the hot composting methods. The minimum size of the pile should be 3 feet, by 3 feet, by 3 feet, although the pile will be tapered with the base larger than the top. Therefore, making the base of the pile 4 feet by 4 feet or 5 feet by 5 feet would help maintain the optimal volume of feed-stocks. The pile can be built on the ground or on any flat surface, such as cardboard, plywood or concrete.
Windrow
This is a long, simple pile that is most frequently used by composters with access to machinery to turn the pile. The pile should be at least 3 feet high and 3 feet wide and as long as desired.
Compost Bin
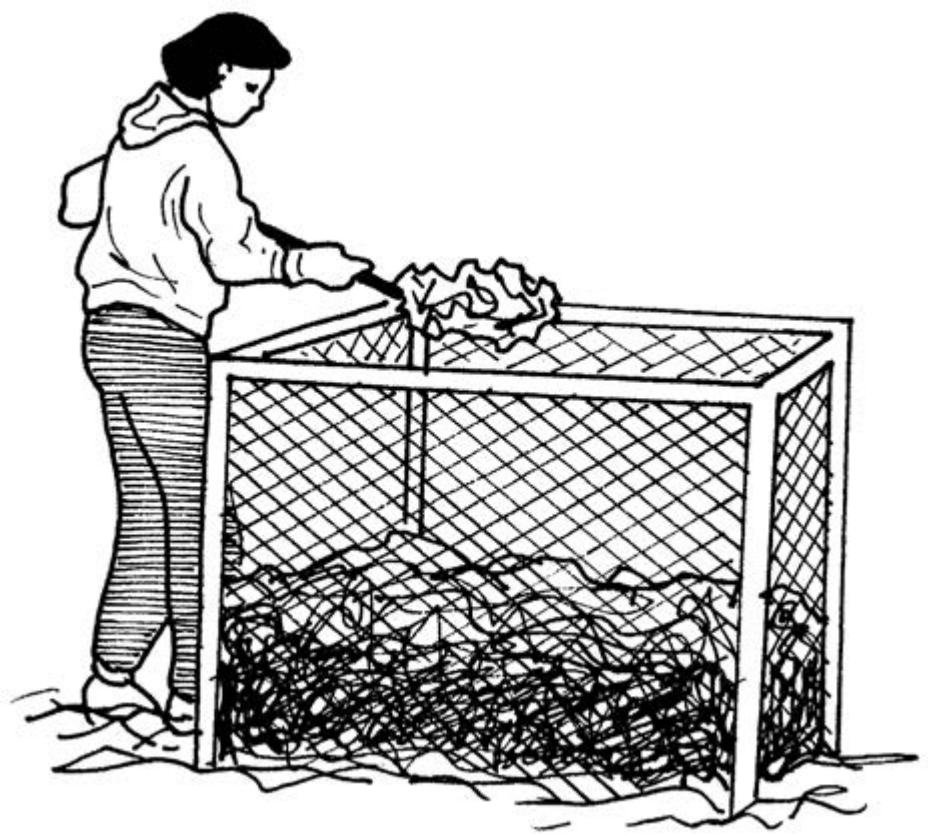
The compost bin holds the compost within three or four walls that are built to have air pass through them. Some composters use pinned logs while others use concrete blocks laid on their side to allow the air to flow through. Wire fencing around four stakes also makes an effective compost bin. Many gardeners have had success recycling used pallets to form the walls of their compost bins, and several garden supply venders sell hardware kits to build a variety of compost bins using local lumber.
Three-Bin Method
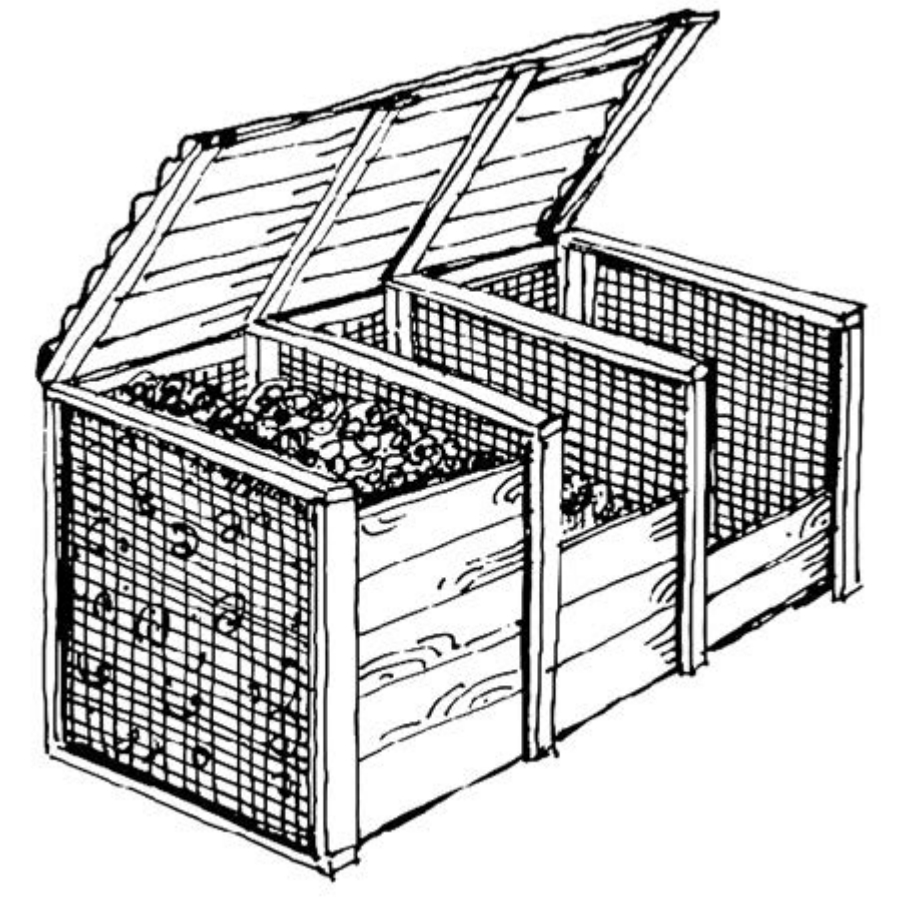
This is a multistep hot composting method where feedstocks are combined in the first bin and, when ready to be turned, are forked from the first bin into the second bin. When the material is ready to be turned again, it is forked into the third bin. The compost remains in the third bin through the curing phase, when it can be applied to the garden, thus making room for the next batch.
Tumblers
Tumblers of various sizes are used in many regions across the state. Commercially available tumblers are often made of plastic and raised on a stand to facilitate cranking. Others are placed on the ground and rolled. When turned (rolled) daily, these tumblers are among the fastest composing systems. Homemade tumblers using 55-gallon drums and larger barrels are also effective but must be robustly constructed to handle the weight of the wet feed-stocks.
Plastic Compost Bins
These bins have become increasingly popular in Anchorage and the Mat-Su Valley. Feedstocks are put into the bin through a door in the top. As the material decomposes, it drops down and can be removed through a door near the base. Although the bins don’t hold much material, they look very neat and may be appropriate for an area where minimizing the appearance of a compost pile is important. Although they are made of black plastic, the bins do not need to be located in a sunny location since the composting process generates heat and does not need the heat of the sun. Unfortunately, since these bins are small, the material inside will freeze sooner than larger piles since there is much less insulative compost to protect the warm core.
Managing the compost pile
Building the pile
There are several schools of thought on building the initial compost pile. Some composters prefer to build the pile in several inch-thick layers of various feedstocks. This gives a visual measure of the amounts of carbon material added compared to the amounts of nitrogen material added. Other composters measure the various amounts of feedstocks ahead of time and then add and mix the materials together as they build the pile. Either method is fine since the pile will heat up and then cool down and will have to be turned or mixed to add oxygen. After the first turning, even if it was started as layers, the pile will be mixed together.
Pile size
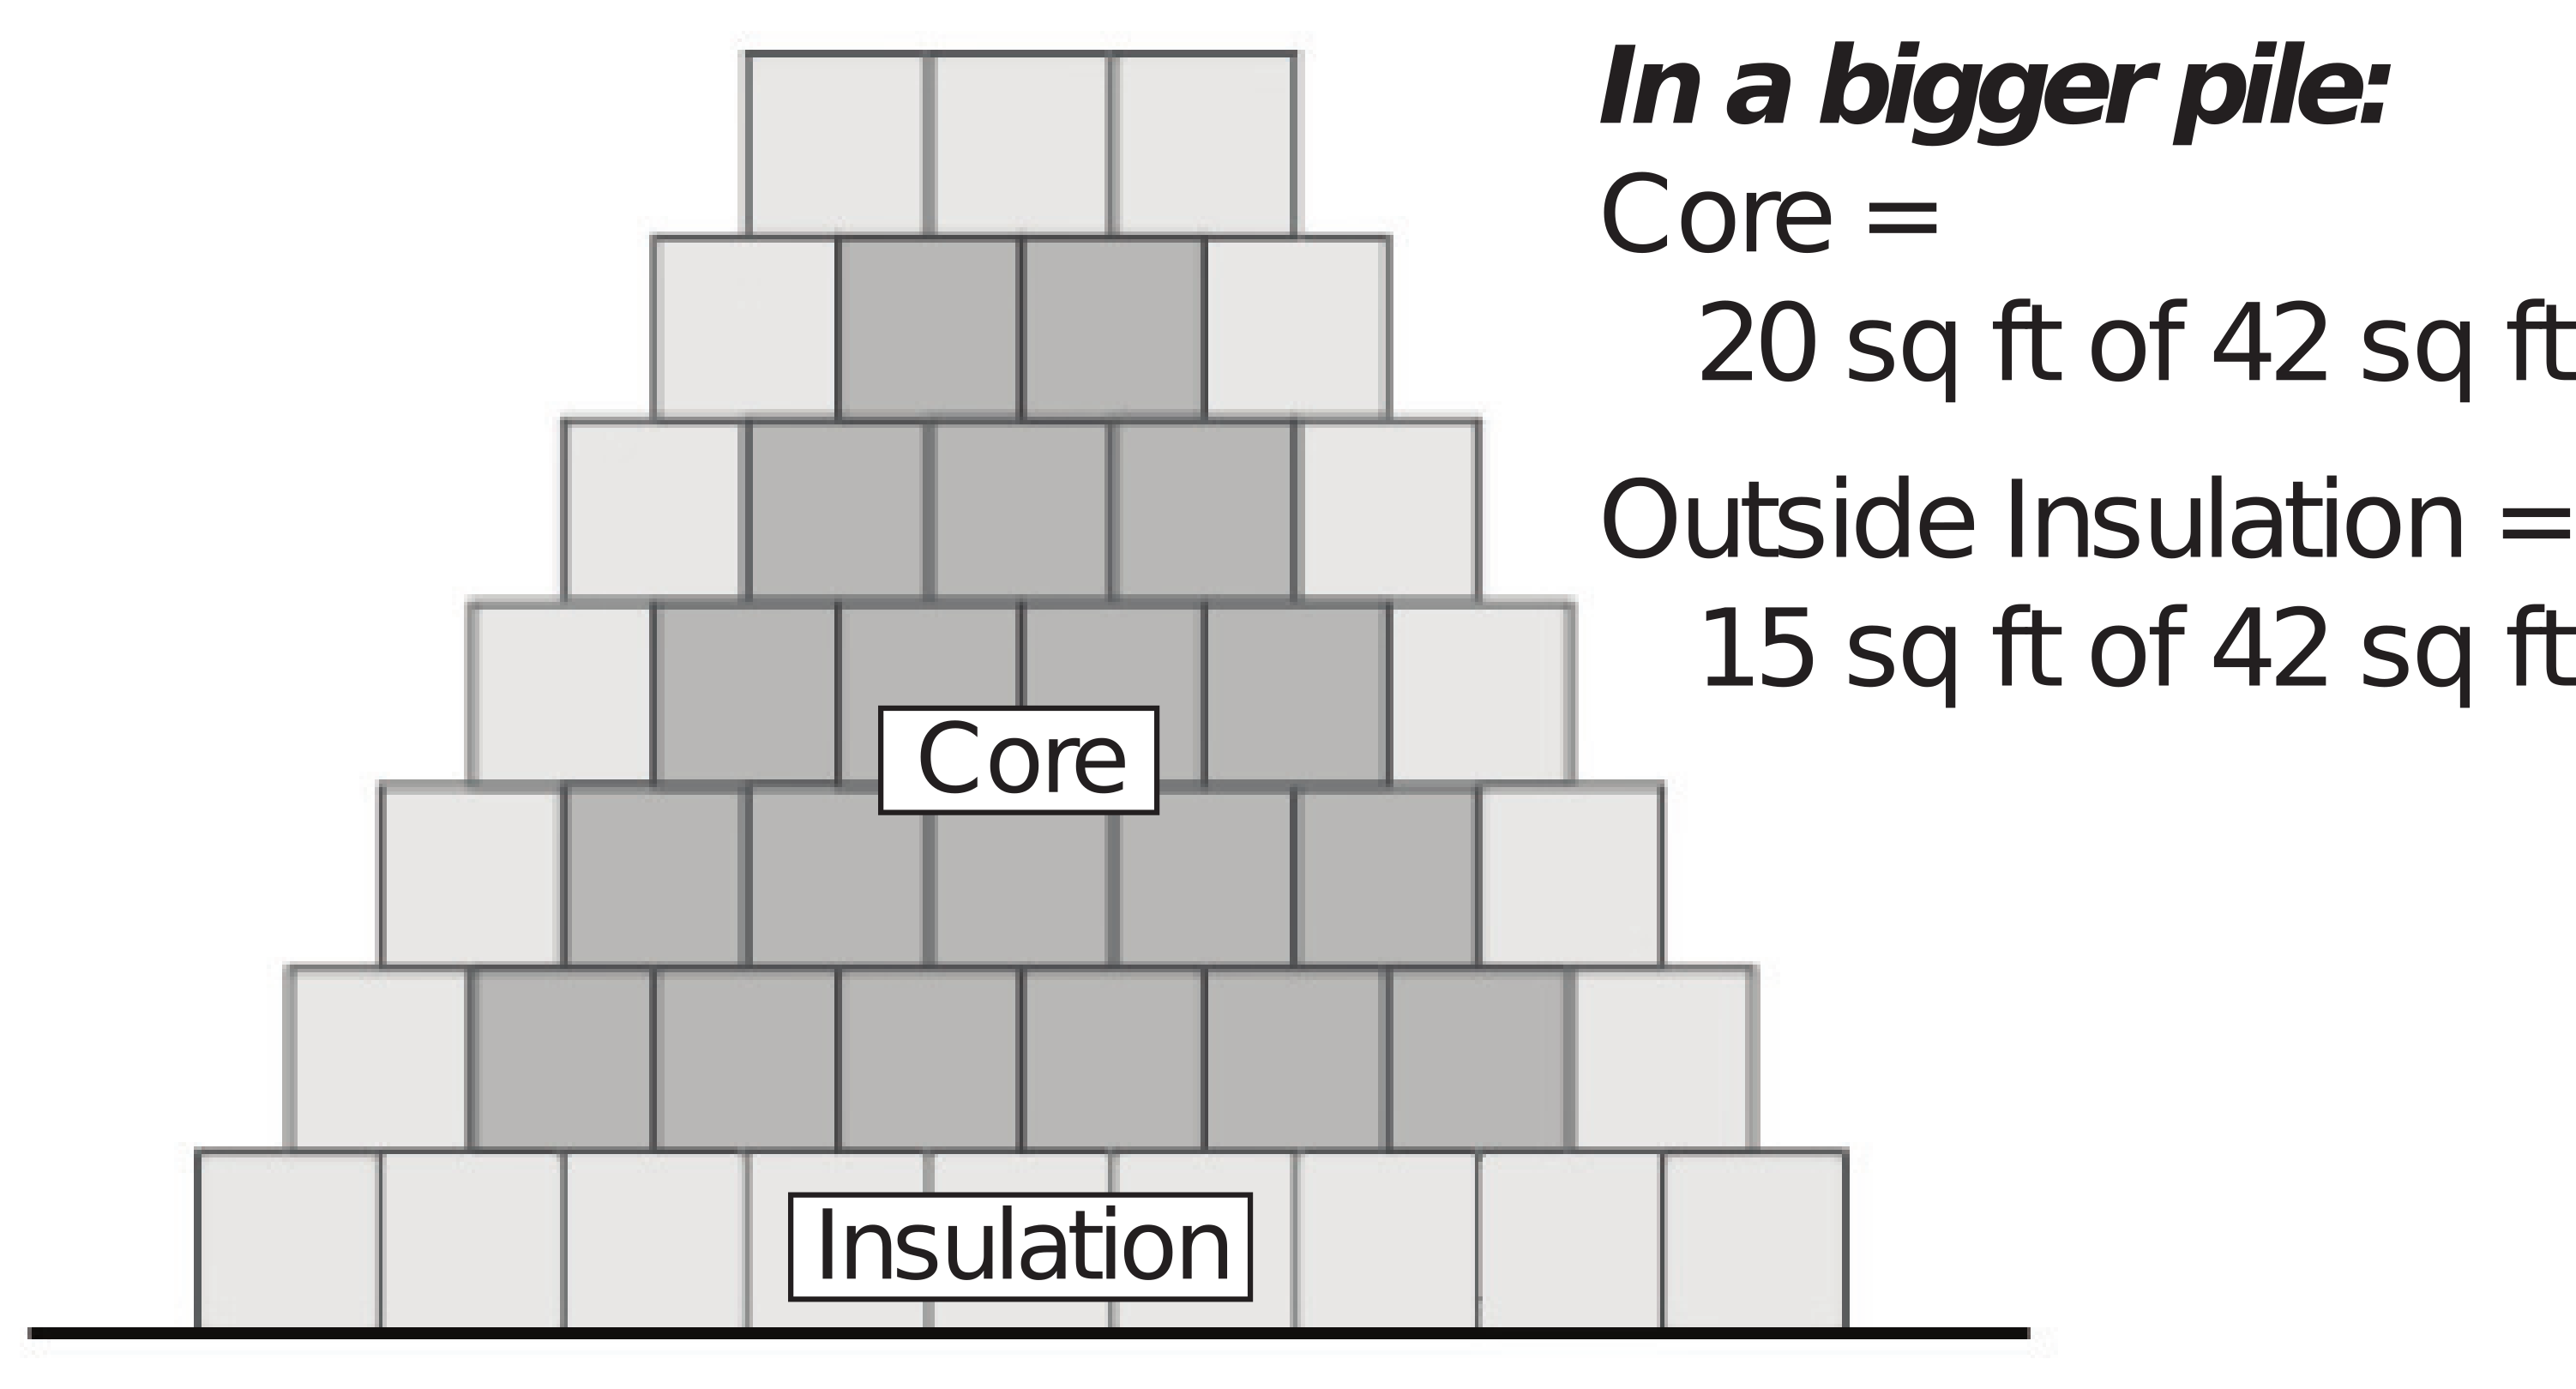
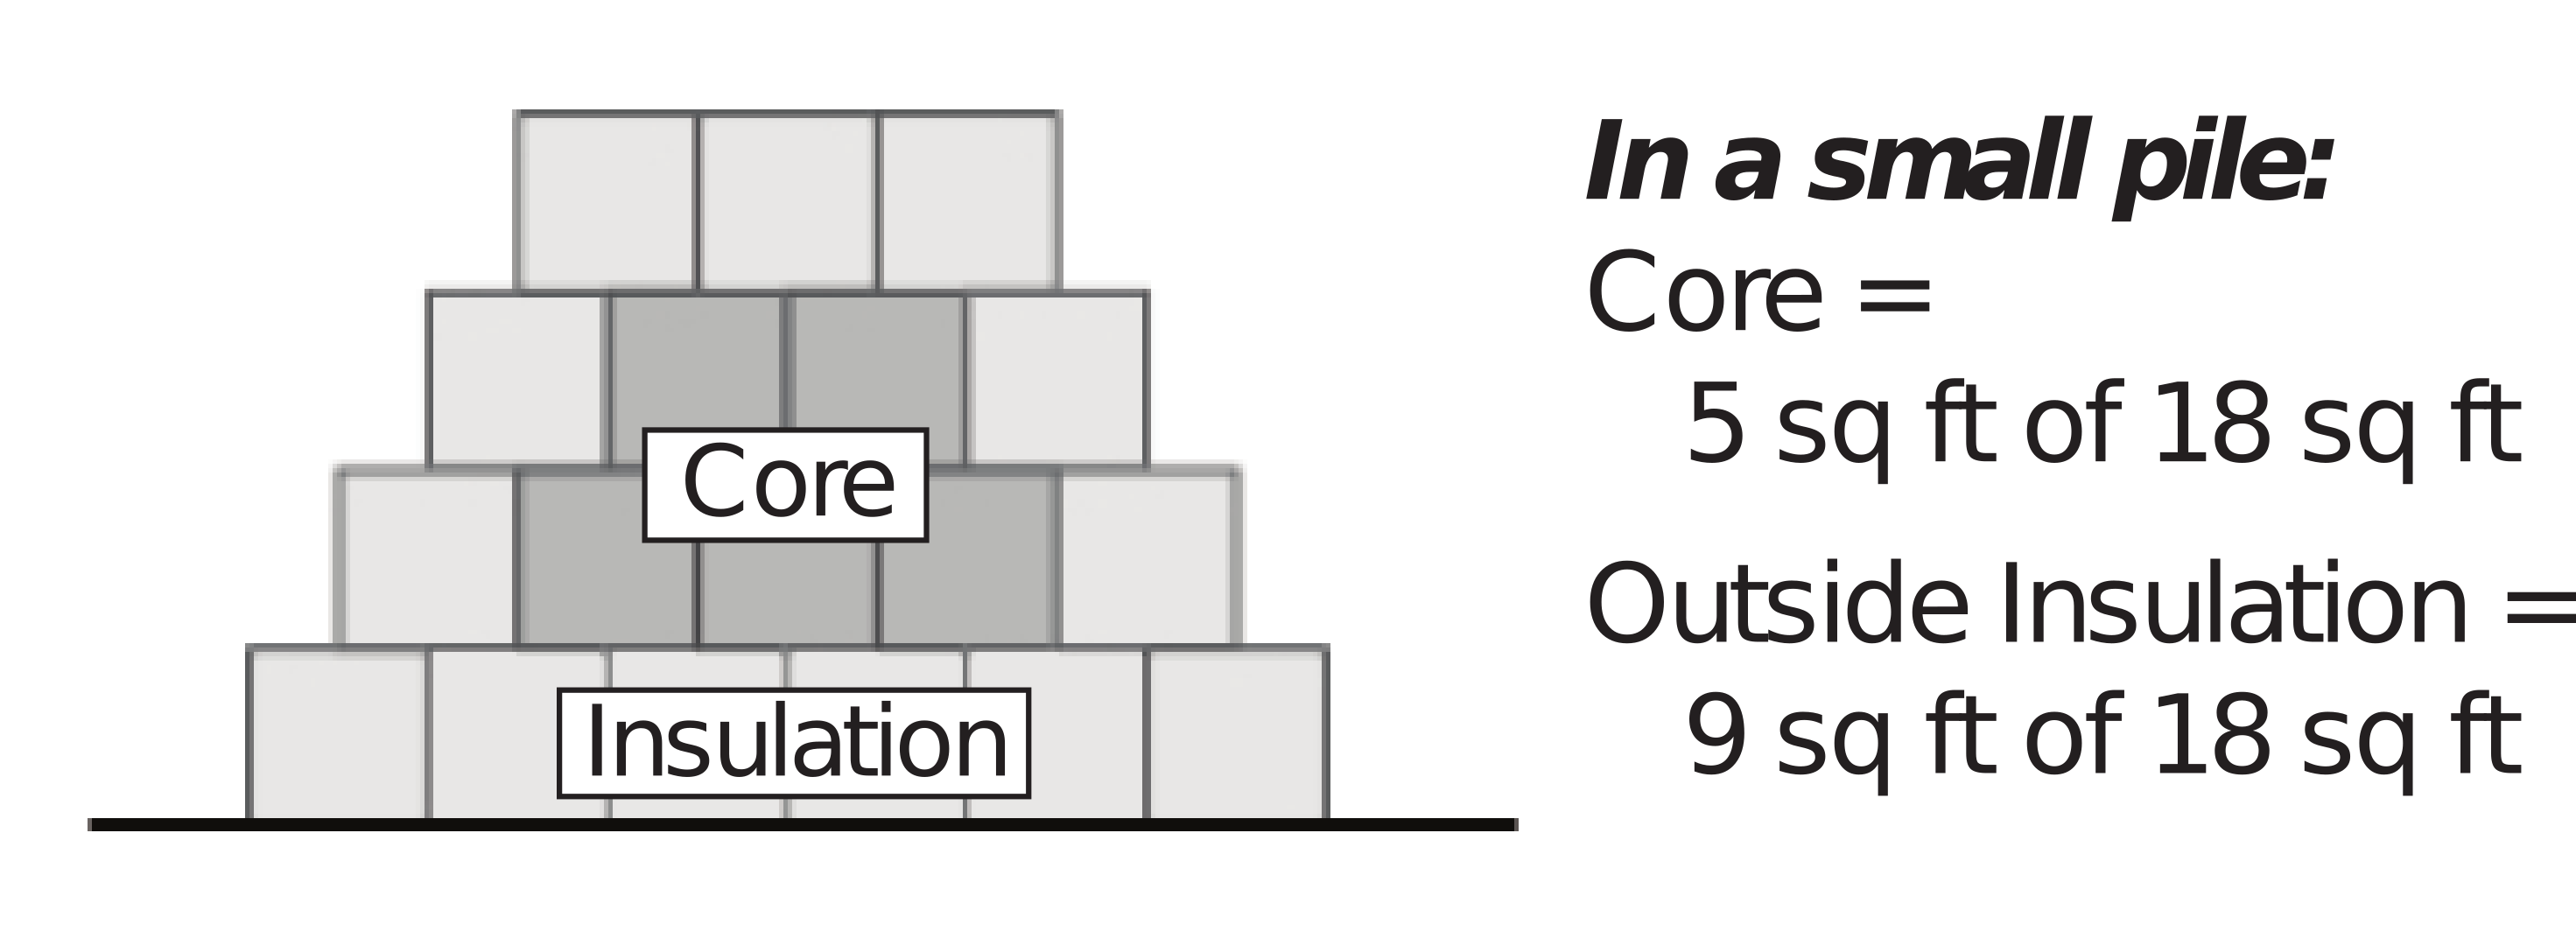
The pile’s size and shape influence both the amount of heat in the core and the moisture level of the pile. As previously mentioned, the pile must be big enough to hold heat. The minimum dimension for an Alaska summer compost pile is 3 feet by 3 feet by 3 feet. With this size there is enough insulation on the outside to maintain a hot core in the center. If you wish to continue composting into the freezing temperatures the pile should be significantly larger. A bigger pile can have a larger heated core for the same thickness of insulative layer (see diagram on page 10). The higher temperature of the larger core will offset the increased temperature loss to the colder air temperatures of fall. Small piles also dry out faster, which can be useful if the composting material has become too wet (above 60 percent moisture). The feedstocks in a series of small piles will dry out more quickly than the feedstocks in a single large pile. In rainy locations an uncovered pile that is built with steep sides and comes to a point at the top will shed rain better than a pile that is relatively flat.
Pitchfork: A 4-tined or a 5-tined pitchfork is a very effective tool for turning a compost pile. The tines of a pitchfork are long and thin and are easier to stab into the pile than the larger flat tines of a garden fork. The longer handle of the pitchfork also makes it easier to pile the material. A 3-tined “hay fork” may be frustrating to use since it would allow much of the material to fall between the tines. The 6-tined (or more) forks may be difficult to force into the pile and should also be avoided.
Toggle: Another style of mixing tool is called a toggle. It has folding vanes at the end of a steel shaft. As the shaft is pushed into the pile, the vanes fold out of the way to minimize resistance. Once the shaft has been pushed to the desired depth, the handle is twisted and the vanes fold out and act like a kitchen mixer, stirring the compost. The vanes will fold back in when the toggle is pulled up. The toggle can be an effective mixing tool for composters who would rather not fork the pile from one spot to another.
The Compost Thermometer: One of the most useful tools the composter can invest in is an accurate compost thermometer (available from many online garden supply venders). Most compost thermometers have a long stem (12 to 36 inches) with the temperature sensor at the very tip along with a temperature gauge that is calibrated toward the higher temperatures that are expected in the compost pile. A 20-inch stem is appropriate for most home composters since it can reach the center of a 40-inch pile, whereas the 30- and 36-inch models are more appropriate for the larger-scale composters. The advantage of the sensor at the tip of the stem is that noncore temperatures can also be monitored simply by not inserting the stem all the way into the pile.
Accurately knowing the temperatures within the pile is the best way to make management decisions about the pile. If the pile is cooling down, it may indicate that it is time to turn it. If the pile is getting excessively hot, it may need to be turned to get rid of some heat. Did all parts of the compost reach 131°F for three days to kill pathogens and weed seeds? The compost thermometer will let you know.
Hose: It is amazing how much water is used up in the composting process. Having ready access to water will encourage the composter to maintain adequate moisture in the pile.
Compost Blanket: In areas of high rainfall a compost blanket acts like a raincoat, shedding excess water off the pile to keep the material from getting too wet. Tarps, sheets of plastic or even an extra layer of “browns” can be used on top to shed rain water.
Bigger or Smaller?
In the diagram, both piles have a 1-foot layer of outside insulation. The big pile, however has a relatively larger core. A larger core is better at holding the heat, so the larger pile is best for composting into the freezing temperatures of fall.
Mixing or turning the pile
Turning the pile is one of the main ways the composter can regulate heat, moisture content and oxygen levels. If the core of the pile is getting too hot (over 160°F), turning the pile will allow the material to cool down. If the pile is too wet (above 60 percent moisture), turning the pile will allow it to dry down faster. If the pile is settling due to decomposition of the feedstocks, turning the pile provides an instant flush of oxygen into the pile and, more importantly, it fluffs up the materials, creating spaces that will allow continuous air exchange.
There are several ways of turning the pile. If a three-bin composting system is used (see diagram on page 8), then the pile is mixed as it is forked from the first bin to the second bin. If the simple pile method is used, start at the front of the pile and uniformly fork the pile from one spot to the next spot. As the pile is being forked, try to throw the material from the outside of the original pile into the center of the new pile. This will ensure that all of the material has been properly heated.
Moisture
All materials in the pile must be moist but not wet. The optimal water content is 45 to 55 percent moisture (on a dry-weight basis), meaning that a 3-pound sample of properly moist compost would have a dry weight of 2 pounds (1 pound water divided by 2 pounds of dry feedstocks = 50 percent moisture). Moisture content is important because below 40 percent bacterial growth slows down and above 60 percent so many of the spaces between particles are filled with water that good air exchange can’t take place. Most gardeners don’t dry samples in their oven to accurately determine the moisture content of their compost; however, a simple “squeeze test” to estimate moisture levels is usually sufficient. The material should feel moist, but you should not be able to

squeeze water out of it with your hands. In addition to water loss from simple evaporation, significant moisture is lost from the microbial processes in a hot pile. This water vapor is the steam you see coming off a heating pile on a cool day. At dry times of the year, you may need to add water to the pile and possibly mix it in. In wet locations you may need to cover the pile to keep out rain. If the pile becomes too wet, fluffing up the compost by turning it will help the pile dry out.
Aeration
As discussed in the mixing section, one of the main reasons to turn the pile is to increase oxygen and move air through the pile. Fluffing up the pile to increase air transport is especially important since an active pile will use up the new influx of oxygen in about two hours. Increasing the air movement through the pile, however, will continue to resupply the oxygen until the pile settles again.
There are both active and passive strategies for aerating a compost pile. Turning the pile is a very active method. Another active strategy is to blow pressurized fresh air into the pile through a network of perforated pipes that are installed underneath the pile. By constantly blowing fresh air through the pile, optimal oxygen levels are maintained. A variation on this method pulls the air into the pile using a powerful vacuum instead of a large fan.
Like active pressurized systems, passive aeration systems usually use numerous perforated pipes that go through the pile. The ends of the pipe extend outside the pile and fresh air goes through the pipe and into the compost pile through perforations in the pipe. The major difficulty with passive systems in Alaska is that they tend to keep piles too cool to reach the weed and pathogen-killing temperatures. Like a radiator in a car engine, the pipes pull the heat out of the pile and release it to the air passing through. Some compost websites discuss inserting a single perforated pipe into the center of the pile and out to the top. This strategy allows fresh air to move into the core of the pile. This strategy has not been successful in Alaska. Unfortunately, too much of the pile’s heat is lost through the “chimney effect” to compensate for the amount of fresh air going into the pile.
Can I use manure as a feedstock?
Manures from most animals are fine, but avoid human, dog or cat feces due to potential disease issues. Keep in mind that E. coli is present in most types of animal manure and is eliminated by the heat of proper composting. Using manure also brings up weed considerations. The seeds of a number of weed species successfully pass through livestock digestive systems. Extra care must be taken to ensure that the entire compost pile heats up enough for a long enough time to kill the seeds. Seeds that escape the heat will contribute to a weed problem in the garden. Use care when using fresh manures and do not use fresh manure in the vegetable garden.
Can a pile catch fire?
This can happen in a very rare situation where tinder-dry feedstocks are heated by an excessively hot pile. It is primarily a concern in large municipal compost piles, which exceed the recommended household size.
Can I compost fish?
Fish are high in nitrogen (C:N of about 10:1). Unfortunately, they can attract pests, including bears. Maintain an adequate carbon level to minimize smell and locate the composting site to minimize the danger of an occasional bear visit.
Does the compost pile have to be in the sun?
No, while the pile can be in the sun it doesn’t have to be. Compost is heated by the microbes in the pile, not by the sun.
How do I know if the compost is done?
Finished, or cured, compost should not have any recognizable feedstock materials remaining in it. It should have a granular structure and smell like fresh soil.
What happens if I skip the curing phase?
You run the risk of damaging young plants (especially transplants) with some of the nitrogen compounds that have not yet stabilized.
Can I continue adding materials to my pile?
No, it is important to build the pile all at once, and only add nutrients if absolutely necessary as described above. Additional feedstocks for composting should be used to start a new pile in another location.
Microorganisms
While there are commercial compost starters available that generally contain microbes and some initial nutrients, the raw feedstocks used to form a compost pile usually contain all the microorganisms needed to make quality compost. You do not need to add soil or compost starters with special microorganisms.
Nutrients
The nutrients necessary for microbial growth are usually present in the feedstocks, so additional nutrients from other sources are usually not needed. However, when dealing with a pile that has excessive carbon-rich feedstocks and a shortage of nitrogen, additives can be very useful. Sprinkling blood meal in the layers is one way to increase nitrogen in the pile. Another way is to dissolve nitrogen fertilizer in water and apply it evenly to the pile.
Spent Brewery Grain
With the increasing popularity of microbreweries, a useful resource is now available to enterprising Alaska composters. As part of the process, brewers steep a mixture of grains in hot water to extract the carbohydrates that will be fermented into beer. After the wort — the liquid that contains the carbohydrates — has been drawn off, the remaining spent grain is now a waste product to the brewer. This spent grain is a great source of nitrogen and organic matter for the compost pile.
Nutrient Content in 1000 pounds of Spent Grain
| Average of Microbrews | Large Brewery | |
|---|---|---|
| Moisture | 720.0 lbs | 24.0 lbs |
| Nitrogen | 9.1 lbs | 41.4 lbs |
| Phosphorus | 1.3 lbs | 5.9 lbs |
| Potassium | 0.2 lb | 0.7 lb |
| Calcium | 0.5 lb | 4.0 lbs |
| Magnesium | 0.7 lb | 2.4 lbs |
| C:N Ratio | 15:1 | 12:1 |
Mingchu Zhang, Professor of Agronomy, School of Natural Resources and Extension. Originally prepared by Jeff Smeenk, former Extension Horticulture Specialist.
Revised July 2021
