Caulks and Sealants Factsheet
EEM-01252 View this publication in PDF form to print or download.
Infiltration heat loss can be a major cause of winter home heat loss. Most of this occurs through leaky windows and door casings that are not well weather stripped or caulked. Good sealants and caulks can reduce this loss easily, effectively and inexpensively and increase the comfort level in homes.
The word "caulk" is an old boat-building term: sealant originated in the home building industry. Today some manufacturers use caulk as an all-purpose term and sealant to describe their high-performance specialty products.
The effective life spans of caulking materials and sealants are typically less than a building's lifetime, so at some point these materials need to be replaced. Caulks can fail when the wood substrate is not properly and effectively prepared or the wrong product was chosen, but by installing them with the best application techniques and with good surface preparation, you can prevent these failures between the caulk and the substrate (whatever it's being attached or adhered to).
Another important consideration for caulking in Alaska is to always caulk when the temperature is above 40°F. Although some caulks can set up at cold temperatures — and if you have an emergency they can be used — it is always better to have any type of caulk set up at a warm temperature.
Where to caulk
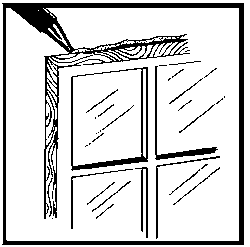
 Caulking should be used only as recommended by the manufacturer and in places (1)
where movement is untypical, except for expansion and contraction, such as at the
sill where wood structures meet the foundation; (2) where storm windows meet the window
frames, leaving weep holes on the bottom of outside pane; and (3) baseboards, duct
outlets and any penetrations that house electrical plumbing or other utilities.
Caulking materials
Caulk typically comes in cartridges and it's often easiest to apply with a caulking gun. But there are other means, including small tanks and boxes with expanding foam fillers and caulks, and some caulking materials even come in spray cans or can be applied with a brush. In order to work or form the joint, a putty knife, or even a plastic spoon, can be used to make a very even caulk bead. You can reasonably expect that a 10-to 11-ounce tube of caulking will fill 20 to 30 linear feet of joint space.
Sealants for vapor retarders, air barriers and moisture
Acoustical sealant is recommended for sealing polyethylene vapor barriers, house wrap and similar materials to a building's surface. Acoustical sealant (also known as "black death") is used almost universally in Alaska because it doesn't harden, it remains fluid at cold temperatures and has very good adhesion. Once on skin, though, it needs to be removed by solvents such as acetone, petroleum distillate or kerosene.
Bituthene is an impermeable membrane that can be wrapped around the exterior block or cement basement walls before backfilling. Bituthene clings to the walls without other caulking.
Caulking preparation and application
- Thoroughly clean and dry the area to be caulked with a solvent and putty knife. Solvent for latex is water; other caulking compounds require mineral spirits, acrylic or naphtha.
- Don’t caulk a joint that is larger than the tip of the nozzle of the caulking gun. If the cracks are deep or wide, fill them with a filler material. As a rule, cracks more than ½ inch wide or ½ inch deep require special preparation with backer rod or expanding foam. Backer rod is a foam rubber rope used to fill larger gaps, e.g., in a log cabin. It comes in ¼-inch to 1¼-inch diameters. Expanding foam is a sealer, not a filler.
- Cut the spout of the caulking gun at an angle that will give you the proper size bead for the job.
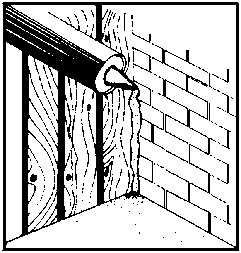
 Hold the gun at a 45-degree angle. Make sure the bead covers both sides of the crack.
DON’T SKIMP. Most people caulk from top to bottom, but you can get better results
by caulking from bottom to top and pushing the gun up instead of pulling the gun down.
Hold the gun at a 45-degree angle. Make sure the bead covers both sides of the crack.
DON’T SKIMP. Most people caulk from top to bottom, but you can get better results
by caulking from bottom to top and pushing the gun up instead of pulling the gun down.- Smooth out the compound with the nozzle as you apply it and with a putty knife after application. If the caulking material shrinks after drying, reapply. Make sure the caulking bridges the gap. Trowel and tool the bead with a putty knife, plastic spoon or other surface finish tool.
- If inexperienced, start at the back of your house and work towards the front. Your skill level will improve when you caulk in places that are visible!
NOTE: Caulking windows on the inside is preferable at all times, due to moisture migration. With the correct product, a good applicator and a clean surface, you can fill in those drafty gaps that steal your heating dollars and compromise your dwelling's health.
For more information
To find out more about various types of caulk and sealant products, call the UAF Cooperative Extension Service energy specialist at 907-474-6366.
To simplify information, trade names of products have been used. No endorsement of named products by the University of Alaska Fairbanks Cooperative Extension Service is intended, nor is criticism implied of similar products that are not mentioned.
Art Nash, Extension Energy Specialist; originally written by Rich Seifert, former Extension Energy and Housing Specialist.
Revised June 2024
