Connecting to UAF Virtual Desktops
Connect to a UAF Virtual Desktop by using either the VMware Horizon Client (for Mac or Windows) or directly through an HTML browser. Keep in mind, the VMware Horizon Client offers better performance and features.
HTML Access allows you to access your virtual desktop without leaving your web browser and is the quickest way to start using virtual desktops. For a more full featured experience follow the instructions below for installing and using the Horizon Client. For specific browser information visit this list of currently supported browsers.
- Using a web browser, navigate to https://vdi.alaska.edu/
- Click Vmware Horizon HTML Access
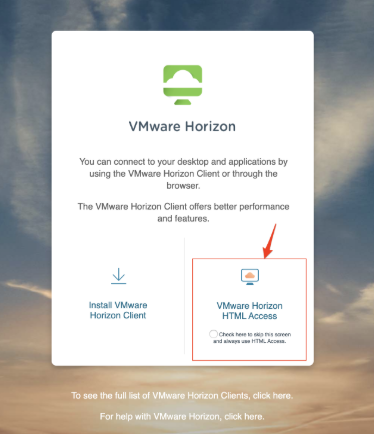
- Enter your university account credentials
- Click on your desired virtual desktop image to use it
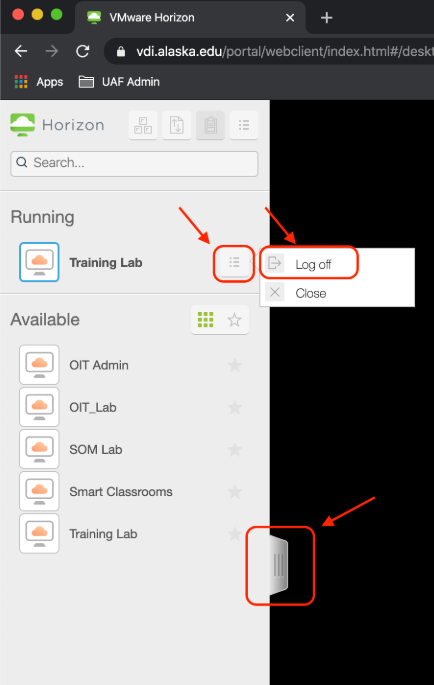
- To log off/close - click the gray menu button on the left of the screen then click
the menu button next to your virtual machine and Log Off
- Using a web browser, navigate to https://vdi.alaska.edu/
- Click on Install VMware Horizon Client
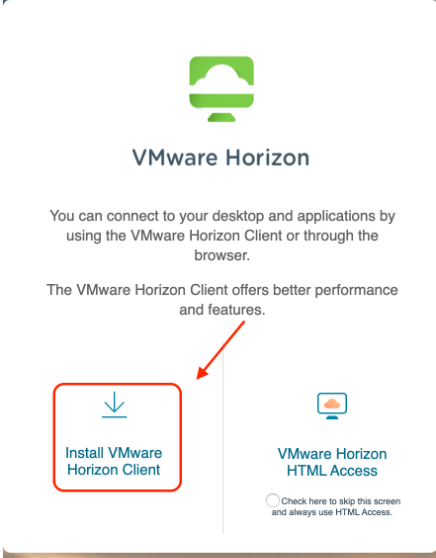
- Locate your operating system and click Go to Downloads then Download
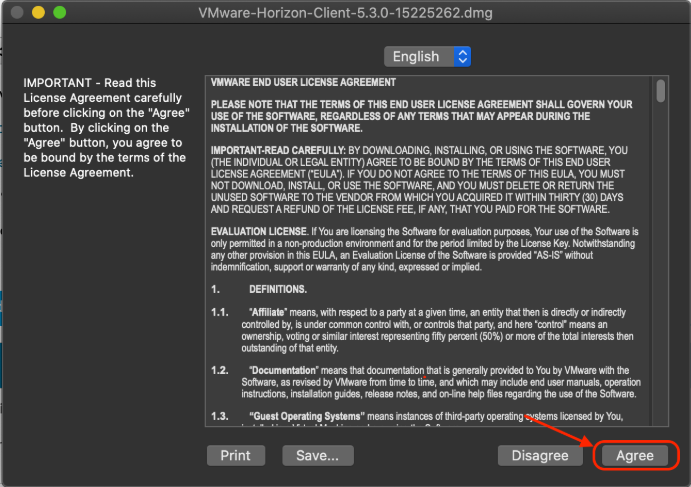
- Save and open the downloaded DMG file
- Once the installation has started click Agree
- Drag and drop VMware Horizon Client app to your Applications folder
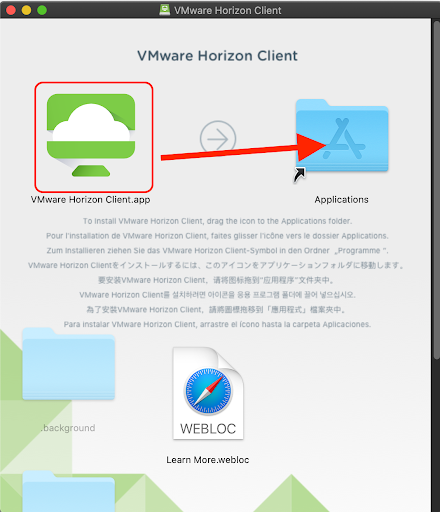
7. Click Replace if prompted
8. Once installed, open the VMWare Horizon Client app and click Open on the downloaded from internet warning

9. Enter https://vdi.alaska.edu, make sure “always connect at launch is checked, then click Connect
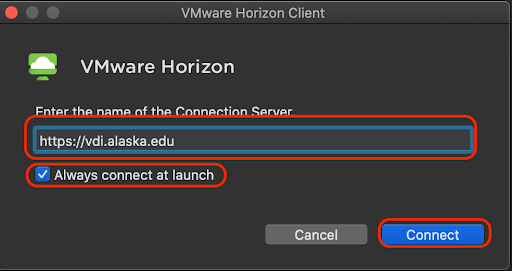
10. Enter your university username and password then click Login
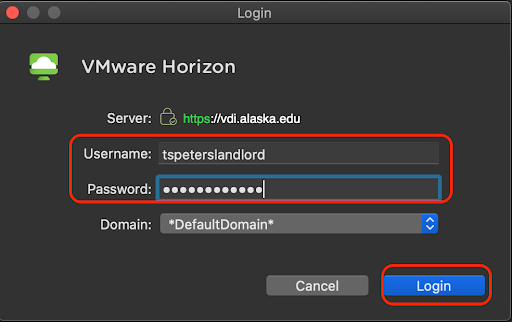
11. Double click on your desired virtual desktop image to launch it
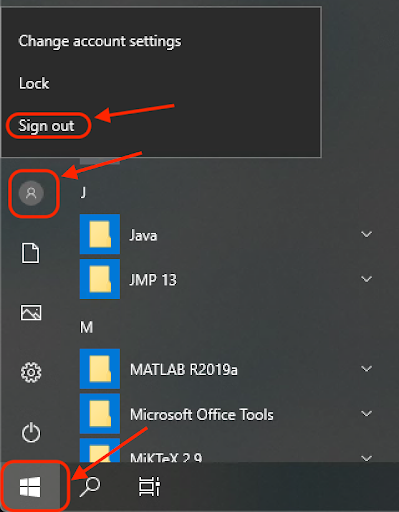
12. To log off/close - Click the Start Menu click your user Icon then Sign Out
1. Using a web browser, navigate to https://vdi.alaska.edu/
2. Click on Install VMware Horizon Client
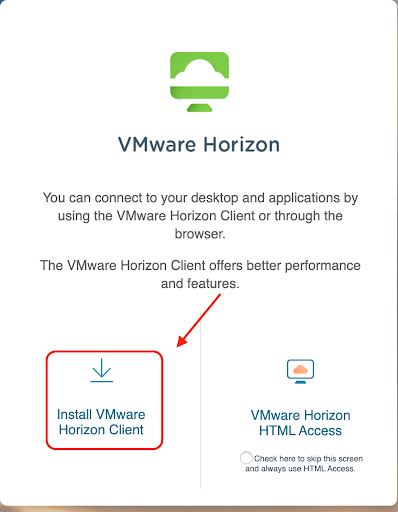
3. Locate your operating system and click Go to Downloads then Download
4. Once downloaded double click to run the VMware-Horizon-Client-xxx.exe file
5. Click Yes to Windows user account control security
6. Click Agree & Install and Finish once complete
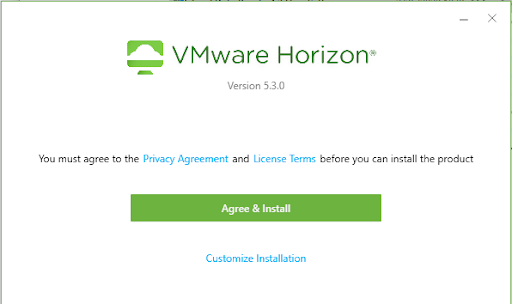
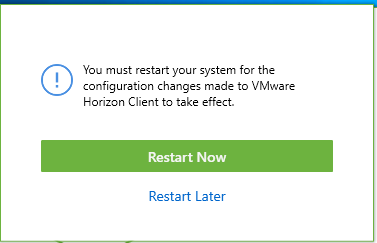
7. Click Restart Now to reboot your computer
8. Double click on VMWare Horizon Client on your desktop to launch it
9. Double click the plus icon above Add Server
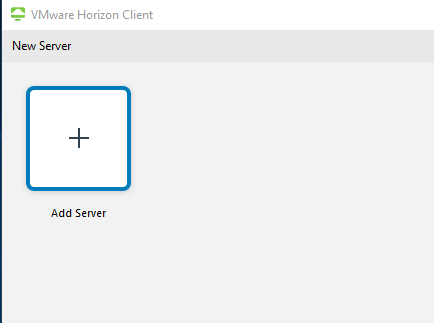
10. Enter https://vdi.alaska.edu and click Connect
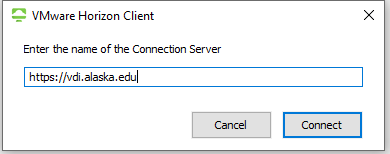
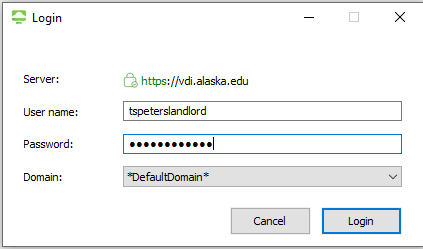
11. Enter your university username and password and click Login
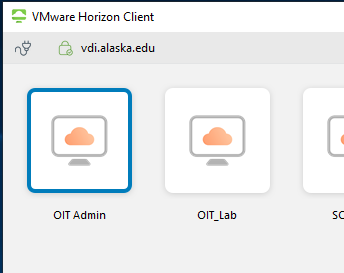
12. Double click on your desired virtual desktop image to launch it
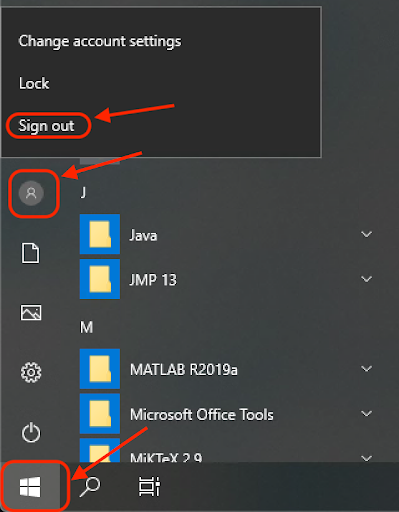
13. To log off/close - Click the Start Menu click your user Icon then Sign Out
There also exists a client for many other platforms, including iOS and Android. You can download the app from the appropriate marketplace and use https://vdi.alaska.edu as the server URL when connecting.


