Plant a Tree: An Alaska Guide to Tree Care
Select the right tree for the right place
HGA-00437A View this publication in PDF form to print or download.
Consider soil conditions, exposure to sun and wind, human activity, drainage, hardiness zone and space constraints. Most tree roots grow in the top 4-18 inches of soil and extend far beyond the drip line up to five times the height of the tree. How much space will your tree need above and below ground when it is mature? Remember that the width of the mature tree is as important as the height when considering location.
Avoid sites where your tree will cause problems or be damaged
Locate trees:
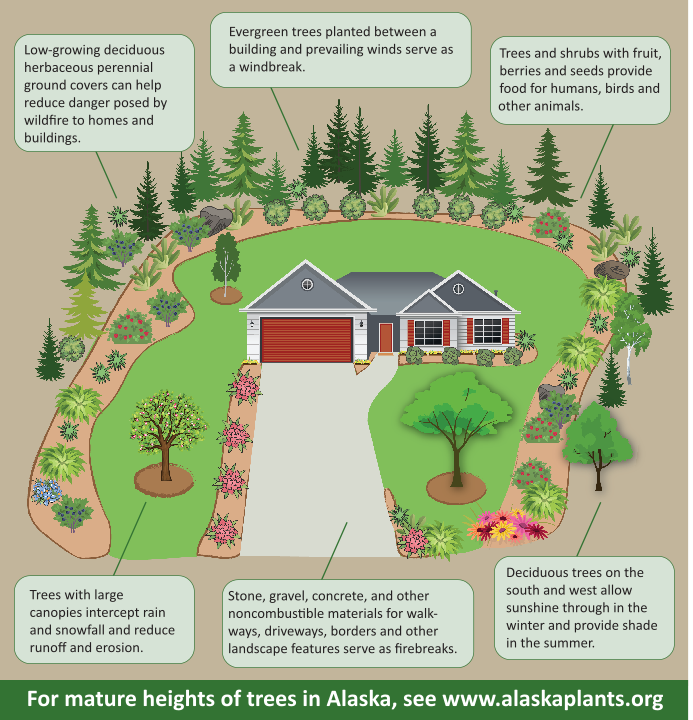
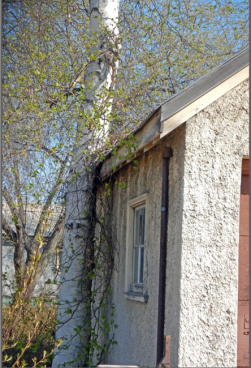
- At least 15 feet away from buildings to avoid fire and damage to trees or building;
- To keep good views open and to block undesirable views;
- To provide shade where you want it or keep sunny spaces open;
- Away from roofs with sliding snow;
- With your neighbors in mind;
- Along streets to improve property values and neighborhood aesthetics;
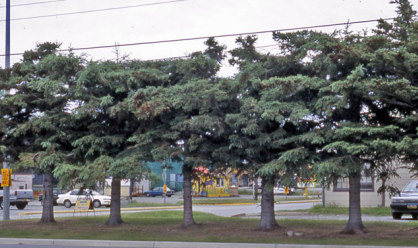
- To provide needed space for root and crown development – some trees prefer to be close to other trees (birch, cottonwood, alder), while others (spruce, maple) need lots of room;
- To avoid obstructing sightlines and traffic signs at intersections and driveways;
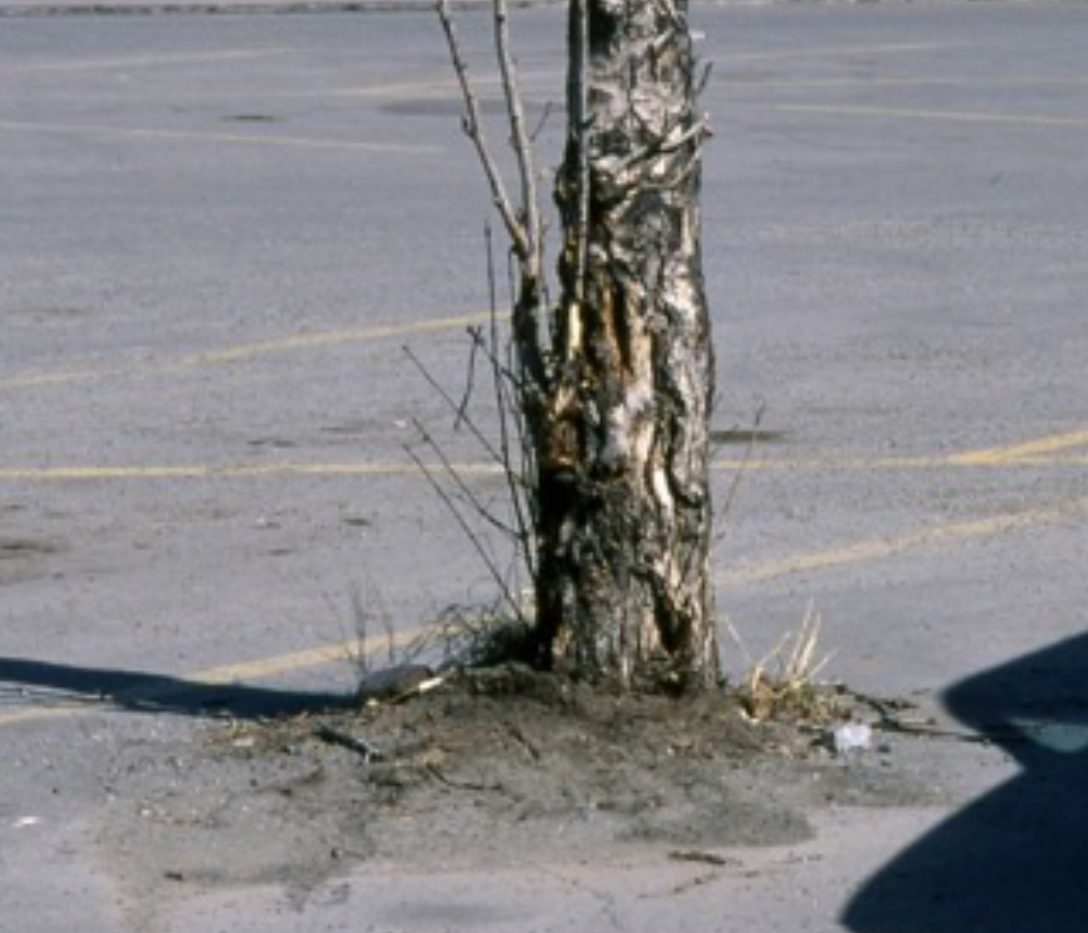
- To give trees space and the right amount of soil to reach mature size without damage to driveways or sidewalks.
Avoid planting trees that will attract wildlife near building accesses, school bus stops and peopled pathways.
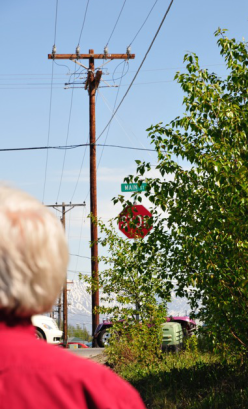
Trees and utilities need space
If planted in the wrong location, trees can interfere with the safety and reliability of the utilities many use every day. Underground utilities may include electric wires, coaxial telecommunication cables, water pipes, sewer and drainage pipes, septic systems and leach fields, which can all be adversely impacted by tree roots. Problems can be avoided by planting the right tree in the right place. Poorly placed trees can interfere with underground and aerial utilities in several ways, including:
- Growing up (vertically) into
- Growing outward (laterally) into
- Growing roots into underground
- Growing in a way that blocks access for utility workers
To determine a location for planting trees so that they do not interfere with utilities, consider the characteristics of both the plant AND the site.
General guidelines for tree planting near utilities
Zone 3
(20 feet or more from utility pole)
Trees planted in this zone should progress from medium (10 to 24 feet) to large (25 feet and taller) the farther you get from the utilities. This helps keep powerlines safe and reliable should a tree in this zone fall.
Plant trees like Colorado blue spruce, Norway maple, birch
Zone 2
(10 to 20 feet from utility pole)
Trees planted in this zone should be small (up to 10 feet at maturity). Planting shorter trees in this area will reduce the need for future pruning.
Plant shrubs like juniper, red twig, dogwood, lilac, spirea, Nanking cherry
Zone 1
Full width of utility easement/right of way (within 10 feet of utility pole)
Keep this area free of trees and vegetation that may block access. Usually, this area encompasses the full width of the utility easement/ right of way.
Grasses, annuals and nonwoody perennials are recommended
Trees and utilities need space
Plant characteristics:
- What will this plant be like at maturity?
- How tall will it be?
- How wide will it be?
- Is the plant shade-tolerant or sun-loving?
- Does the plant produce fruit or seeds?
Location (site) characteristics:
- Are there any utilities located on the property?
- If so, what are the easement/right of way widths for these utilities?
- Does the utility have any requirements concerning vegetation in this space?
- What is the topography/terrain like?
Is this the right tree for the right place?
- Will the tree interfere with utilities today if it's planted in this location?
- Will it block access for utility personnel?
- Will it obscure utility equipment or prevent the utility from being able to safely work?
- Will the tree interfere with utilities in the future if it is planted in this location?
- Is the species capable of growing up (vertically) into the
- Is the species capable of growing out (laterally) into the utilities?
- Is the species capable of blocking access as it grows?
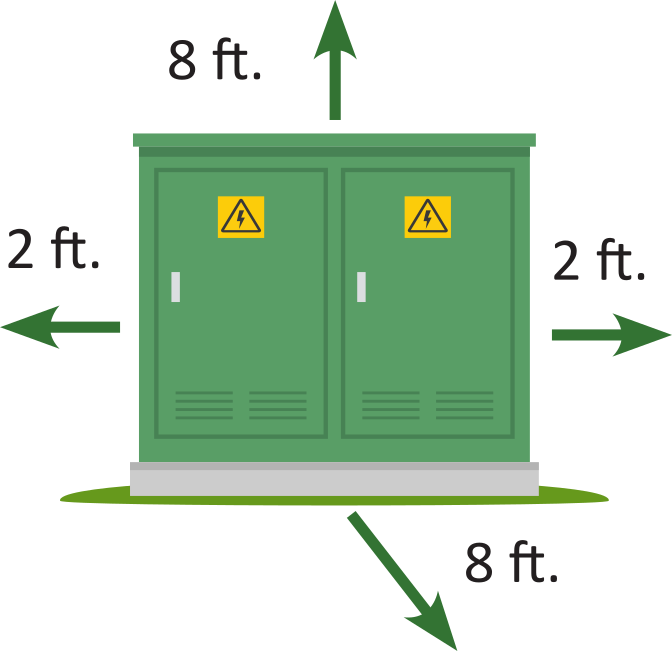
The safest route is to err on the side of caution by not planting any trees within a utility easement. Some utilities may consider grasses, flowers and select low- growing shrubs to be compatible with the space, but always check with your utility provider before planting anything within an easement.
Plant trees and shrubs where they will not interfere with, or block access to overhead or underground utility lines, poles or transformer boxes.
Plant A Tree: An Alaska Guide to Tree Care
Select a good quality tree
HGA-00437B View this publication in PDF form to print or download.
The right tree will be an asset that increases in value as it ages, while a poor quality tree will require more maintenance and may become a liability.
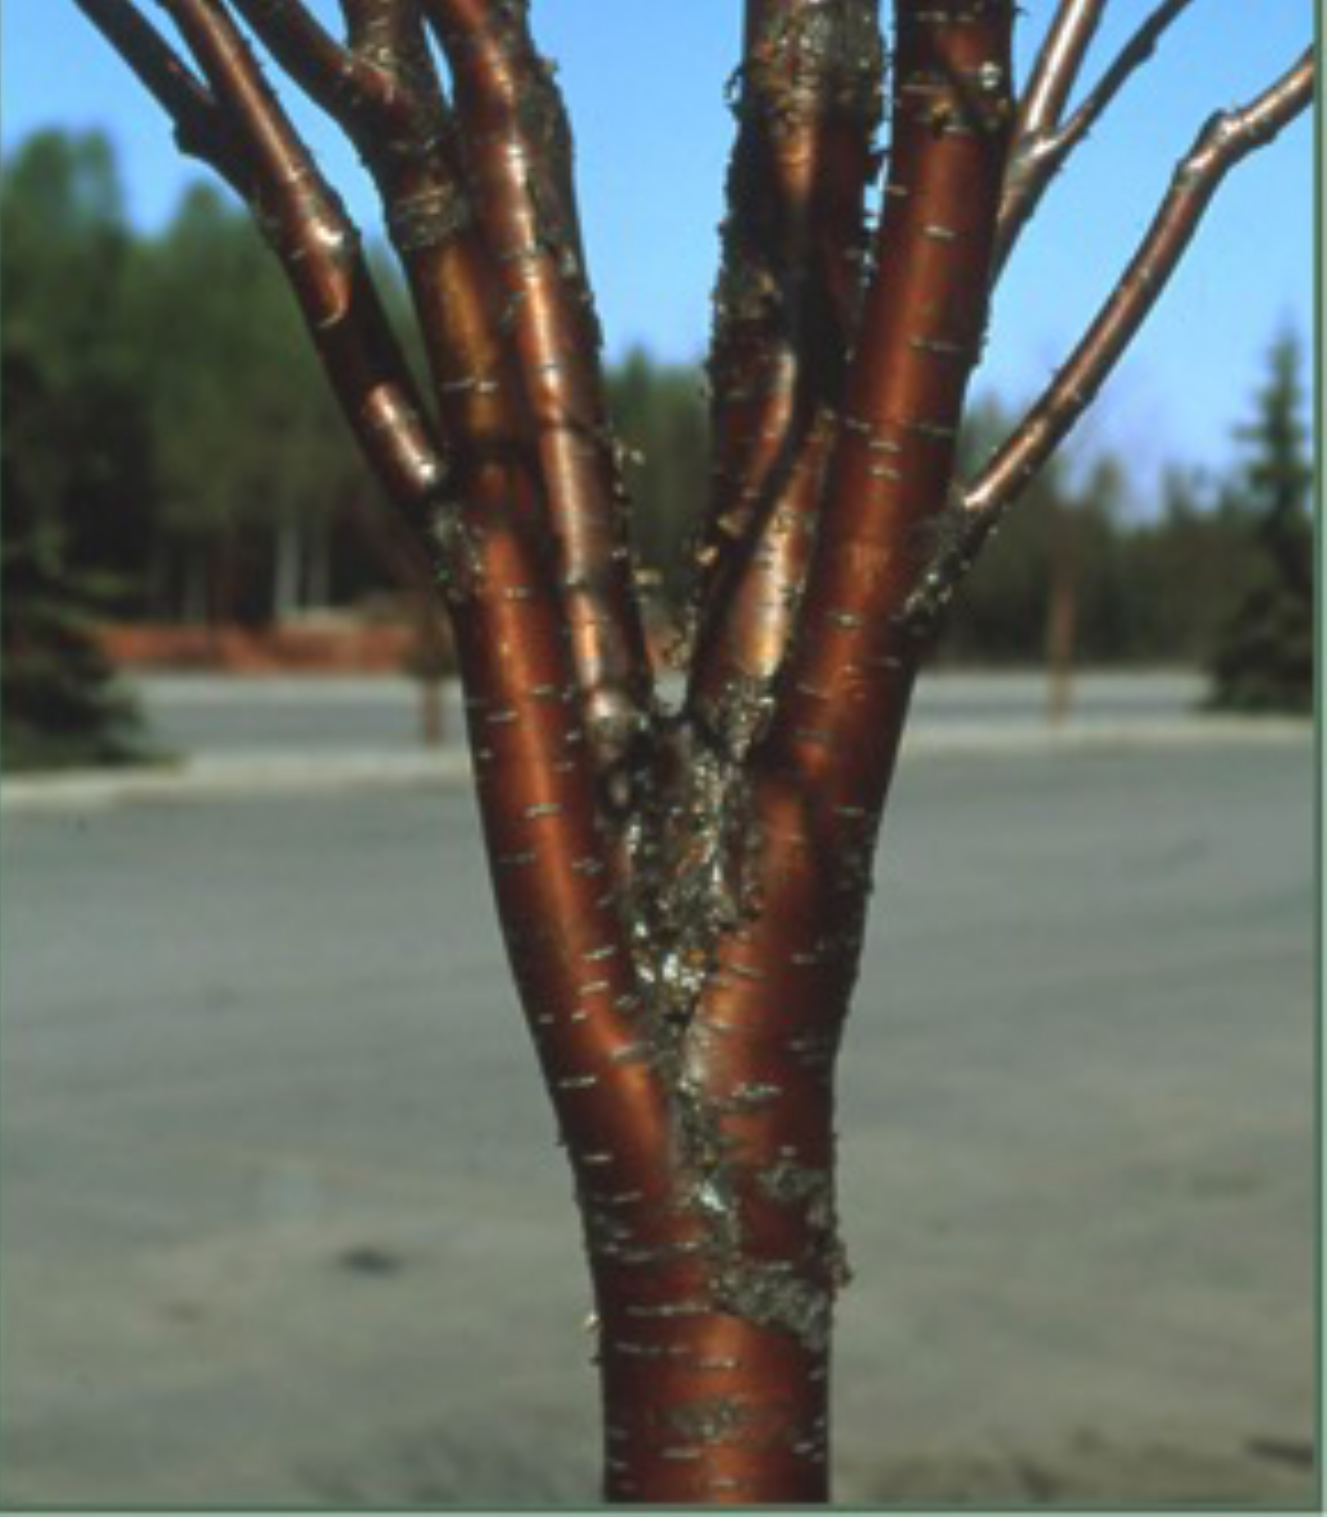
Structure
- Trees with “cone” shaped crowns, such as spruce or larch should have a strong central leader. Trees with more “rounded” crowns, such as birch, willow, or crabapple should have strong branching. Don’t select trees with broken or multiple leaders.
- Branches are evenly spaced and form wide angles with trunk (45-90 degrees).
- Trunk stands upright without the support of stakes.
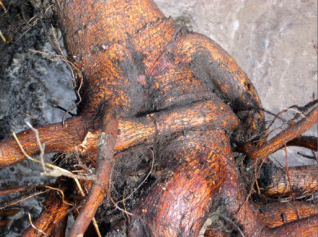
Roots
- Root flare (where trunk and roots meet) is at or above surface and there are several roots at least as big as a pencil in top 3 inches of soil.
- Roots are white or light brown and healthy.
- Roots fill container but are not pot-bound, circling trunk or inside of container.
Health
-
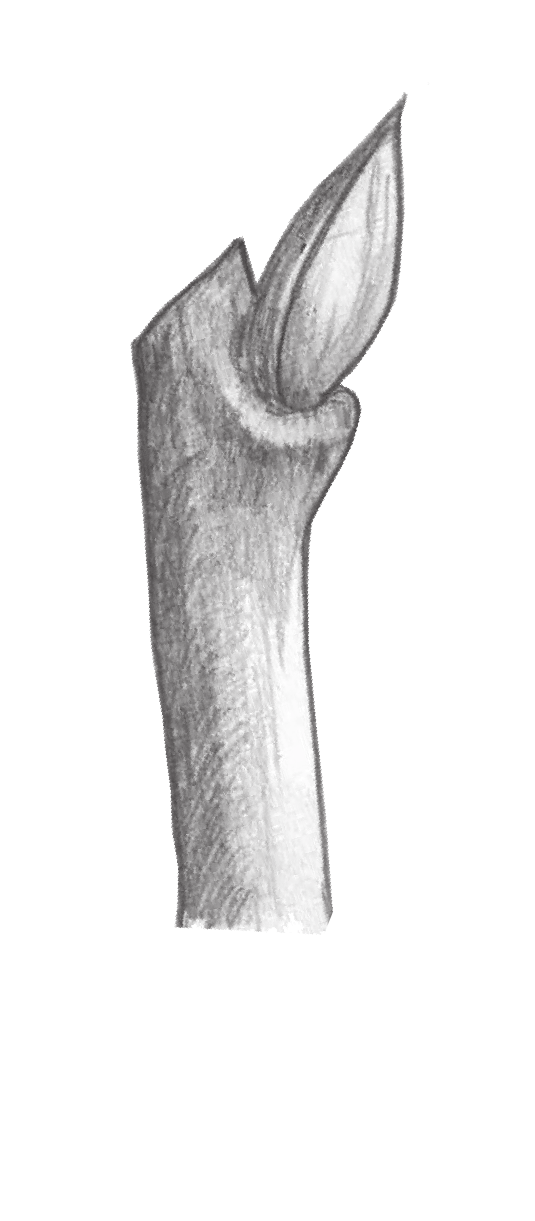
Tree is free of wounds and incorrect pruning cuts – no stubs or flush cuts.
Correct cut - Tree shows no signs of insects or disease; no weeds or other plants growing in the container.
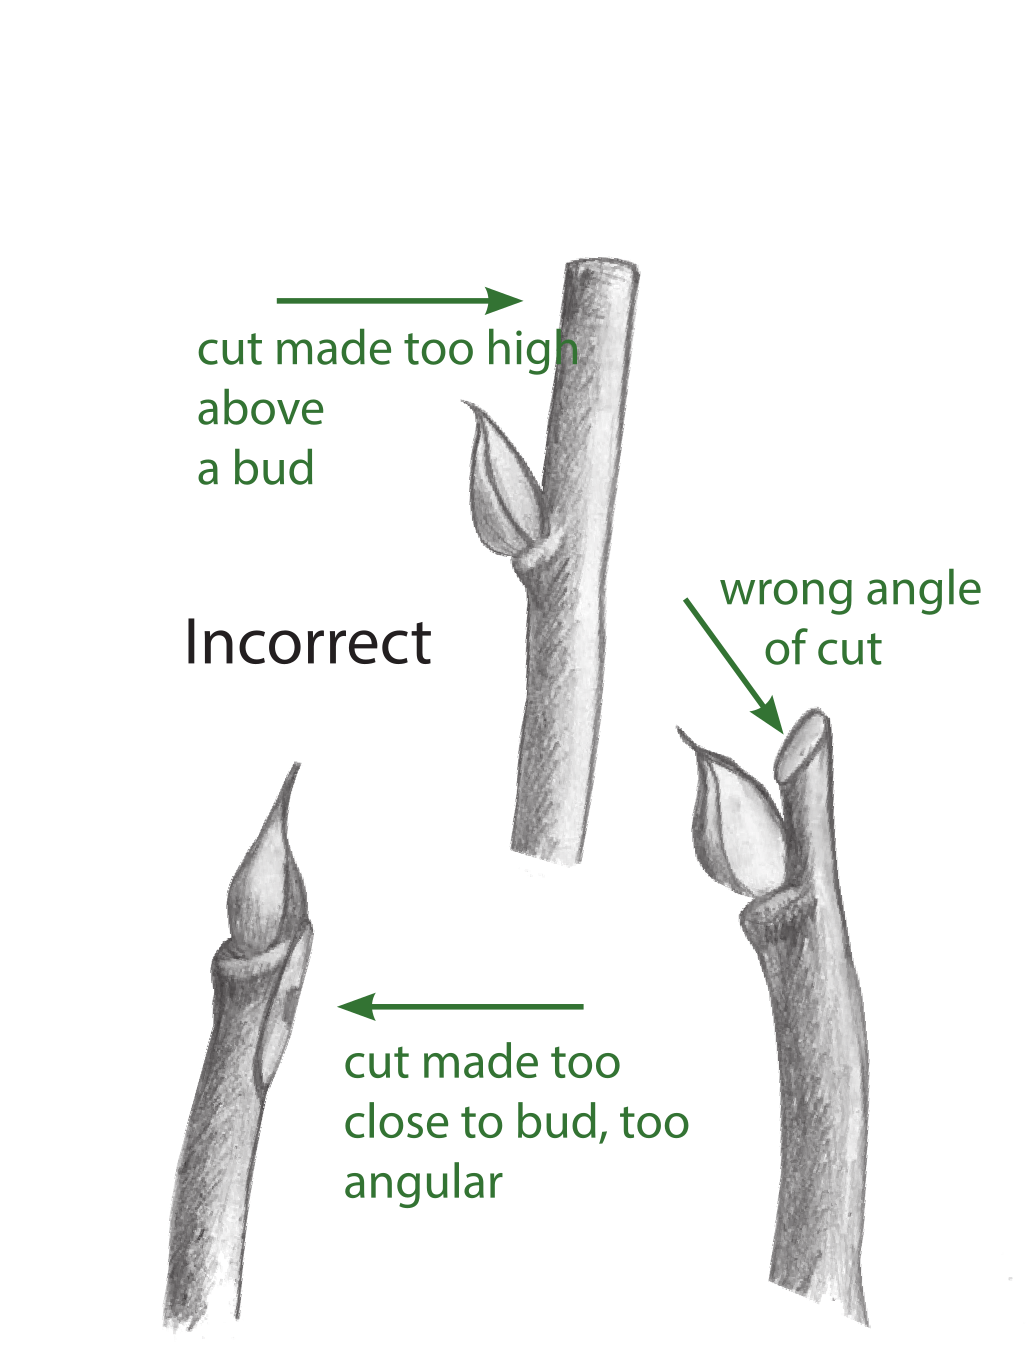
Incorrect cuts
Select a good quality tree
Bare Root (BR), Balled and Burlapped (B&B) or Container?
How do you want your tree? Each production method has advantages and disadvantages. Your situation will determine which will work best for you. Bare root trees are less expensive, easier to transport, handle and plant and may be planted anytime during the growing season as long as the roots are held in mulch, gravel or loose soil prior to planting so that they do not become dry. It is also easier to see what you are purchasing with BR tree and their long-term survival rate is usually higher. When selecting bare root stock keep these things in mind: the root system should be proportional to the branch system; branch diameter of 1⁄2 inch to 3⁄4 inch is ideal. Roots should be firm, relatively straight and healthy looking.


| Caliper (trunk diameter 4” above ground) | Minimum root spread | Tree height |
|---|---|---|
| 1” | 16” | 8'-10' |
| 2” | 28” | 12'-14' |
| 3” | 38” | 14'-16' |
(American Standard for Nursery Stock ANSIZ60.1)
Avoid:
- Undersized, yellow or missing leaves;
- Conifers that have been sheared into unnatural shapes (like Christmas trees);
- Roots that are broken, kinked or growing in a circular shape. Check containers and B&B trees for root flares that are below soil line and circling or pot-bound roots.
- V-shaped, or narrow angles between trunk and branches
Plant it right
- Before you begin, be sure to have utilities located – they may be more shallow than expected. In Alaska, call 811 or 800-478-3121.
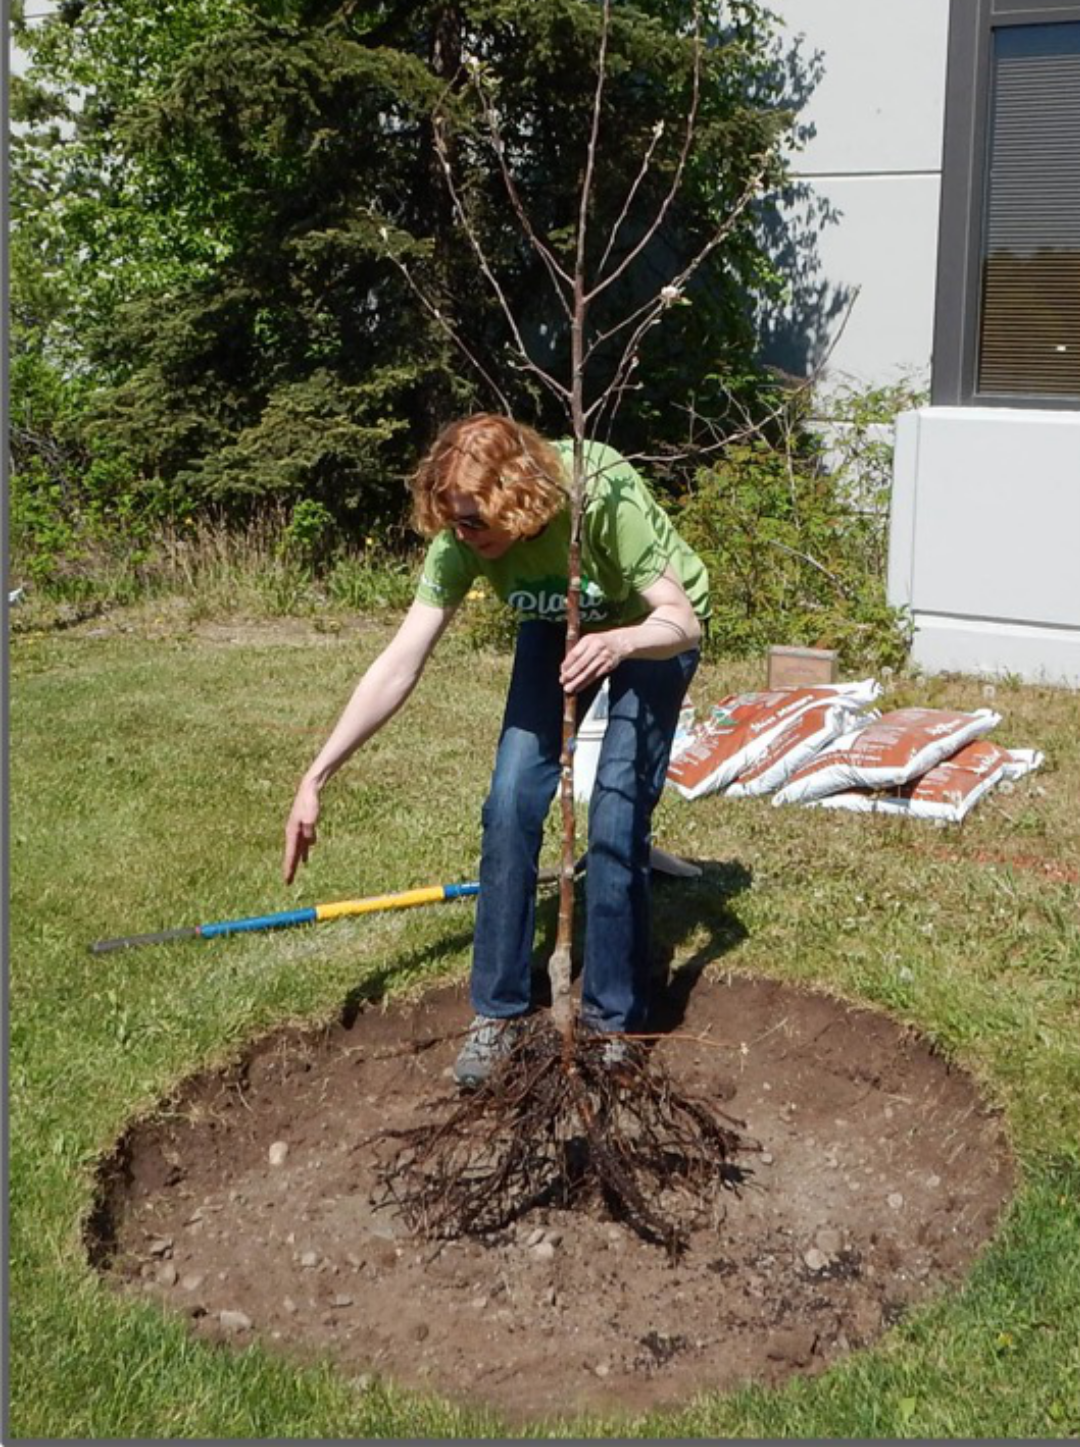
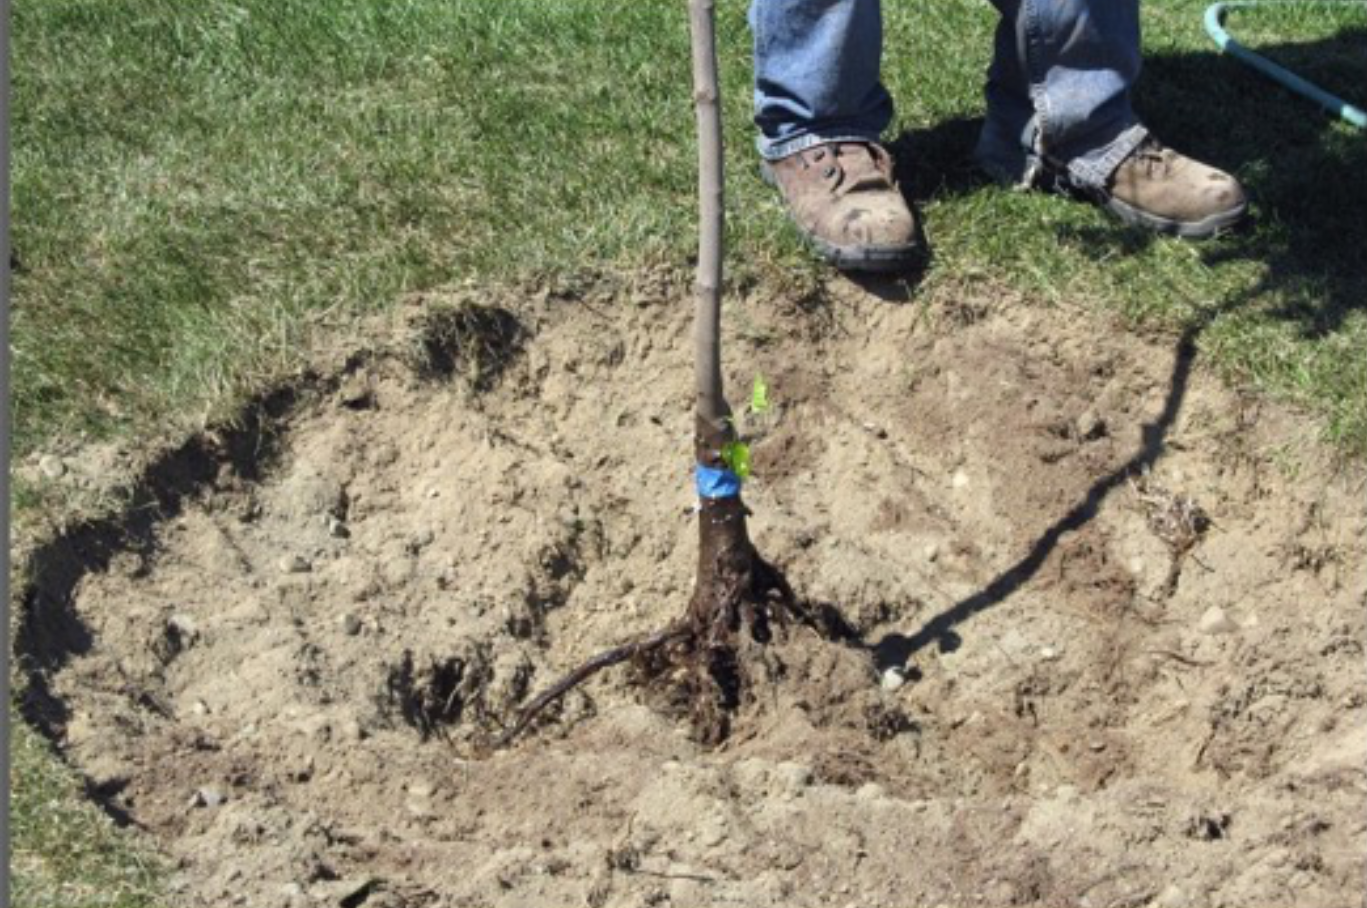
- Locate the root flare of your tree. You may need to remove excess soil to fully expose the root flare. Measure the distance from the root flare to the bottom of the root ball.
- Remove vegetation and dig in a saucer-shaped area at least two times the spread of the roots and no deeper than height from base of root flare to the bottom of the root ball; prepare a planting hole that encourages the roots to spread and grow into the surrounding soil.
- Remove all twine, tags and wrap from around the trunk and cut away and remove the container, wire basket and/or burlap; remove and properly dispose of any weeds from the pot to avoid introducing invasive plants.
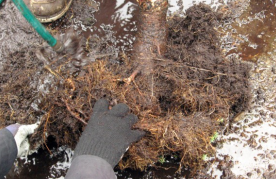
- If planting BR, separate and spread the roots so that they will grow out into the surrounding soil; prune roots that are diseased, damaged or circling the root ball.
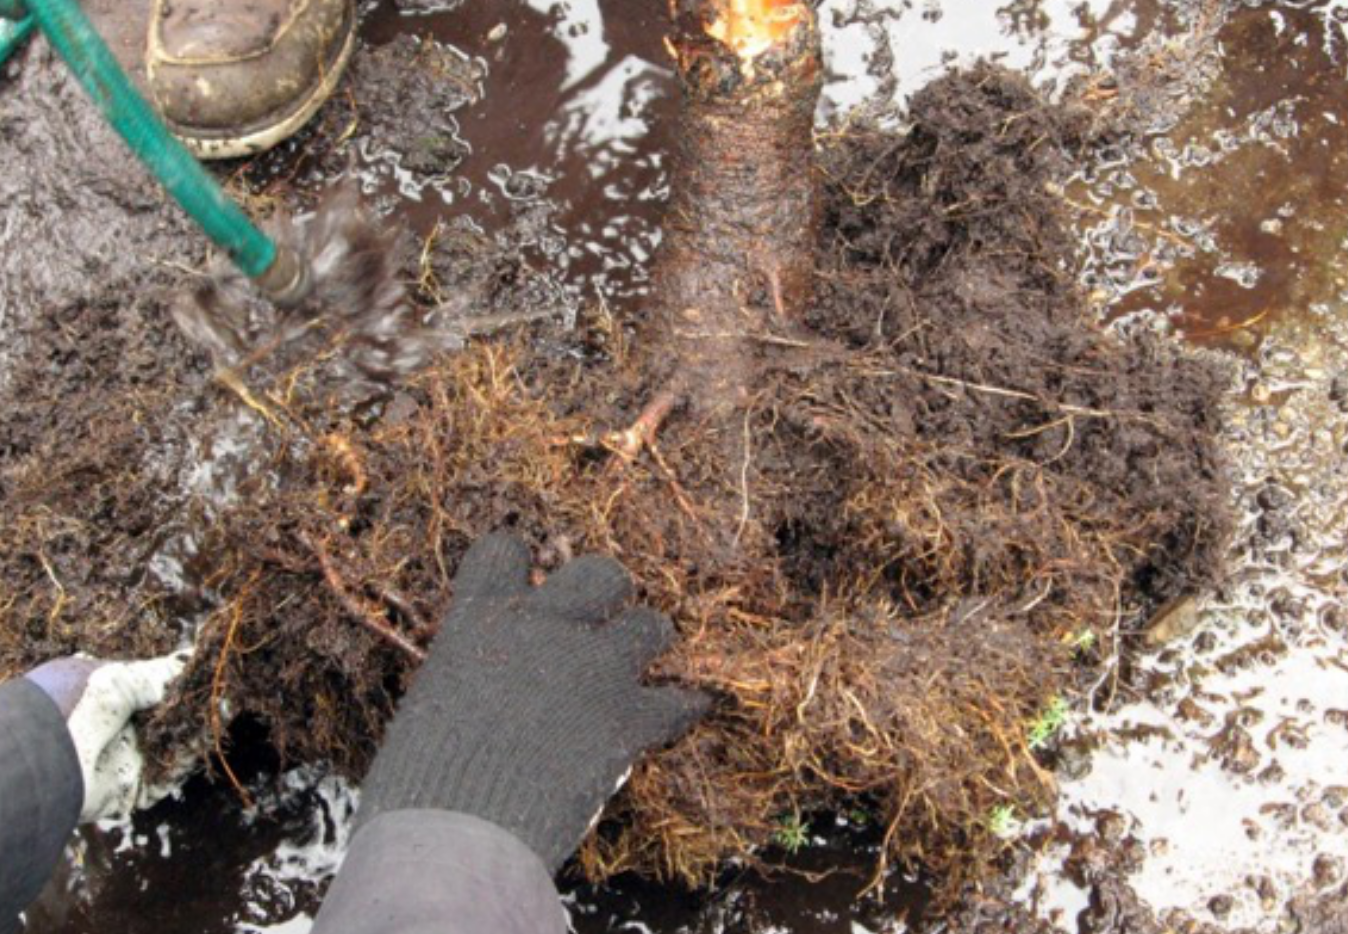
- For containerized or B&B trees, you may soak the root ball in a large tub of water to remove soil. This process, called root washing, allows you to find and cut circling or damaged roots and remove weeds and soil that may be different from soil on site. It will also be lighter and easier to plant.
- Prune roots with clean cuts back to white, healthy root tissue.
- Set the tree in the hole on solid ground so that it does not settle. Don’t place loose
soil in the bottom of the planting hole. The root flare
must be just above ground level. Roots of trees planted too deeply may not get enough water and oxygen, and as the tree grows, the roots and trunk may decay, causing the tree to die or fail. - If the soil is very poor or compacted, you may widen the planting hole to 4 – 5 times the size of the root ball and mix some topsoil with existing soil, creating a transition to surrounding soil. Roots growing in a hole filled with nonnative soil and surrounded by poor soil may circle the planting hole and become “pot-bound” rather than spreading out. Trees can grow successfully in rocky soil.
Plant it right
- Gently firm the soil around the bottom of the root ball so that the tree is vertical and adequately supported. Use water to settle the soil as you backfill in 1/3 increments. Slightly tamp down the remainder of the backfill as the hole is filled. Do not compact soil or damage roots by walking on wet soil.
- Apply 3 to 4 inches of organic mulch in a circle extending 2 to 3 feet from the trunk
or to the dripline. Mulch improves the soil, reduces compaction,
holds moisture, moderates soil temperatures and discourages injury from lawn mowers and weed whips. Keep mulch 6 inches away from the trunk. Water well after mulching. Do not place plastic under mulch. - Stake only if needed to stabilize the roots. Use smooth, wide, flexible material for ties that support the tree but allow it to sway; trees grow stronger root systems and trunks if allowed some wiggle room. Never place wire around the trunk, even in a rubber hose. Secure ties as low on the trunk as they can be placed to stabilize roots, about one-third of the way up, generally just above the lowest branch on deciduous trees. Remove ties within one year or as soon as roots are firmly anchored and tree is stable without ties.
- Prune only dead and damaged branches at planting.
- Fertilizer is not recommended for newly planted trees. Watch for symptoms indicating that additional nutrients are needed.
Care For Your Trees
- Water trees during the first five years after planting if soil 4 inches down is dry.
- If the tree is staked, check ties regularly to be sure the trunk is not damaged. Remove ties after one growing season or as soon as roots are well anchored.
- Do not use de-icing salt near tree roots or where it will drain into the root zone. Remember, roots spread far beyond the drip line.
- Most landscape trees do well with little or no fertilizer. Use only if symptoms, such as little growth, indicate a need. First, be sure symptoms are not due to other causes, such as tree is planted too deep or needs more frequent watering.
- If symptoms indicate a need, apply slow release fertilizer in spring, early summer or late fall and follow product directions. Be cautious with fall fertilizing. Don’t fertilize a stressed tree.
Plant A Tree: An Alaska Guide to Tree Care
Prune your tree
HGA-00437C View this publication in PDF form to print or download.
- Begin pruning to develop a strong structure in the second or third growing season.
- Learn about the species you are pruning and how they respond to pruning. For example, if you prune lilacs early in the season, you will remove flower buds.
- If you can’t prune with both feet on the ground, hire an arborist.
- Where possible, favor branches that form wide angles with the trunk: 45 to 90 degrees is ideal.
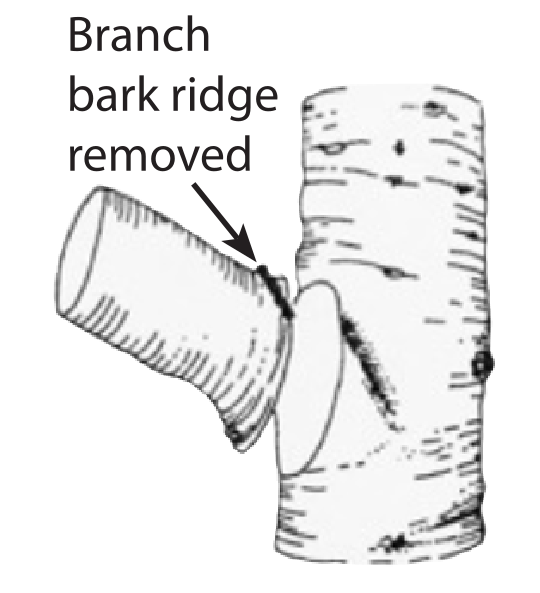
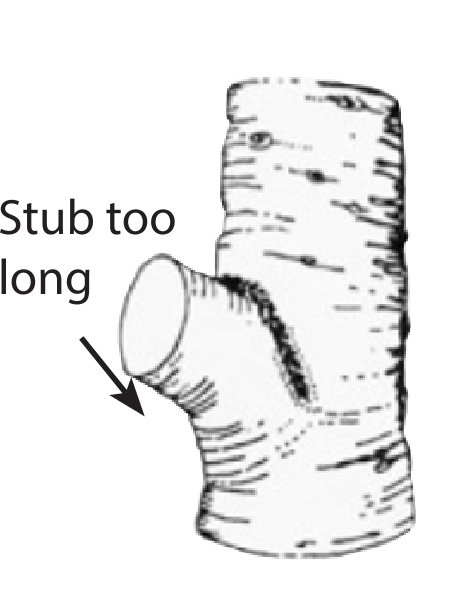
- Do not top tree, make cuts flush with trunk or leave stubs.
- Try to prune as little as necessary to achieve your goal. Do not remove more than one-fourth of a tree’s live foliage in a season.
- For most species, the tree should have a single trunk. Remove dead and defective branches and select a strong leader that will produce a branch growing in the desired direction (usually outward).
- Conifers need little pruning; prune to maintain one central leader.
- Make a sharp, clean cut at a slight angle about 1⁄4 inch beyond the bud.
- Painting pruning cuts or any wound is not recommended. This practice doesn’t prevent or reduce decay and may interfere with the tree’s natural ability to seal the wound.
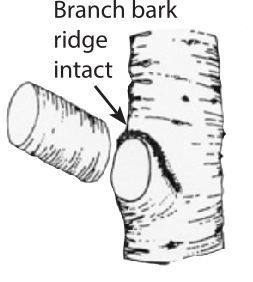
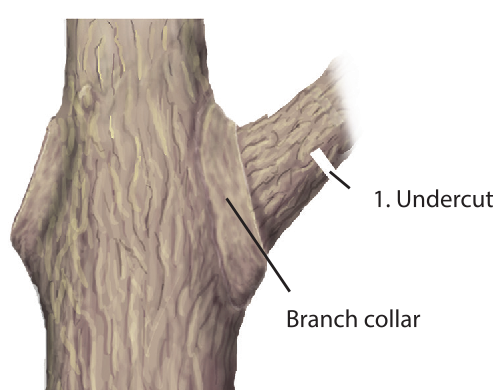
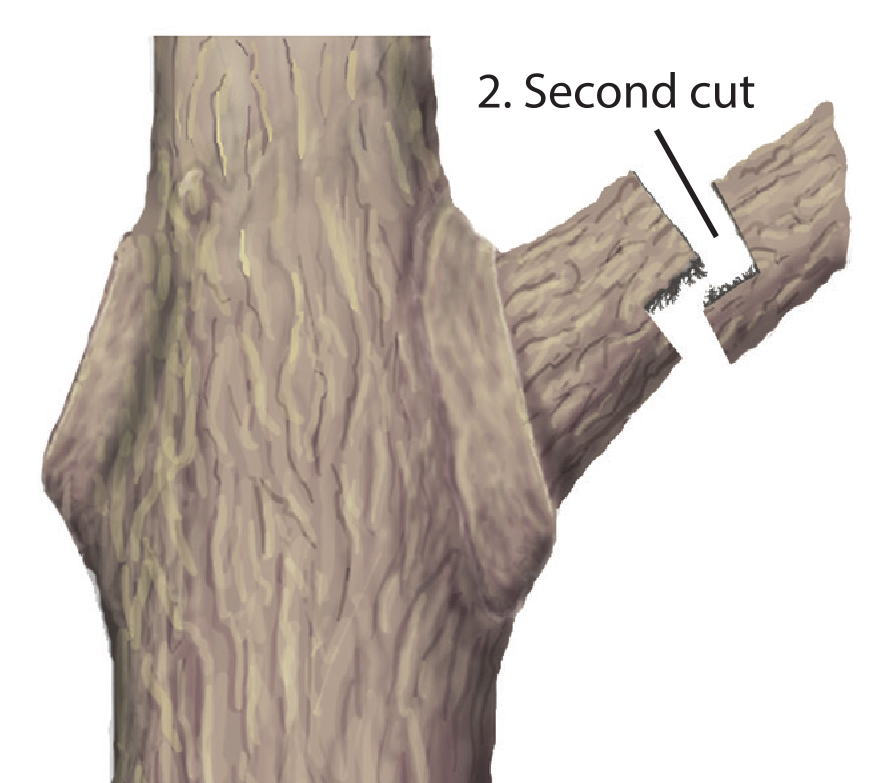
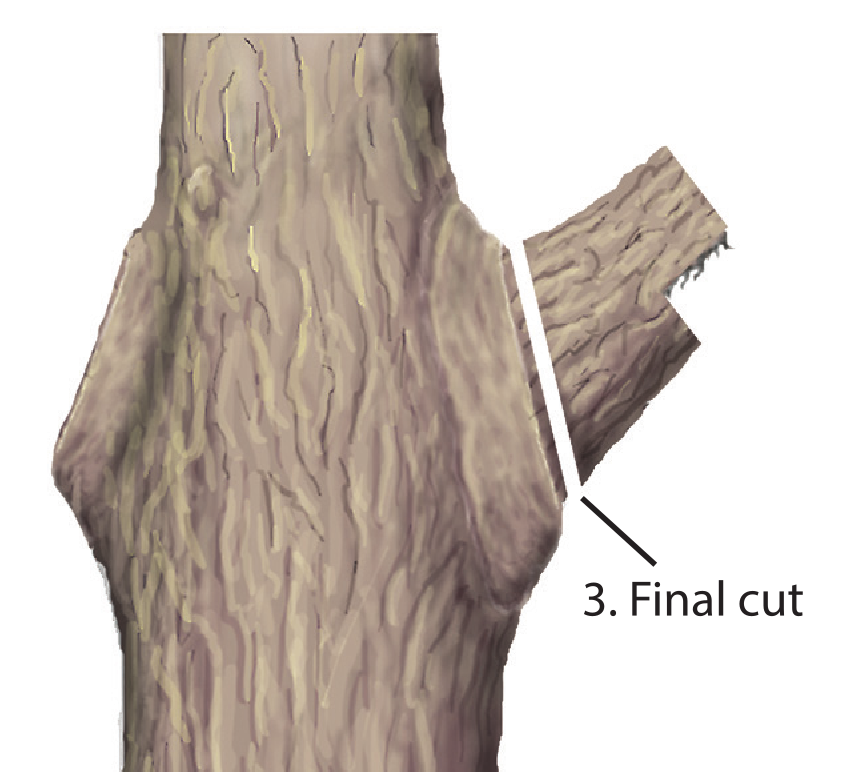
- If a branch is too large to support when pruning, make an undercut about 8 inches above the point of attachment, one-third of the branch diameter. Next, make an overcut above and beyond the undercut to allow the branch to break off at the undercut. Finally, make the final cut outside the branch bark ridge and branch collar (see diagram). This method will prevent the falling branch from tearing bark on the main trunk.
- Make each cut carefully. Avoid leaving jagged edges or torn bark. Use sharp bypass pruning shears and a pruning saw with teeth that cut when you pull.
- Never prune trees or branches within 10 feet of a utility line.
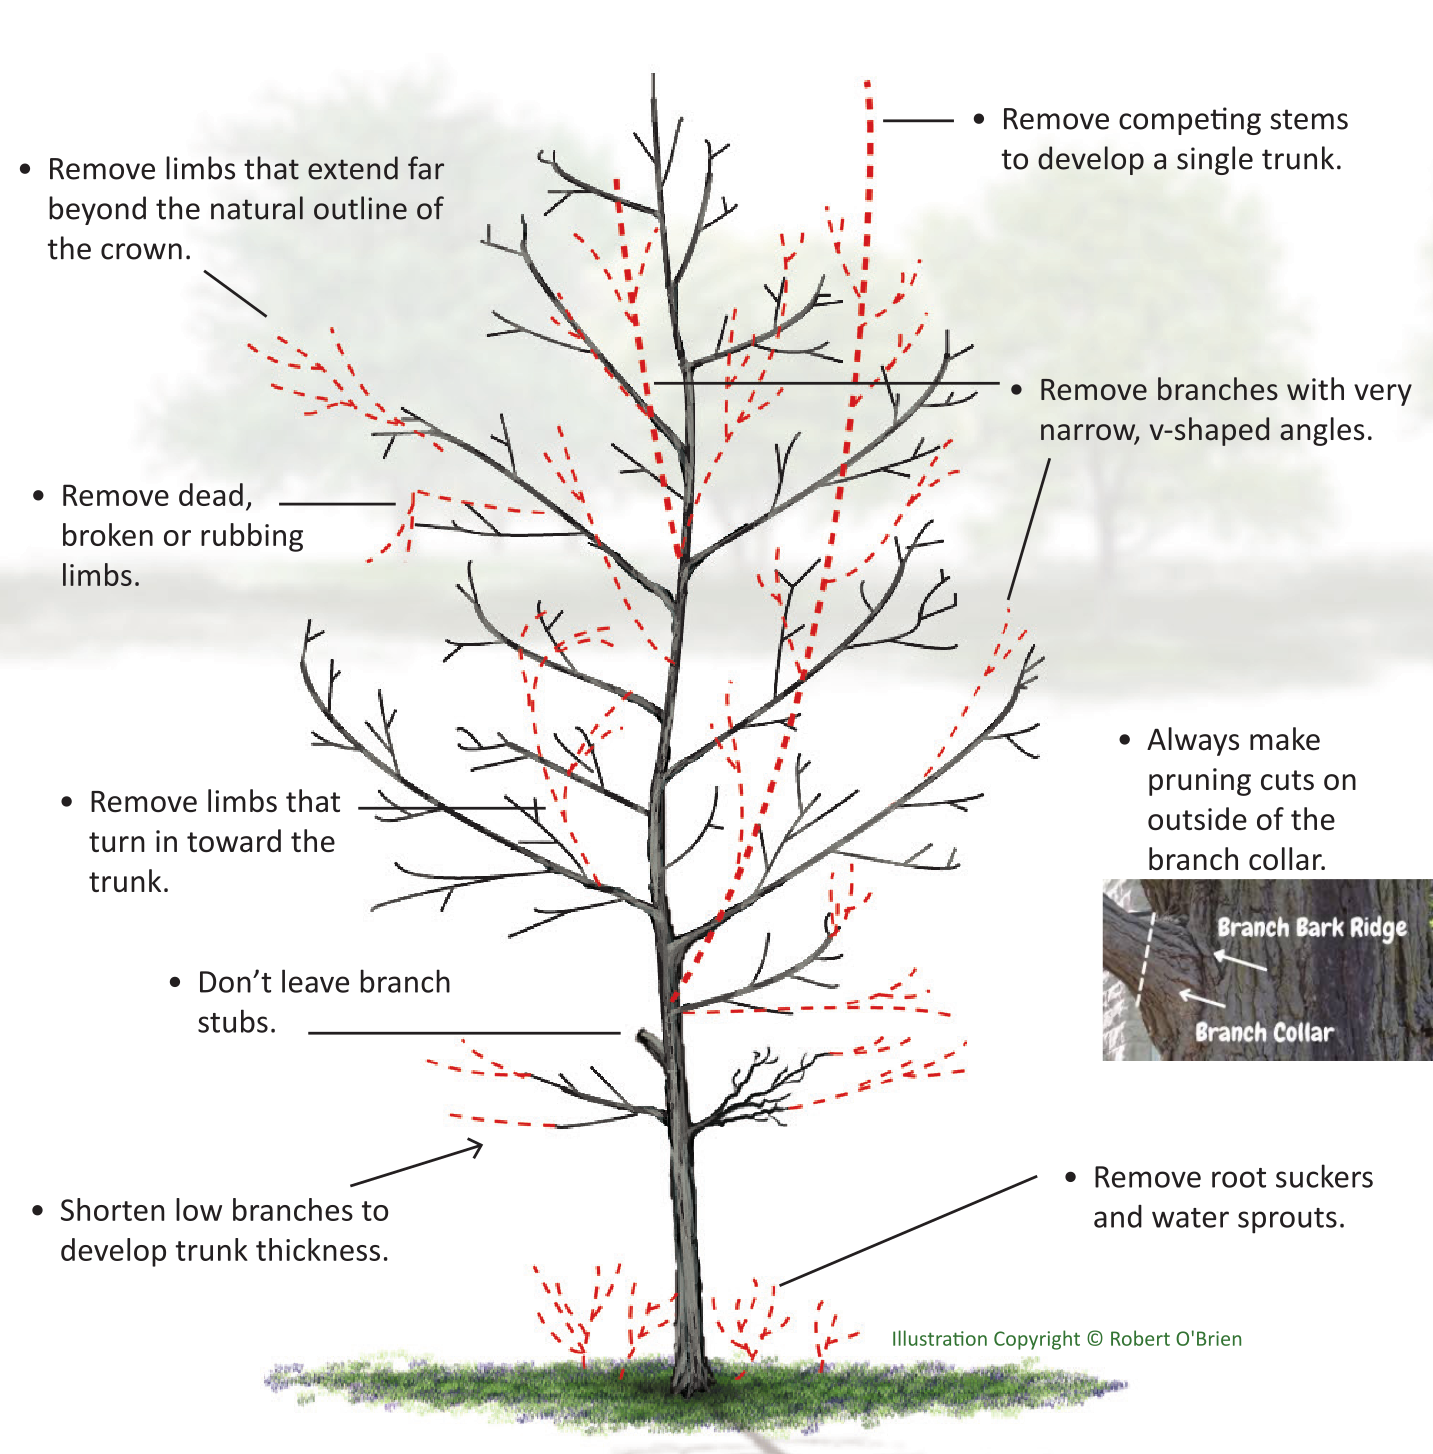
Prune your tree
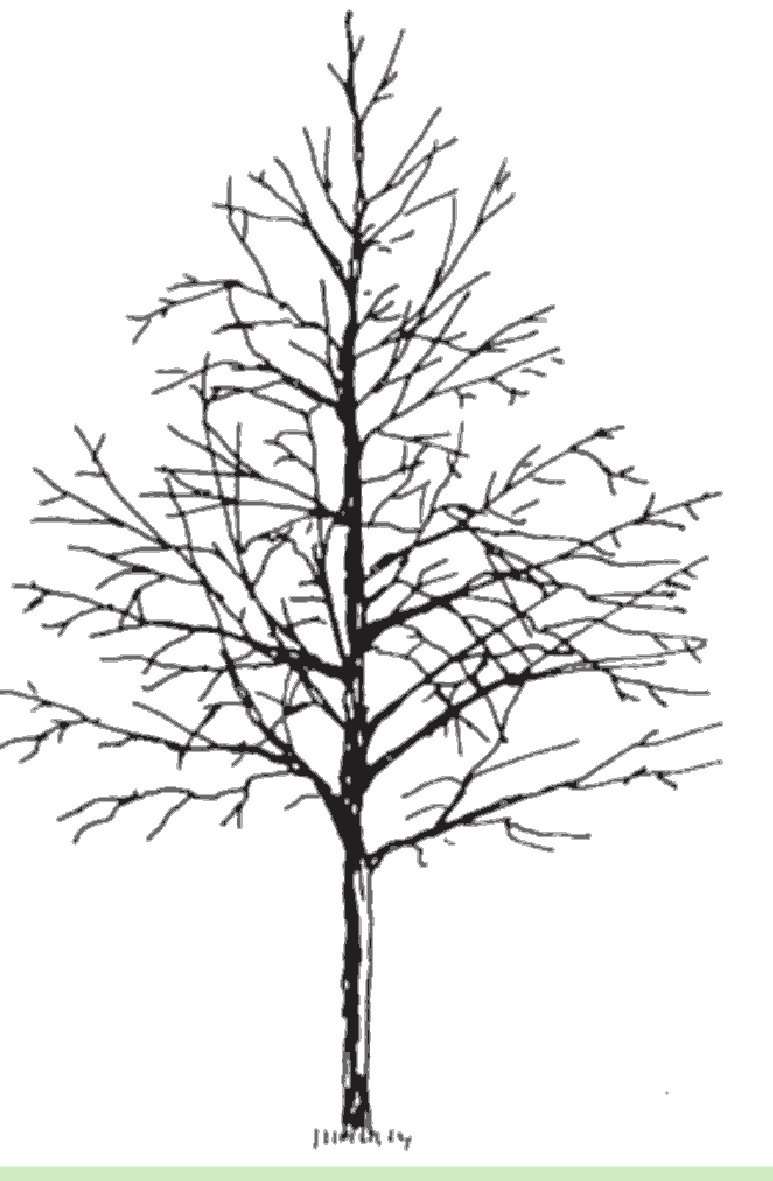
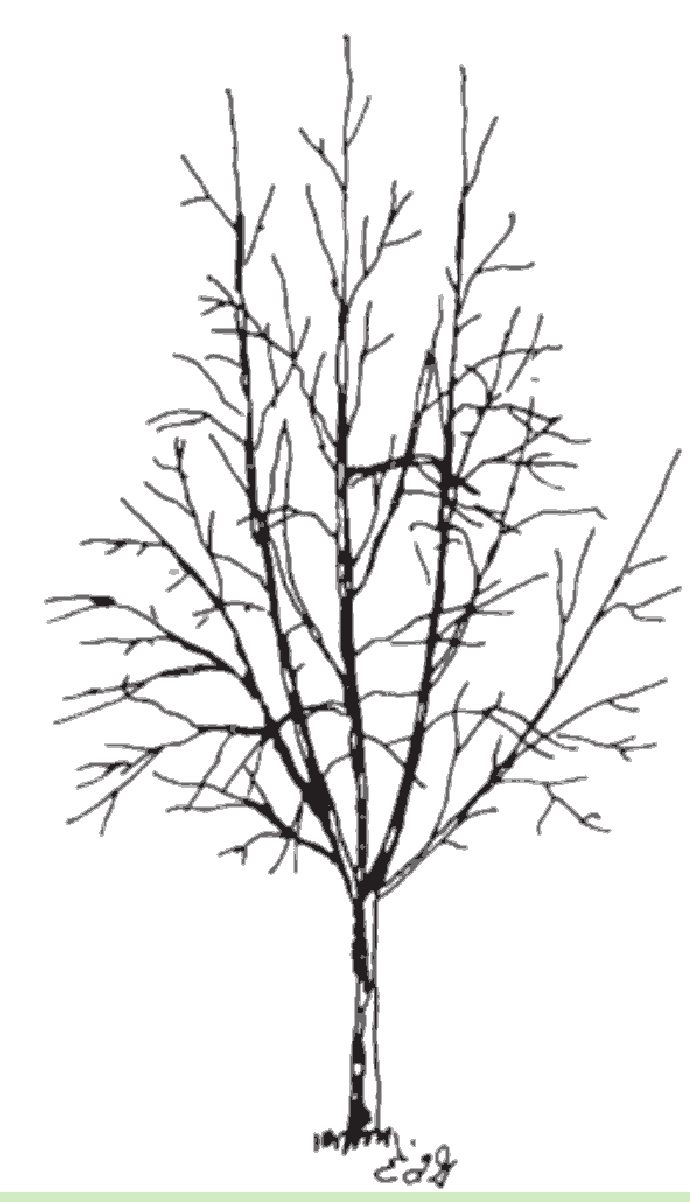
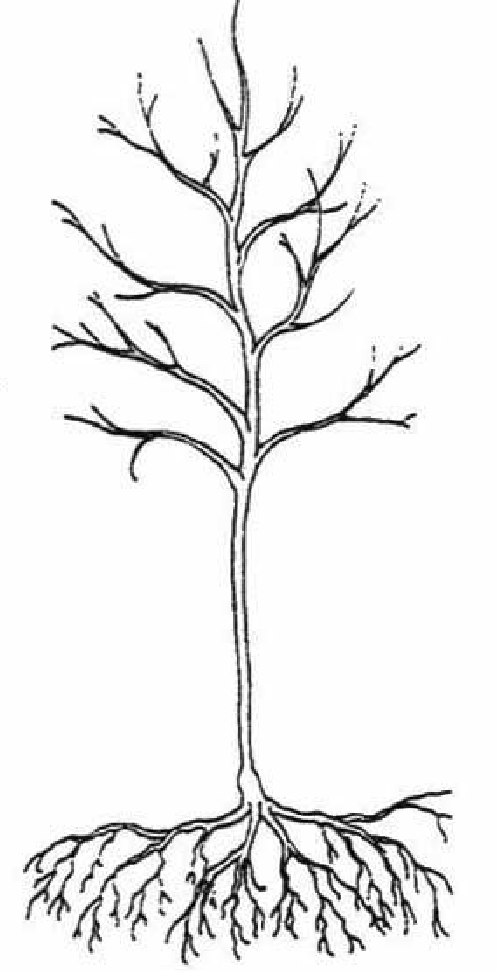
Remove branches shown with dotted lines:

![]()
![]()
Gino Graziano
04-24